
Flag Display for a Navy Veteran
A veteran Navy Officer reached out to me with a seemingly simple request - to see if I could help him display flags he had collected in his 24 years of service. I met with the retired Lieutenant and he showed me a box of carefully folded American flags in different sizes, nine in total. Most were from the various ships he had served on and some from other special occasions in his life. Rather than just using individual flag display boxes he wondered if I could combine them all into one display.
I was humbled and honored by the request and said if he could give me some time I was sure I’d be able to come up with a design that would meet his approval. His reply: “Great, thank you. Take the box of flags and do your best. I prefer dark wood.” That was all the guidance I received - talk about a man having faith in my abilities!
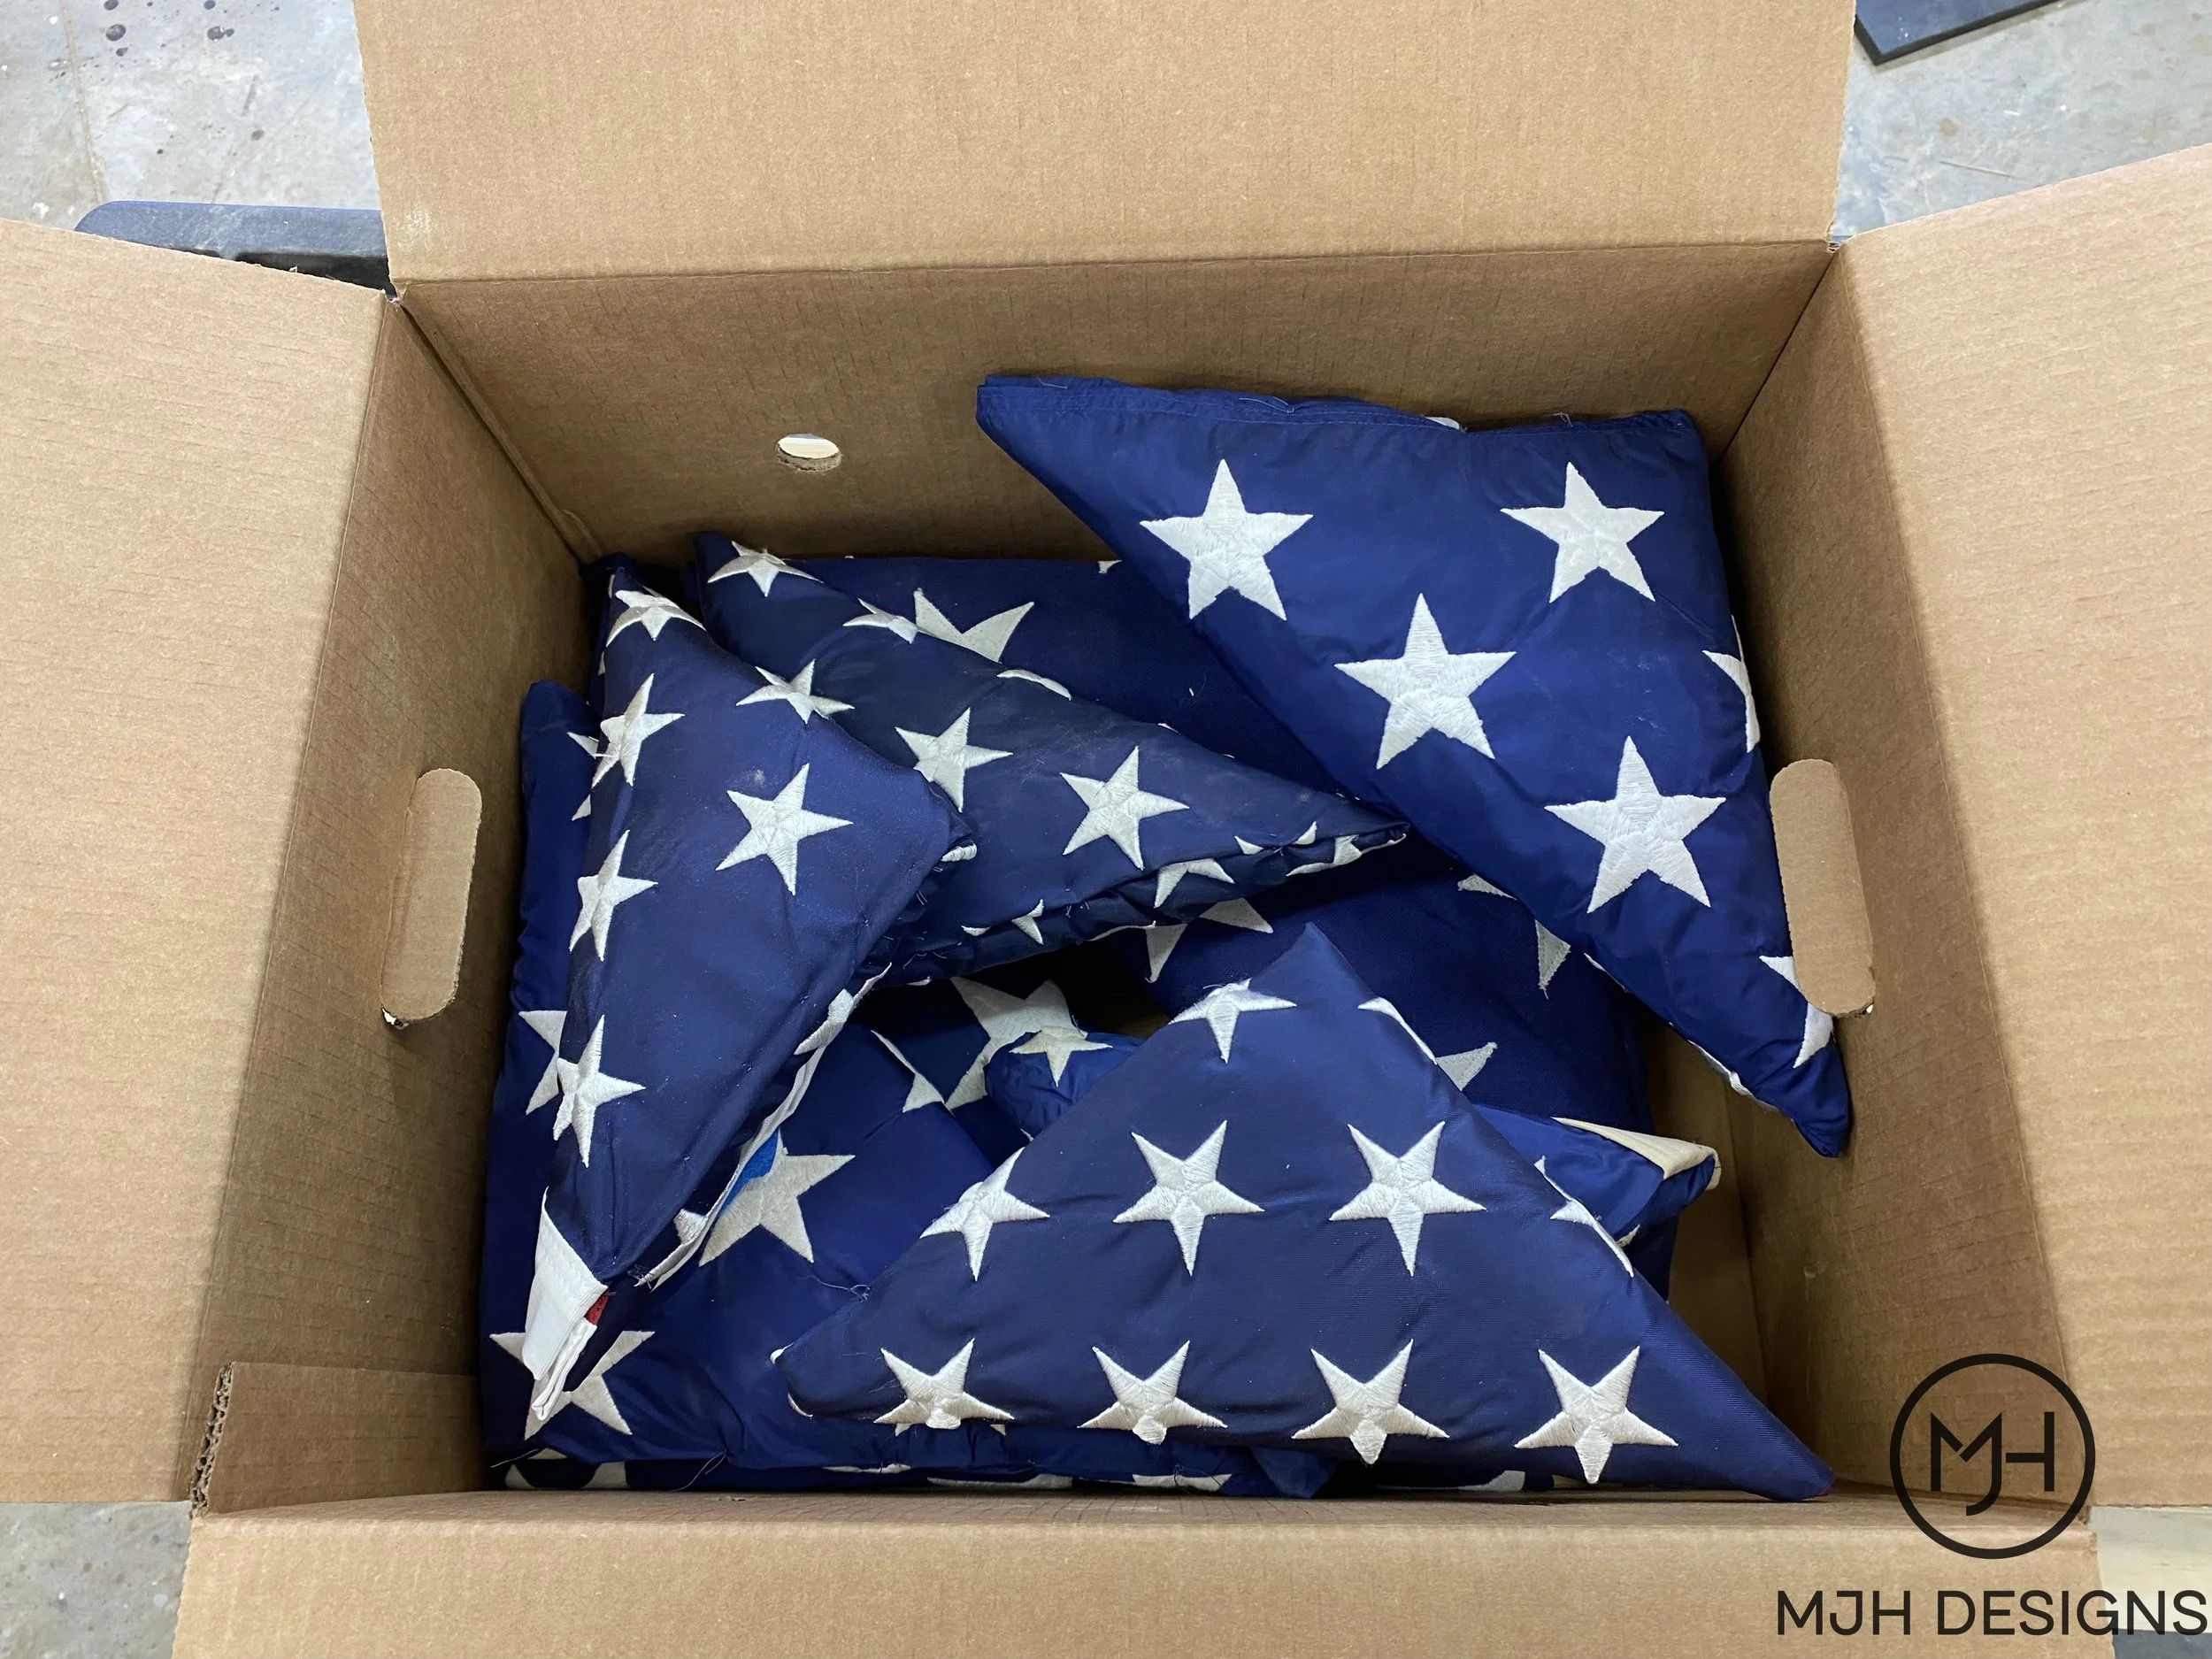
The box of nine folded American flags - as they say “this is how it started!”
I took the flags home and as a first step I measured each one and made plywood duplicates, knowing I would need to move them around to work on layout and design. By using plywood stand-ins I could keep the originals safe, clean and dust free in my house.
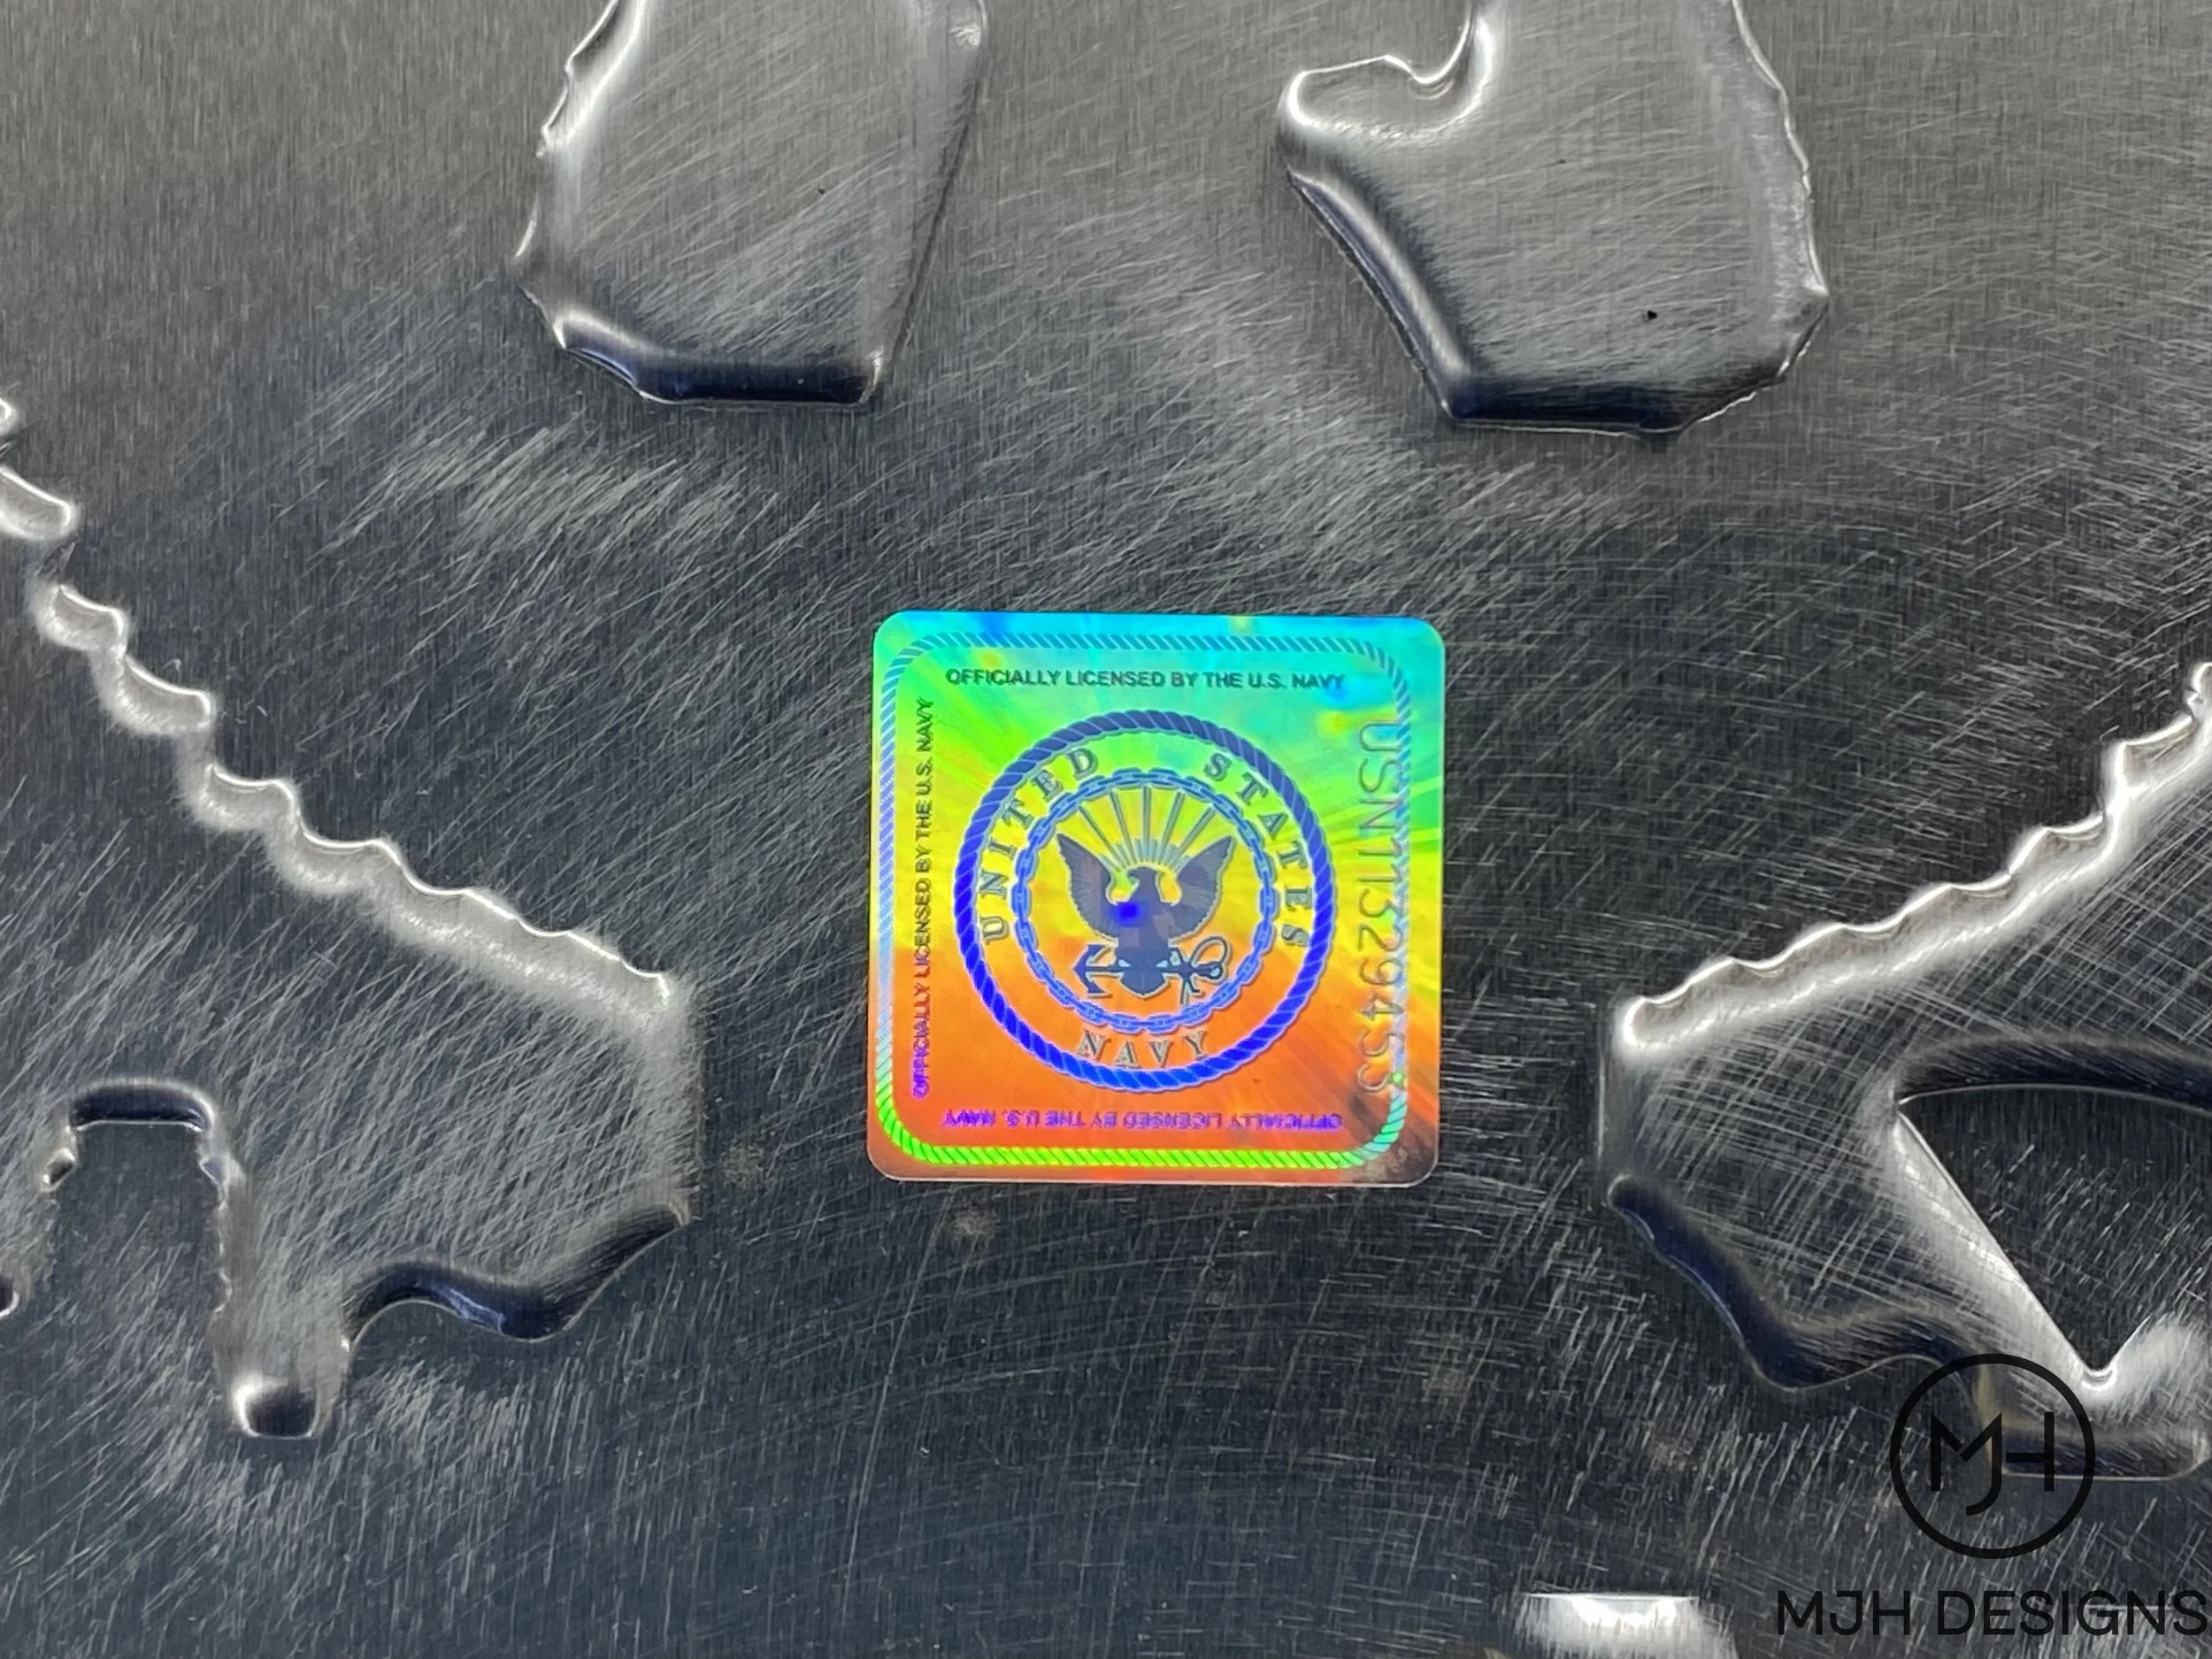
The nine flags came in four different sizes and I spend a fair amount of time scribbling and sketching design ideas; some were too crazy, others too boring. Slowly an idea emerged and once I found an officially authorized round metal shield with the Navy emblem I knew what I was going to do.
Using a simple CAD program I drew the triangles to scale and designed the layout for later use on my CNC router. Other details like how to include the LED backlighting, how to mount the flags securely without damage, etc. were solved later on.

First layout on computer screen.
Cutting 4” wide strips from maple plywood for the inner walls or liners of the triangular “cubbies” was the first step. Walnut trim was added to the front edge and the strips were then cut to length, with 45 degree and 22.5 degree mitered ends. These steep miter cuts required some custom fixtures on the table saw to keep the material securely in place.
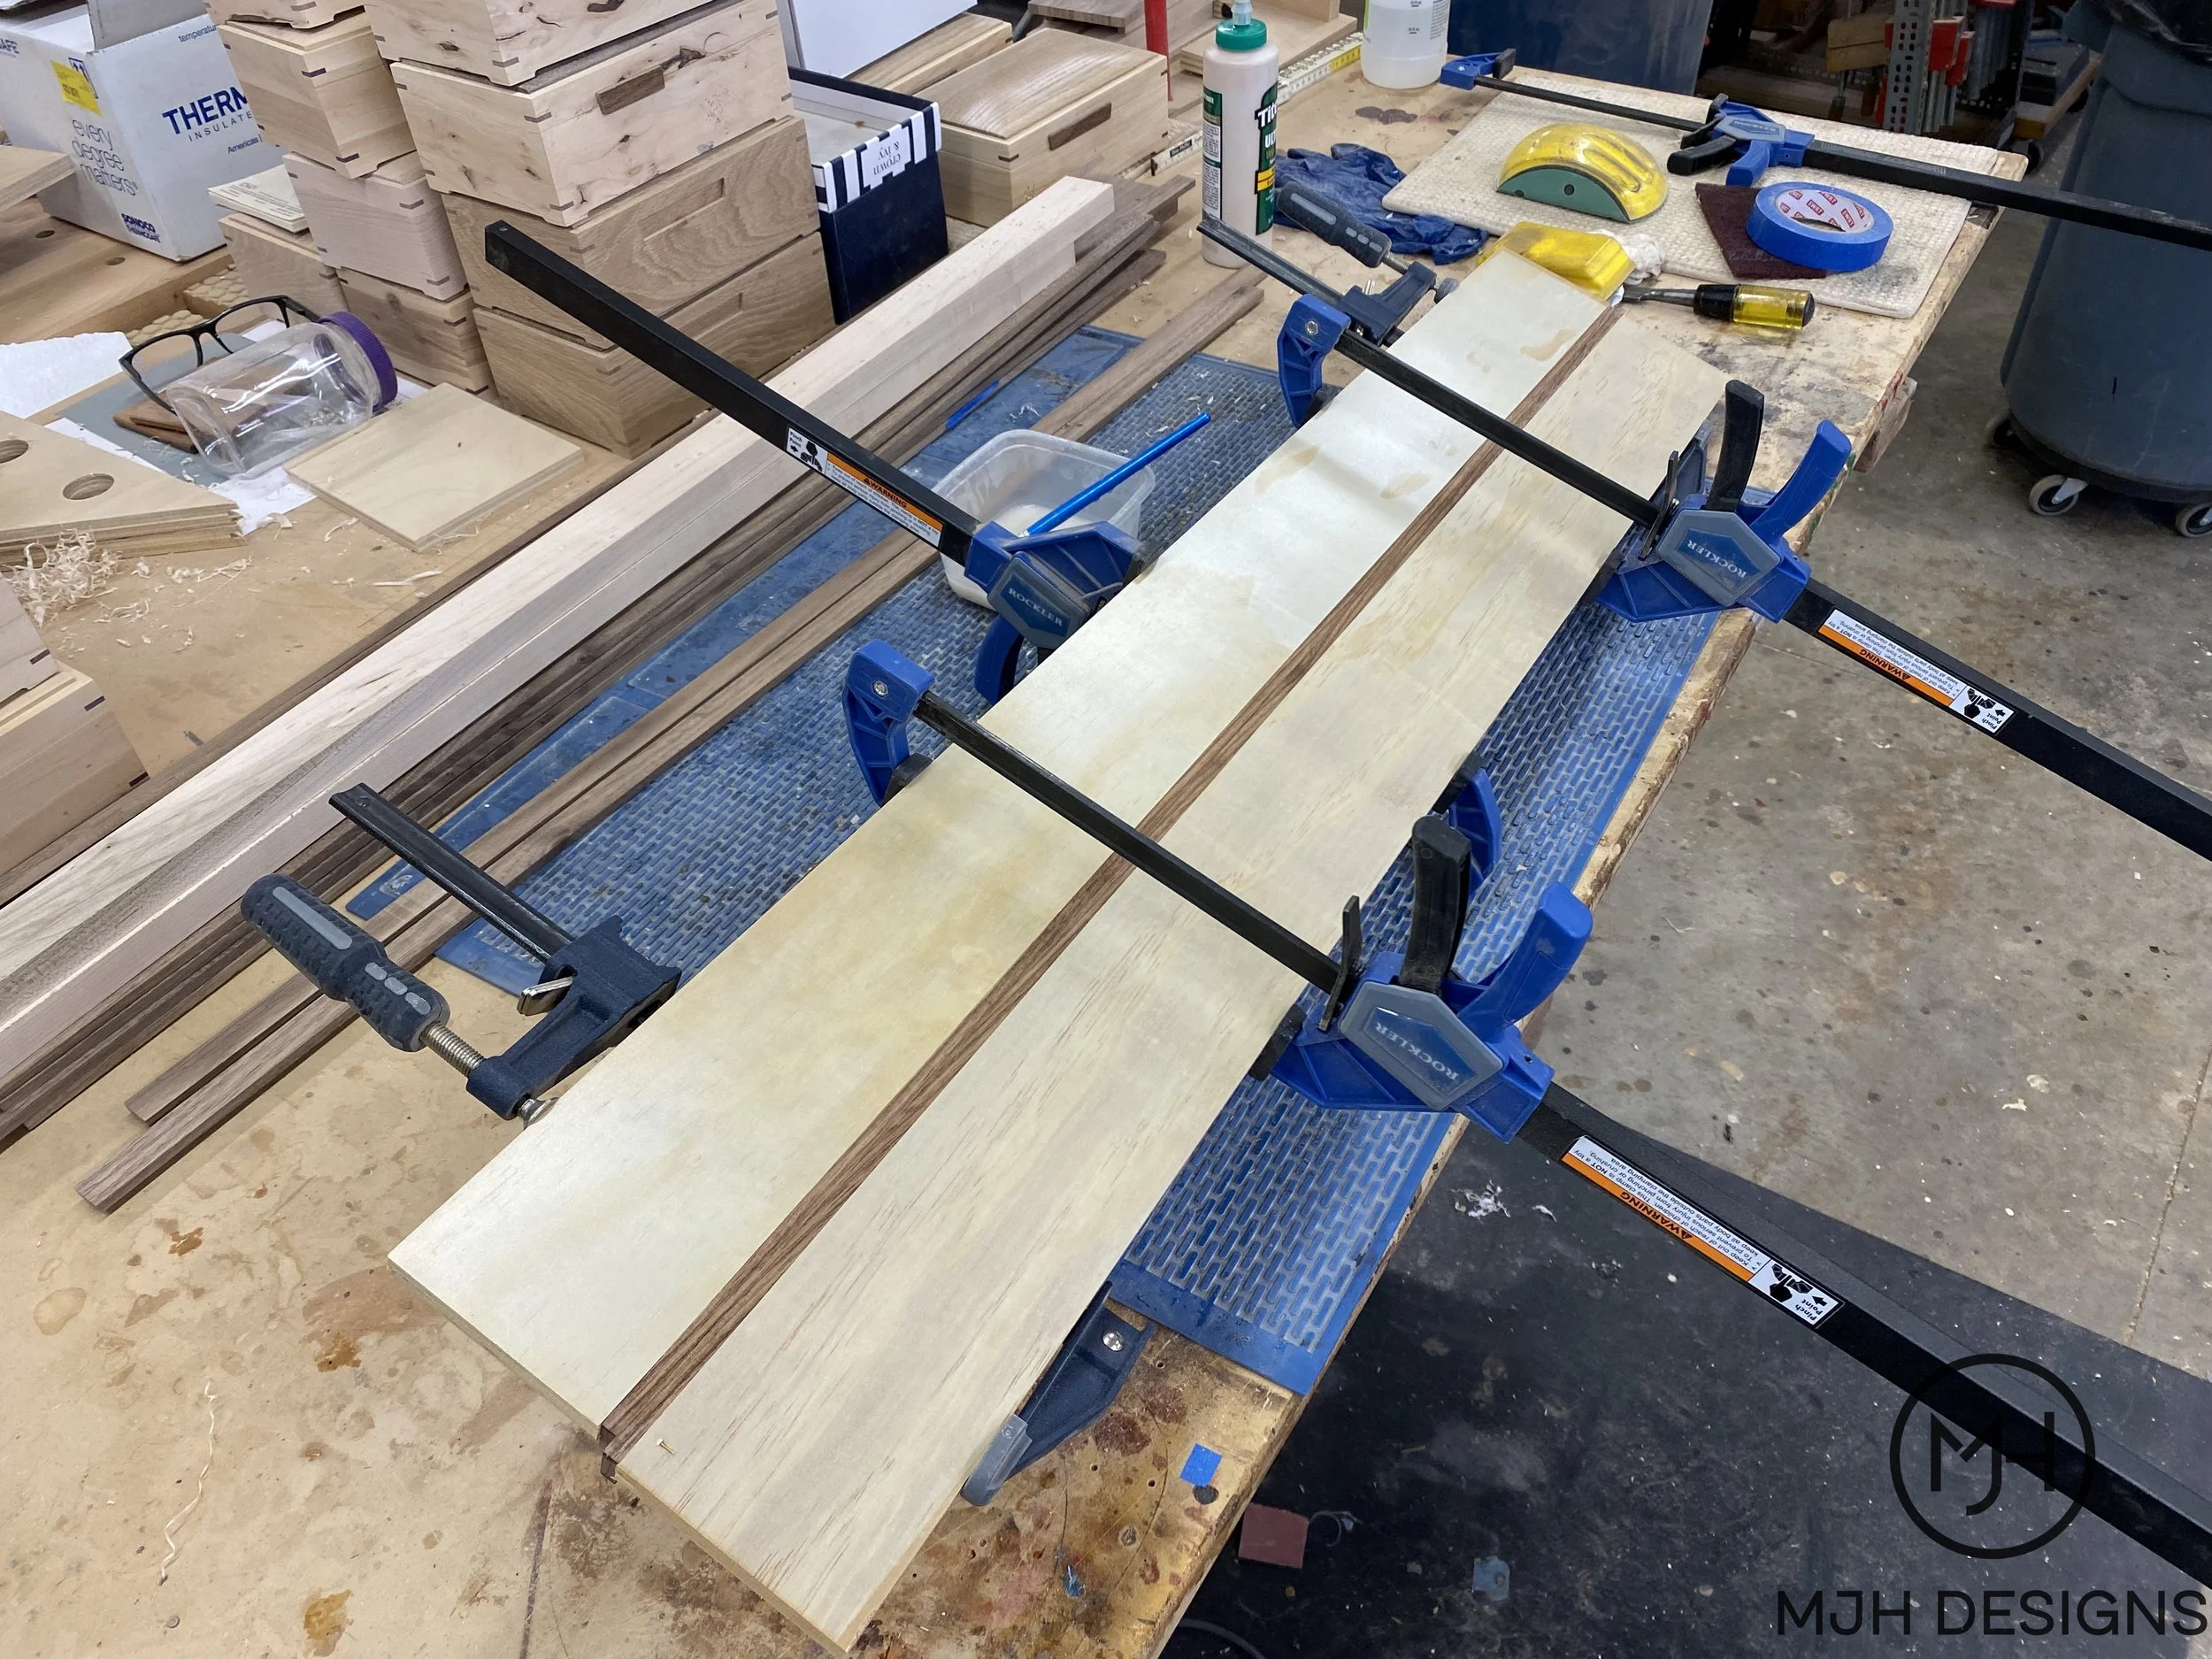
Walnut trim being glued to 4” plywood strips, two at the same time.

Steep 22.5 degree miter cuts.

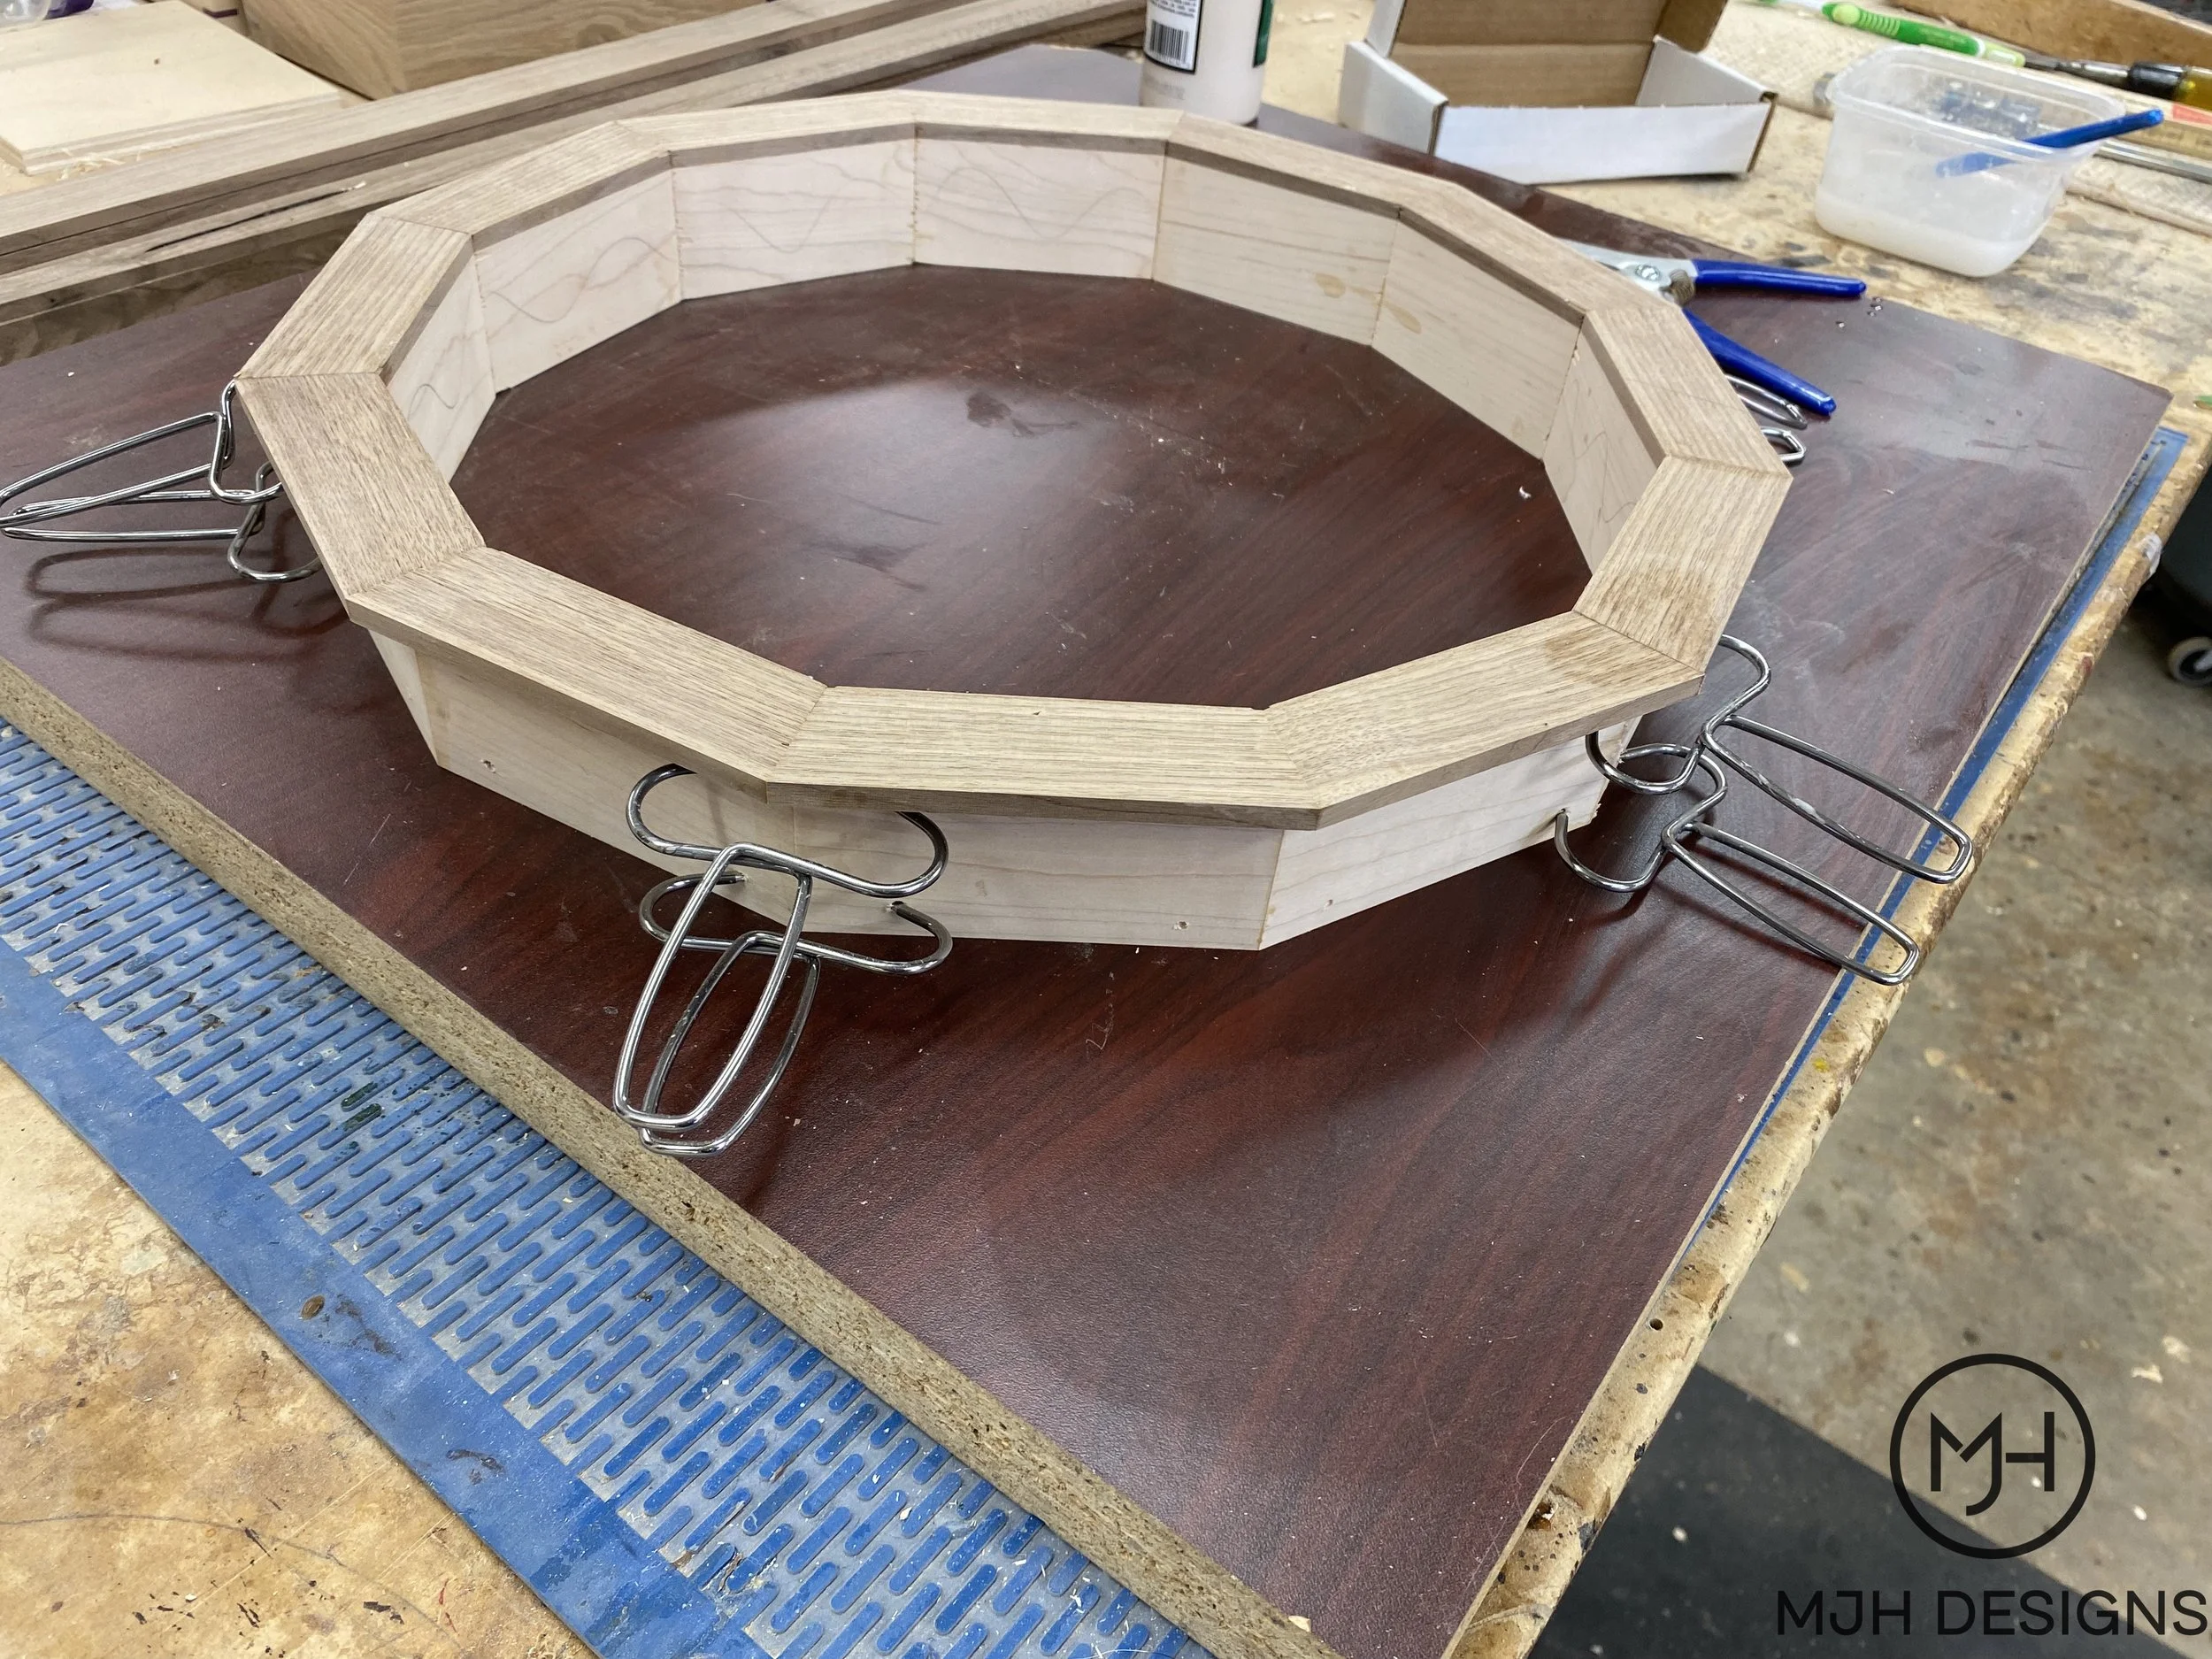
The triangles were assembled with glue, thin braid nails and clamps.
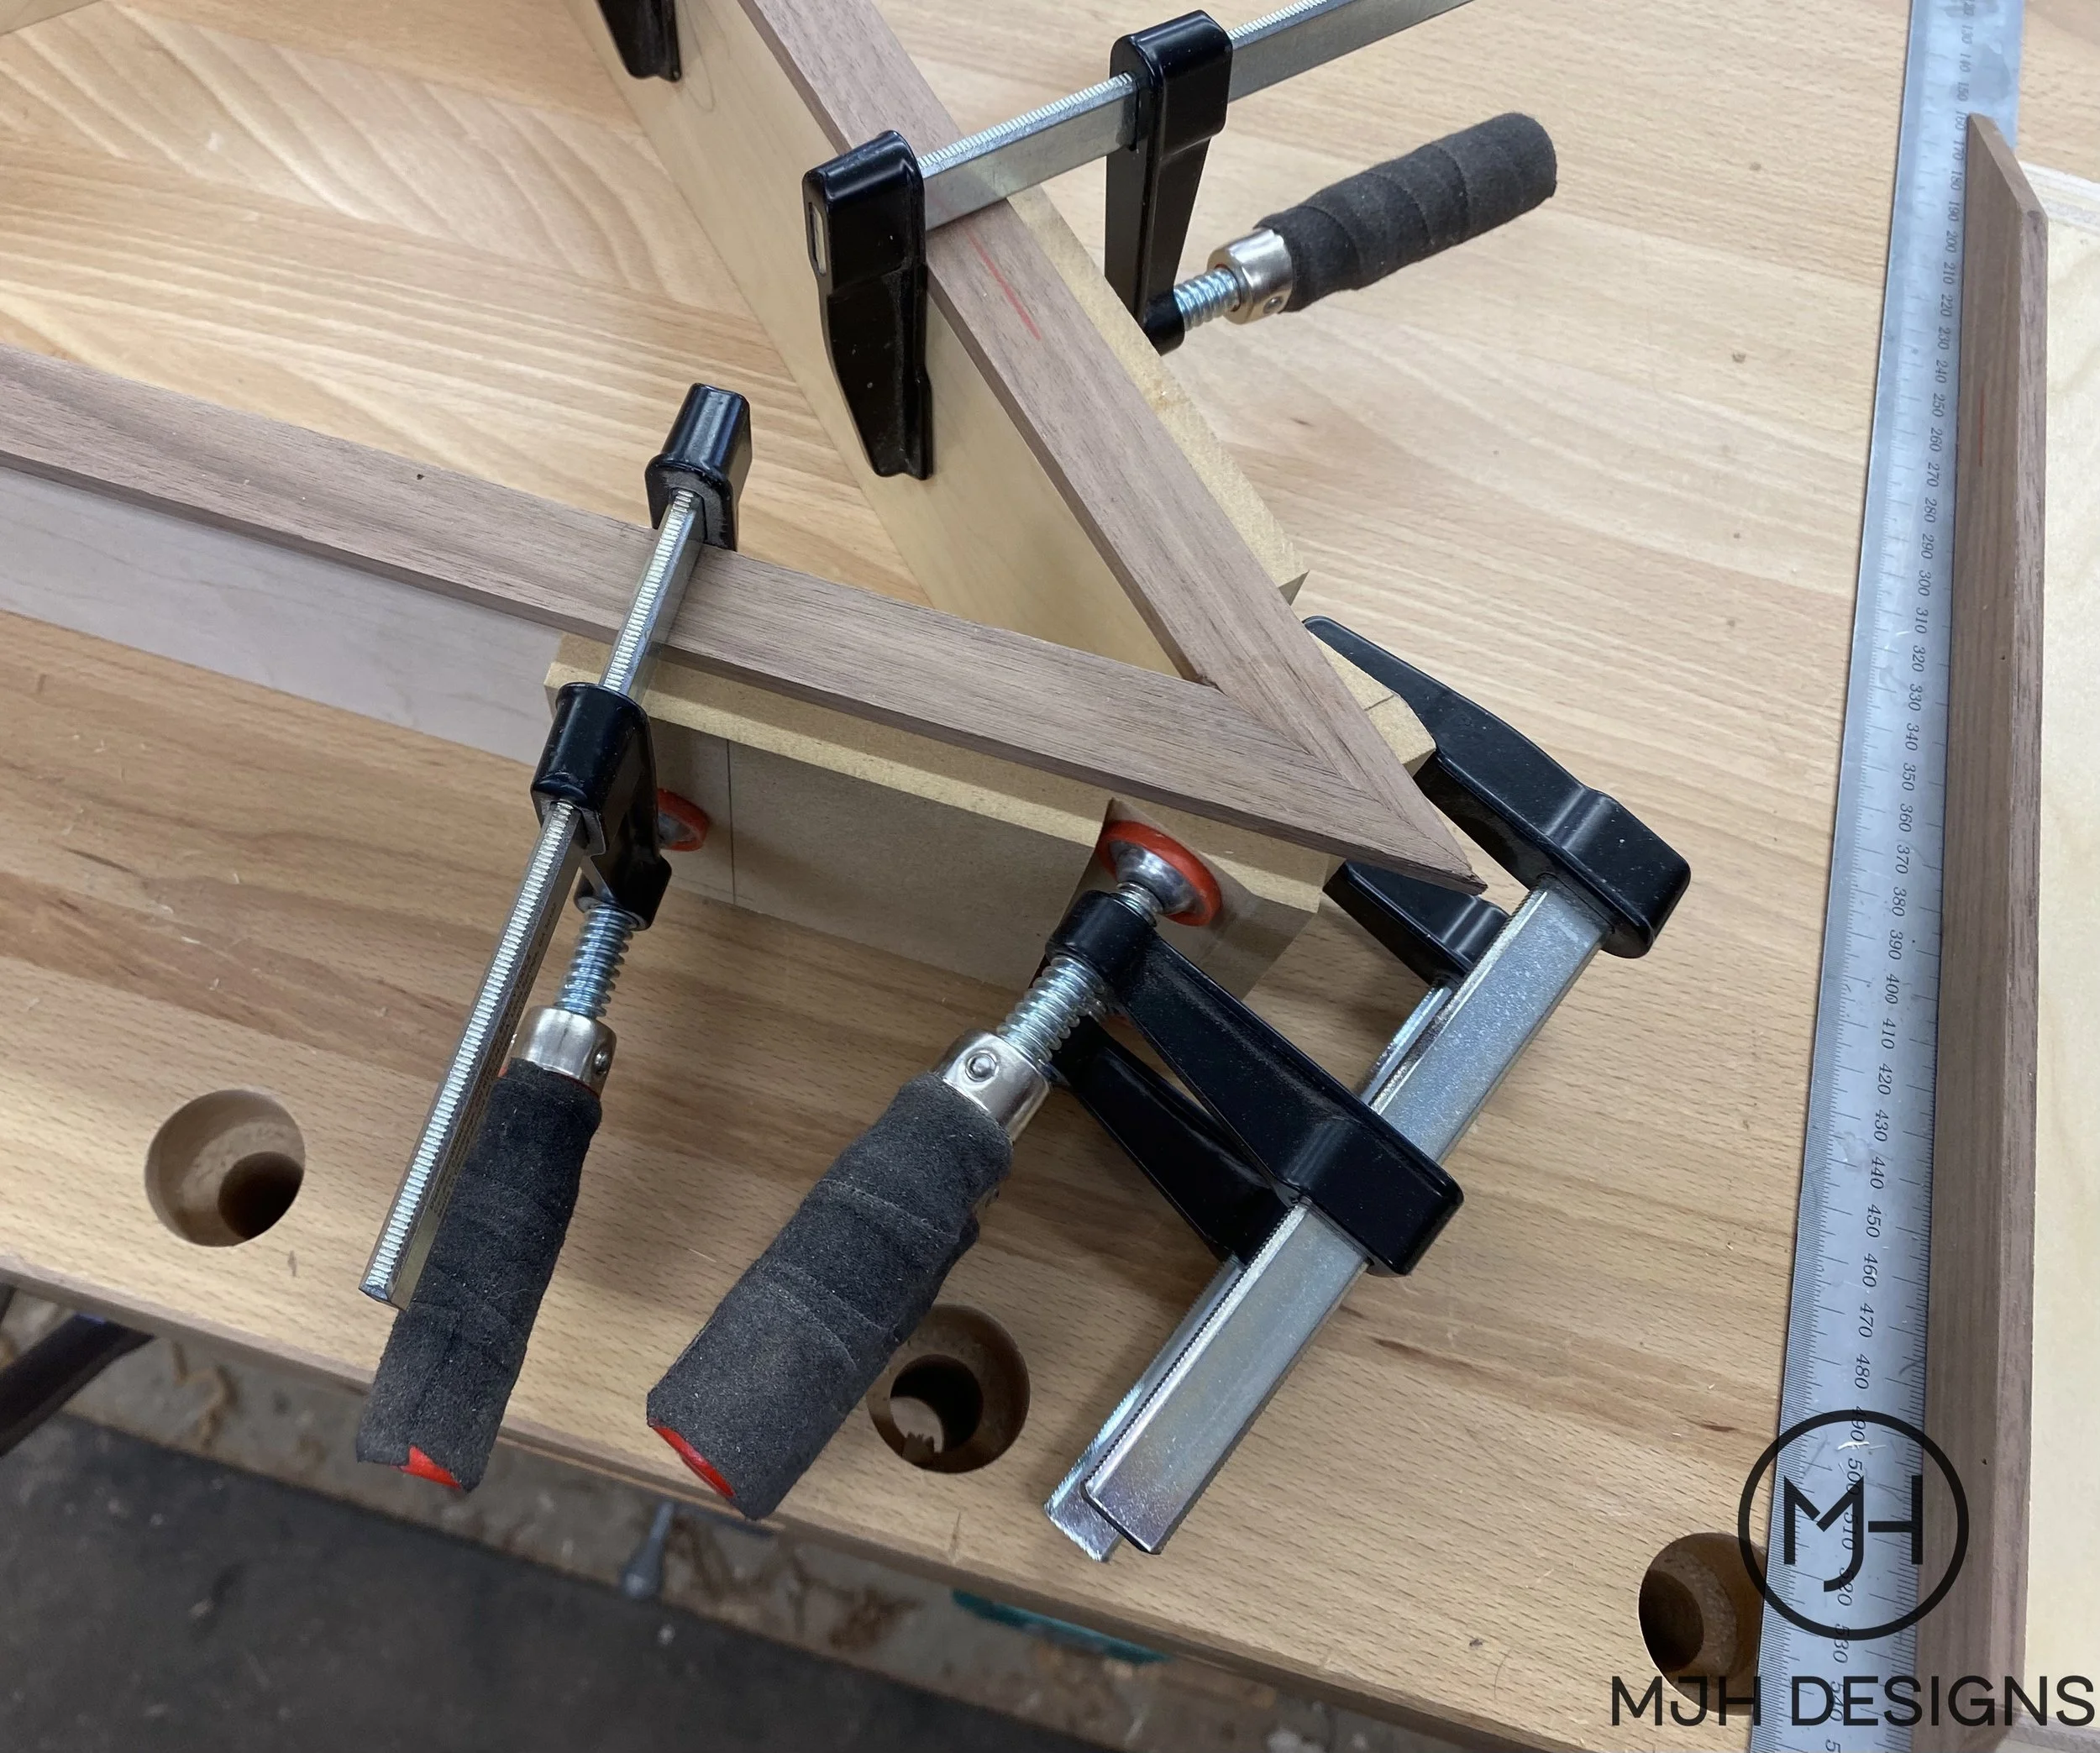
MDF blocks helped to keep the clamps from sliding off.
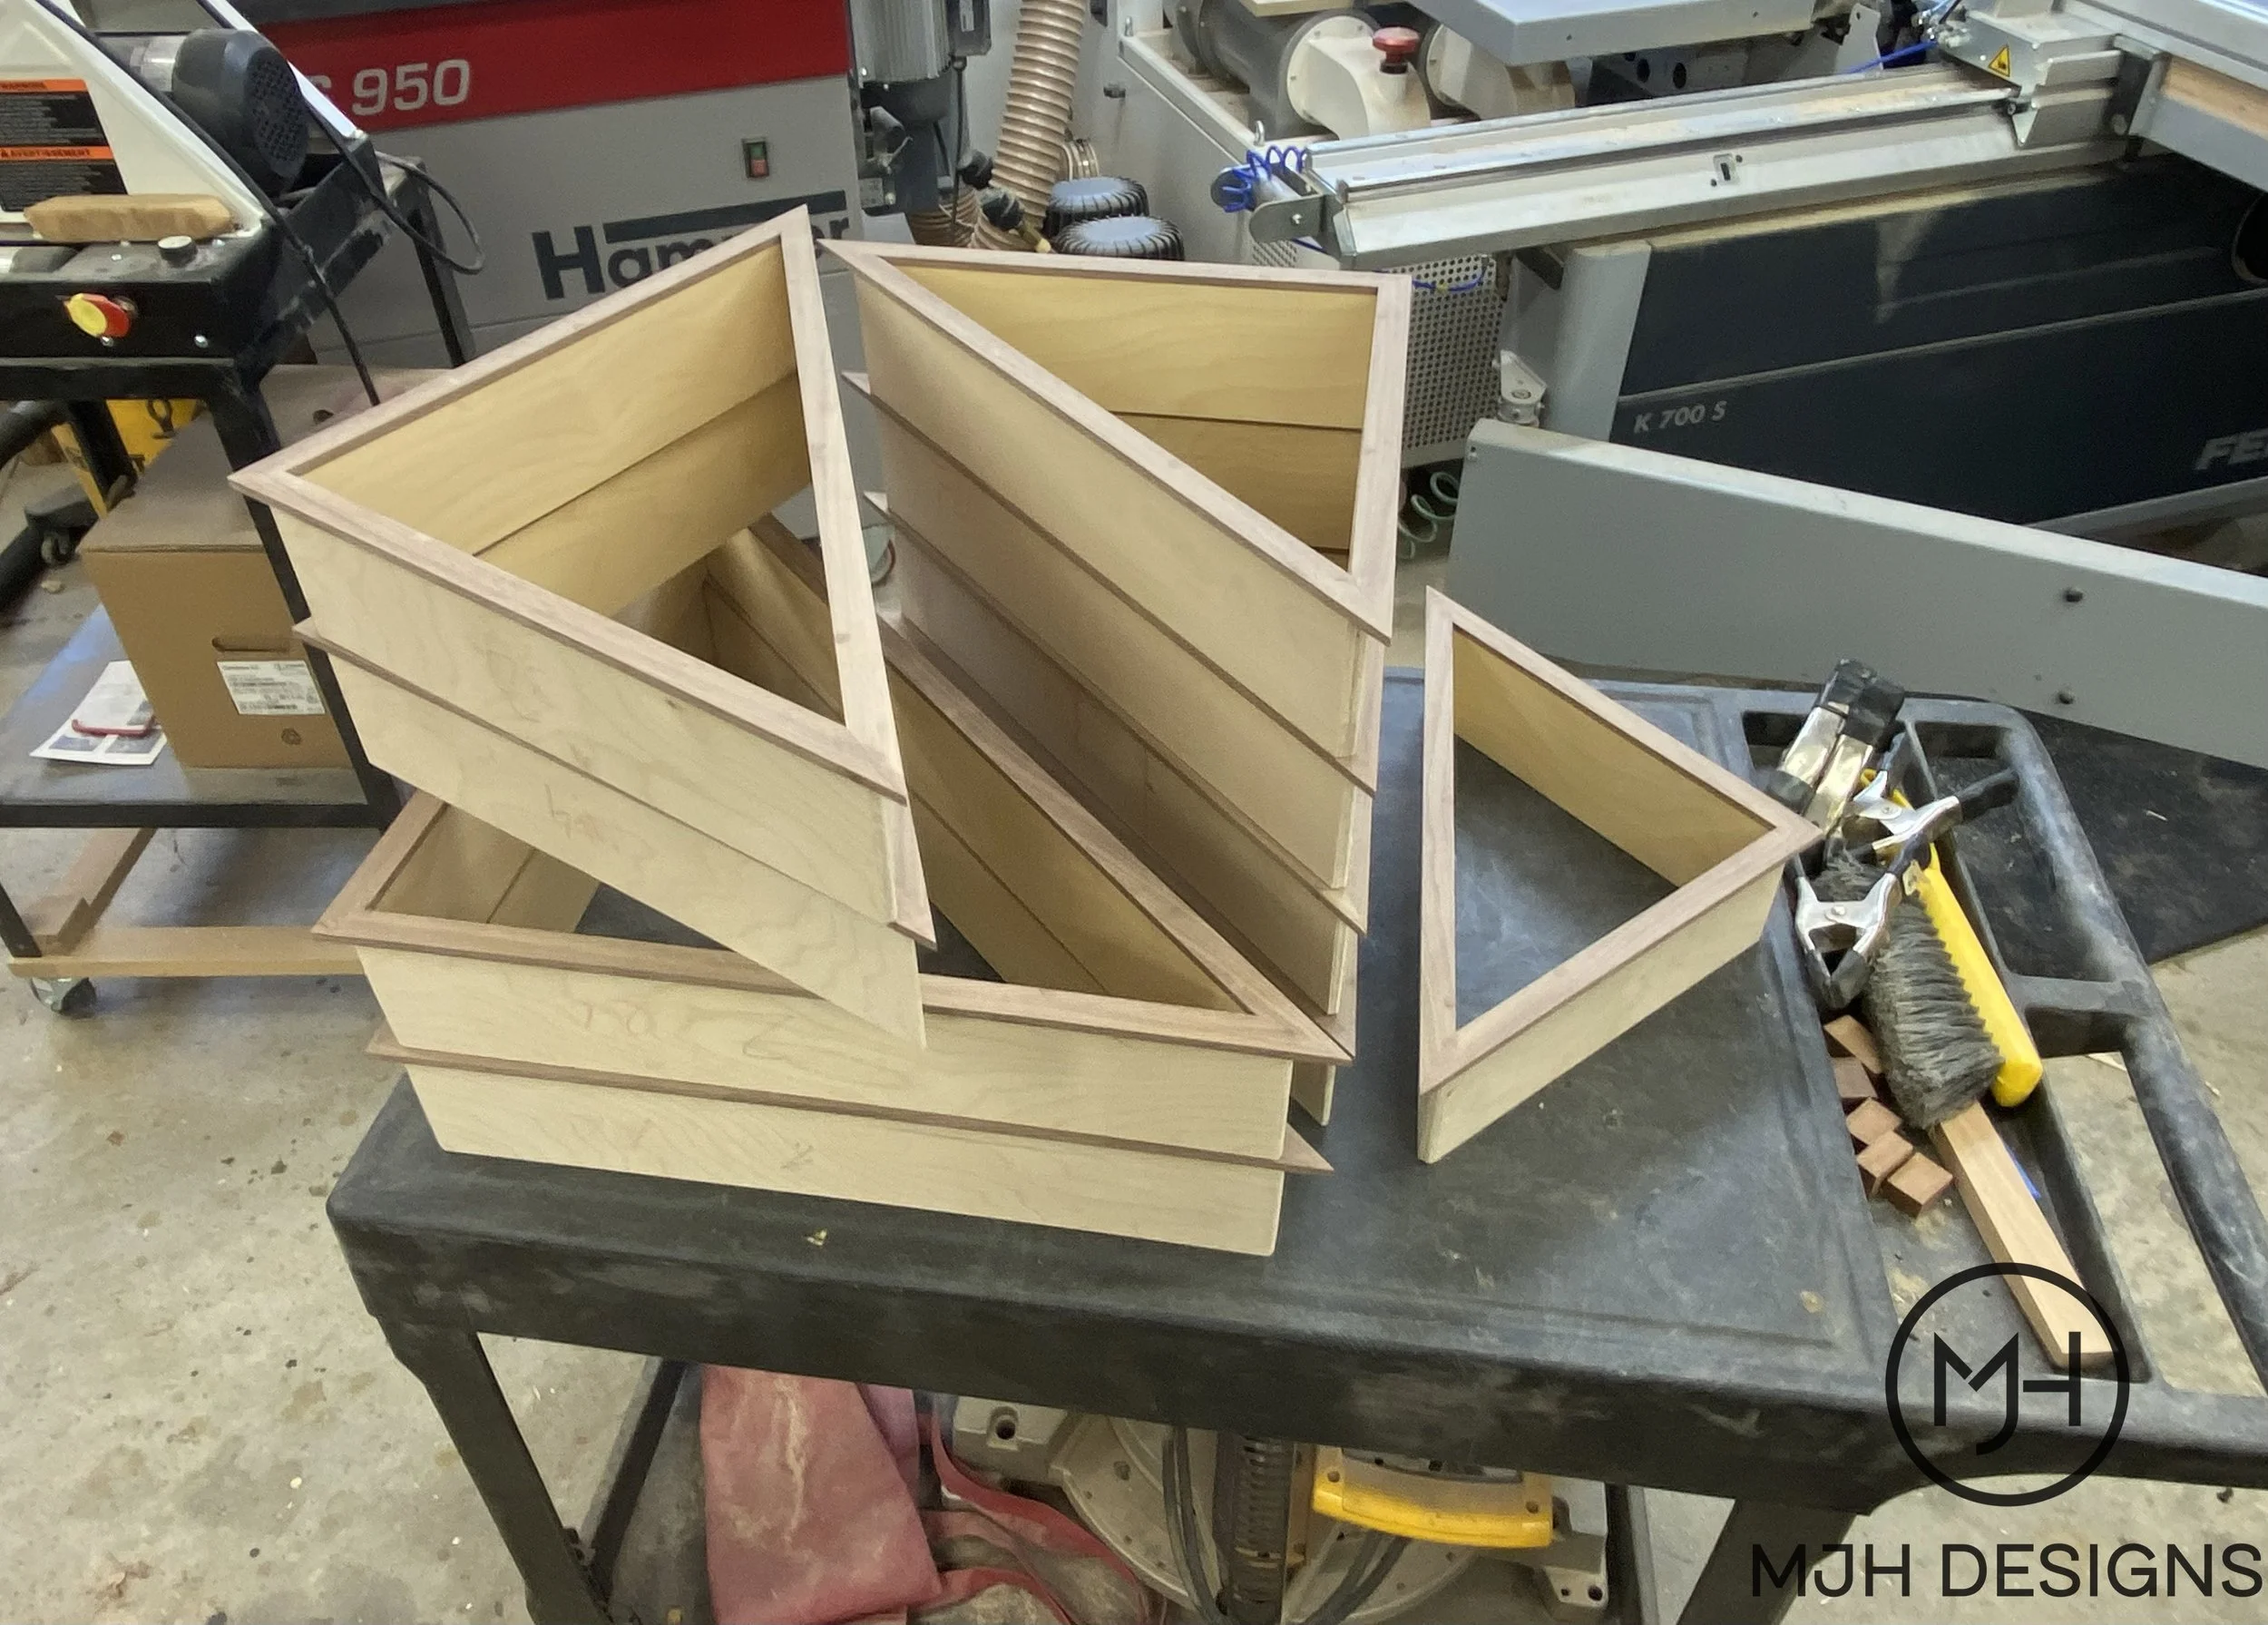
Finished cubby liners.
Next I worked on the round liner for the military emblem. It was made of solid maple, also with walnut trim on the front. Twelve segments were glued together and once dry, the inside and outside circles were routed. Since my router can only reach down 2” I made two circles and glued them together later for the full 4” depth.
12-segment ring being glued up.
Inside and outside circles being routed.
Inside and outside circles for emblem display being routed on a CNC machine.
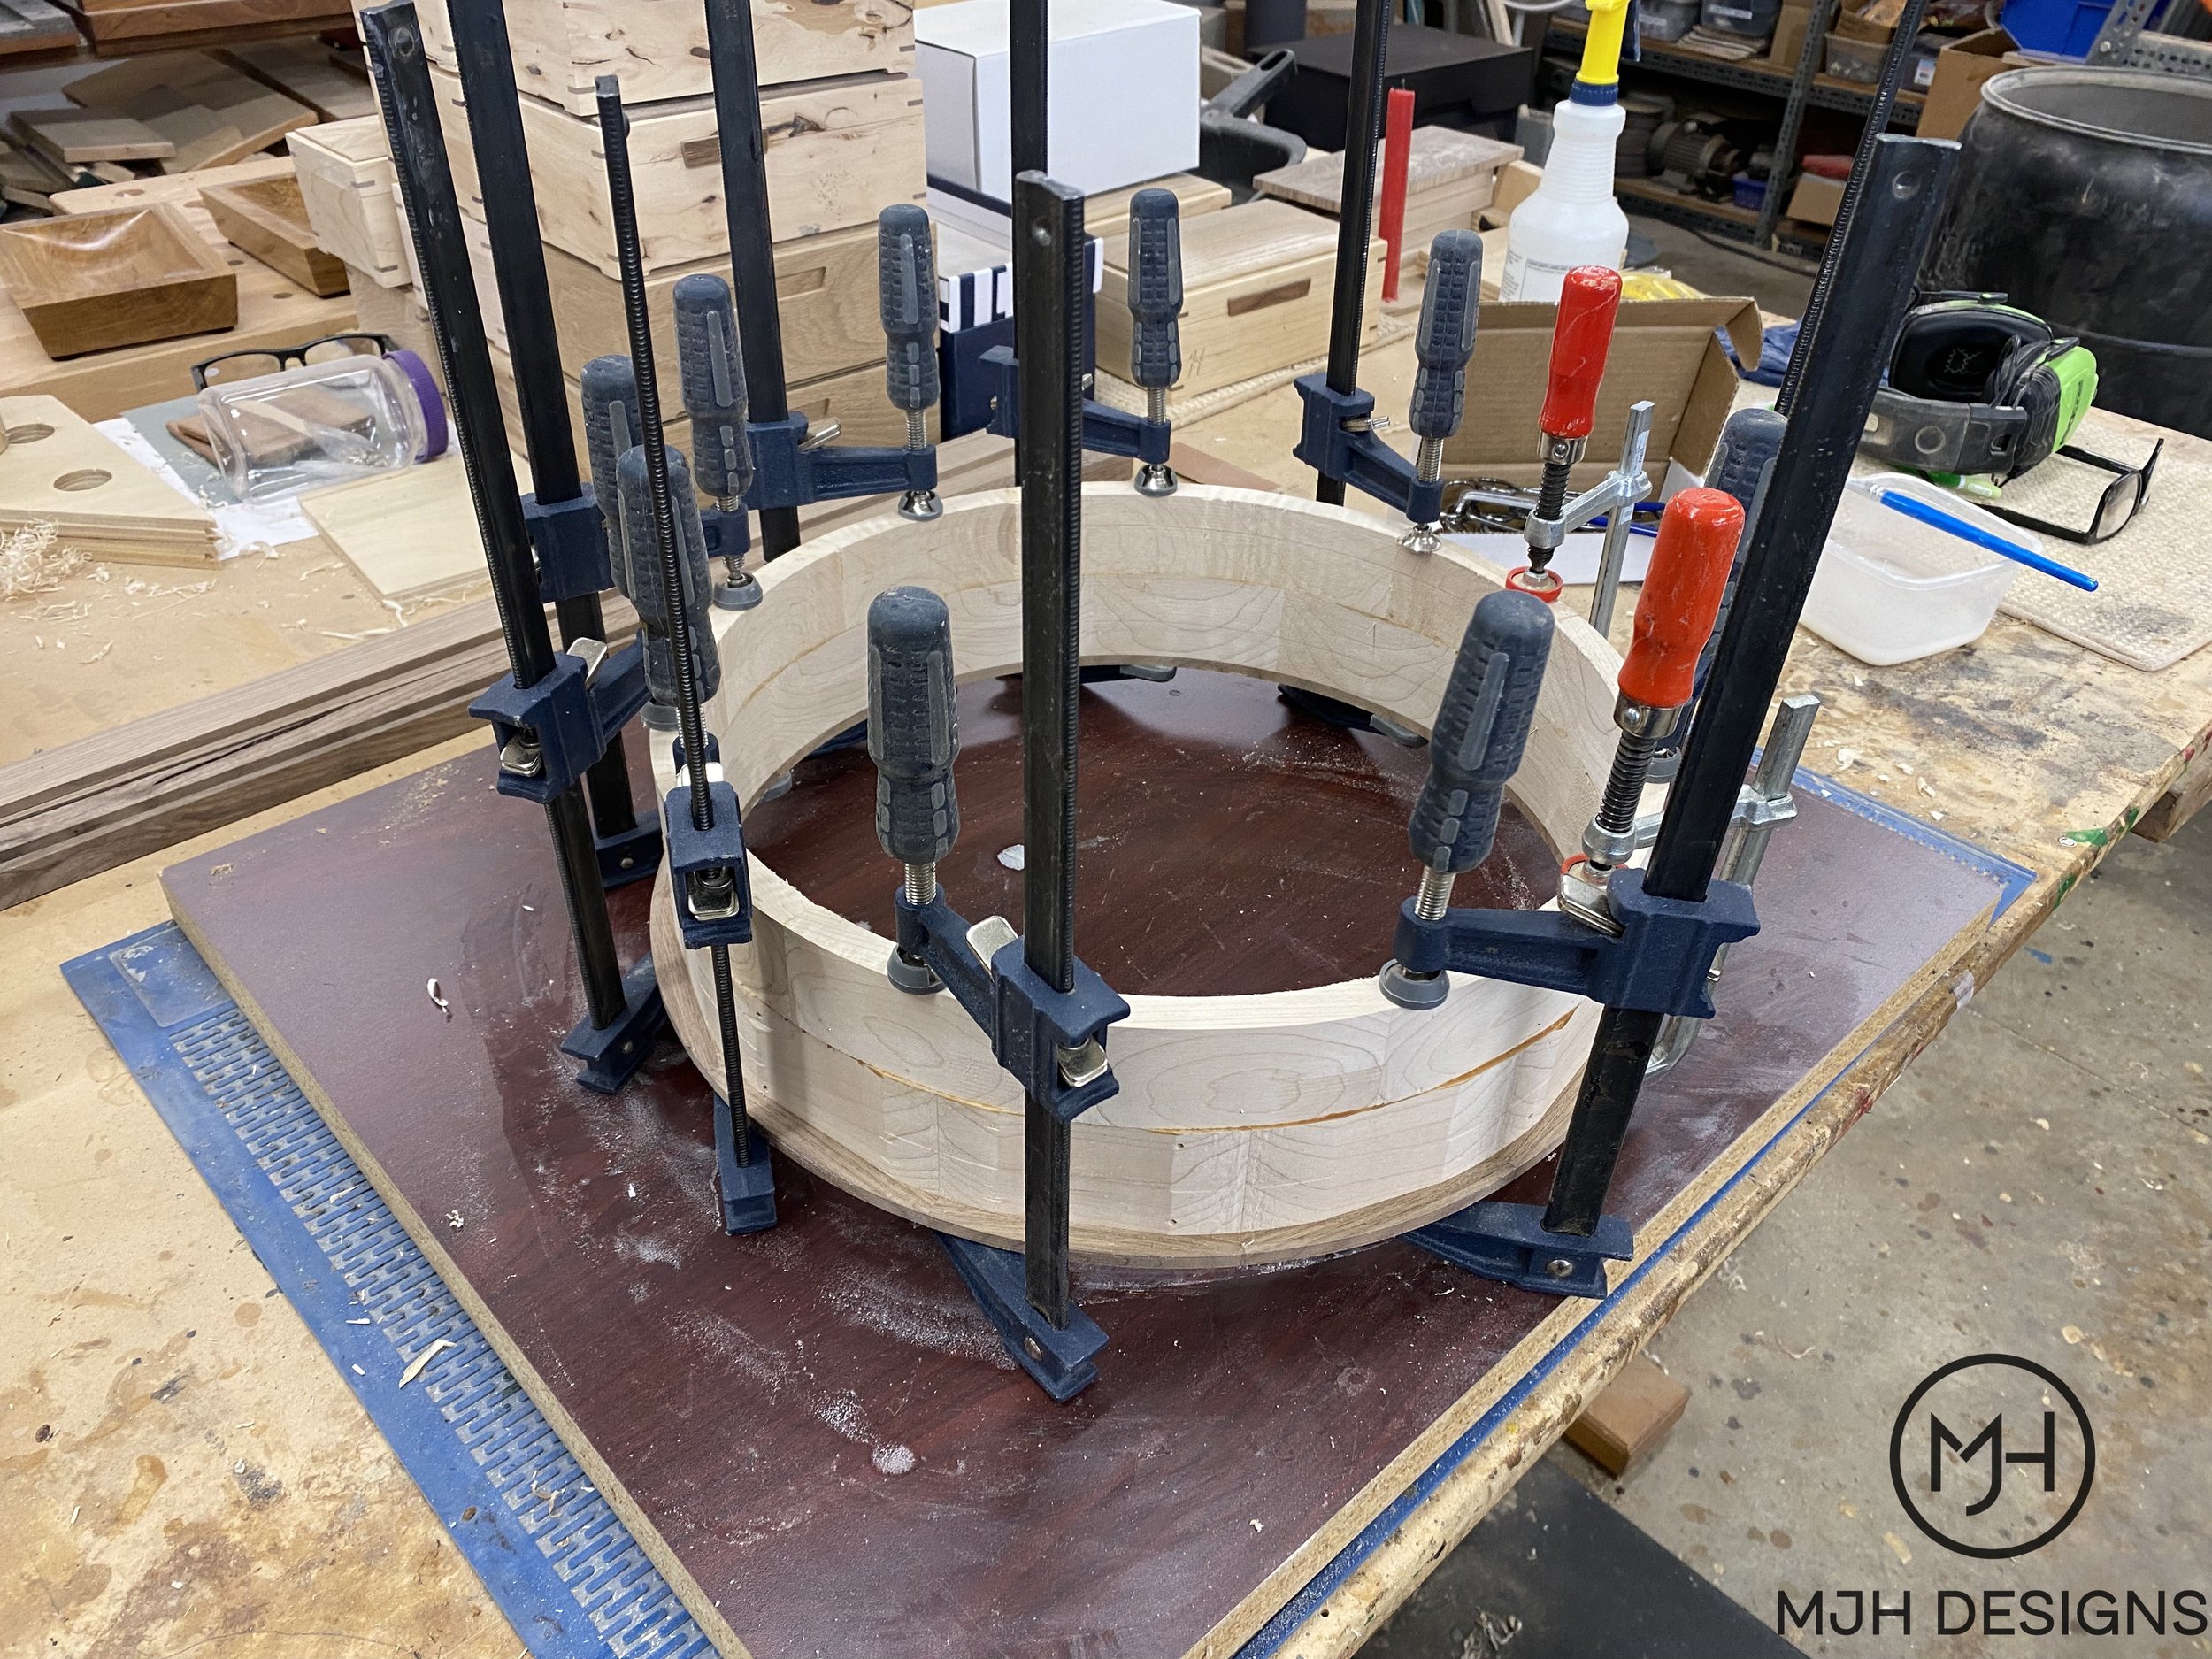
Two rings glued together.
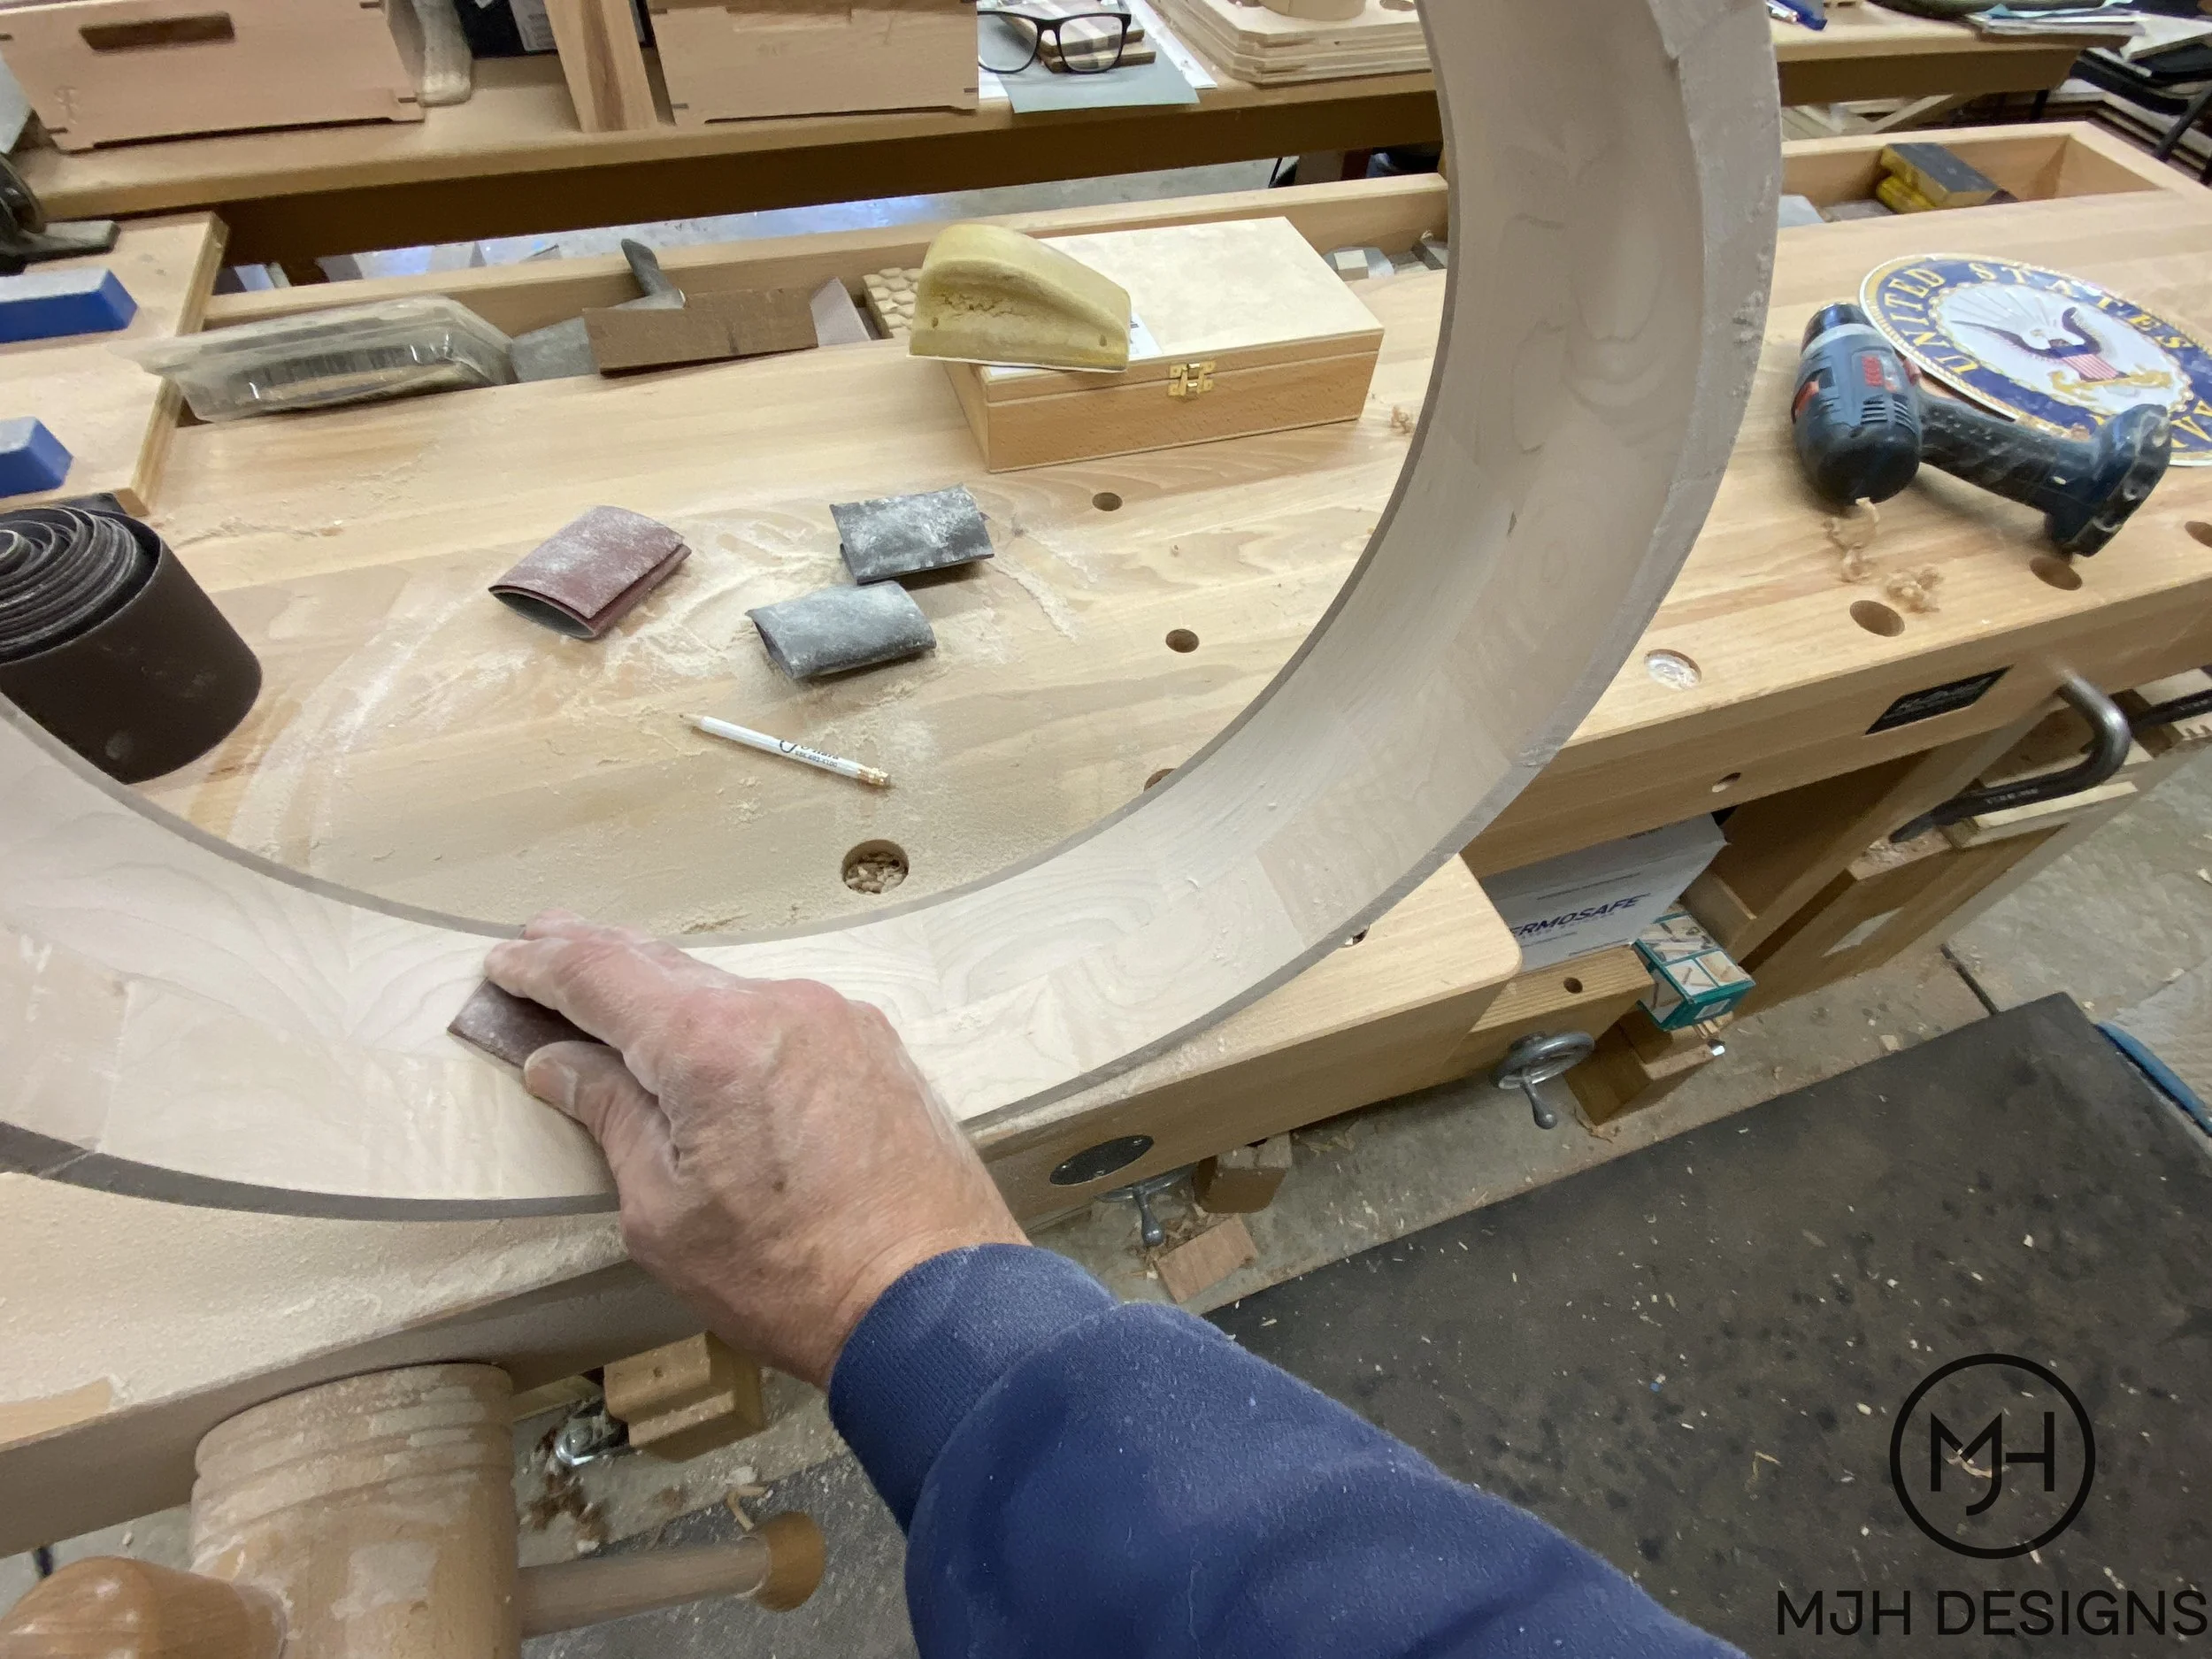
Little hand sanding for a smooth finish.
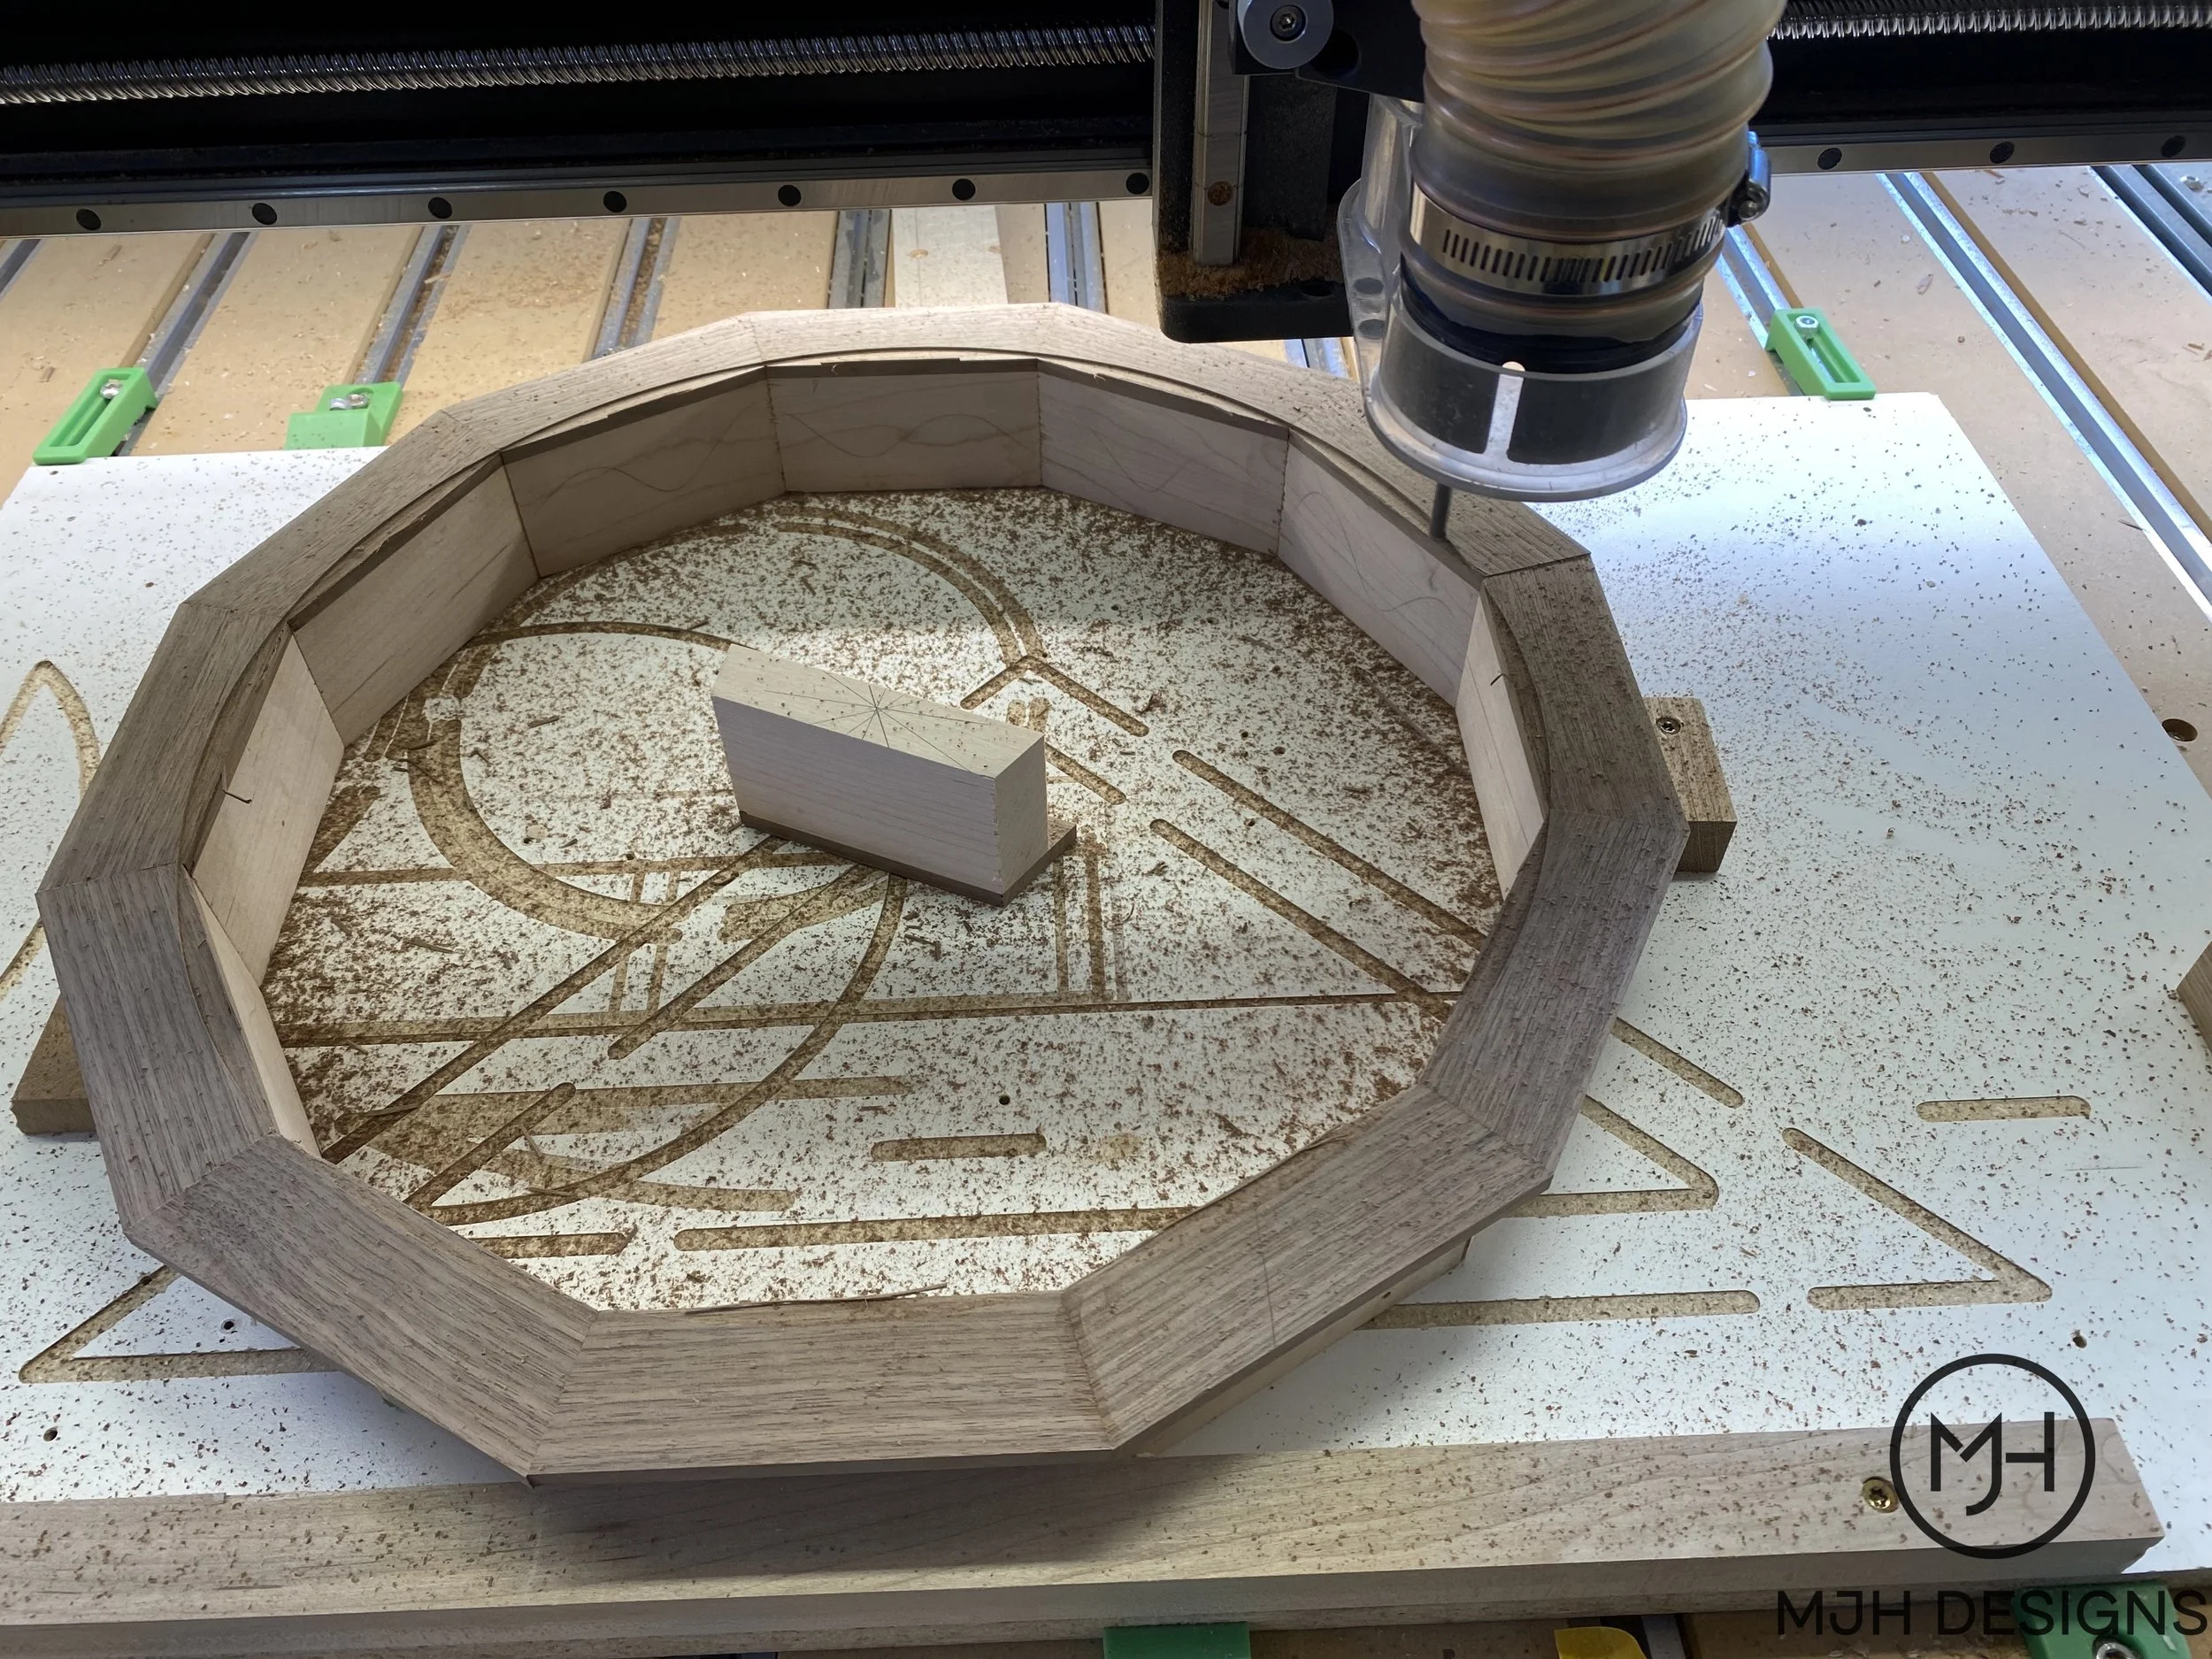
With all cubby liners done it was time to work on the front panel. I used a thin 5mm thick sheet of plywood to make a test panel. That allowed me to see the overall layout, check to make sure all the cubby liners fit properly and the spacing between the triangles was constant.
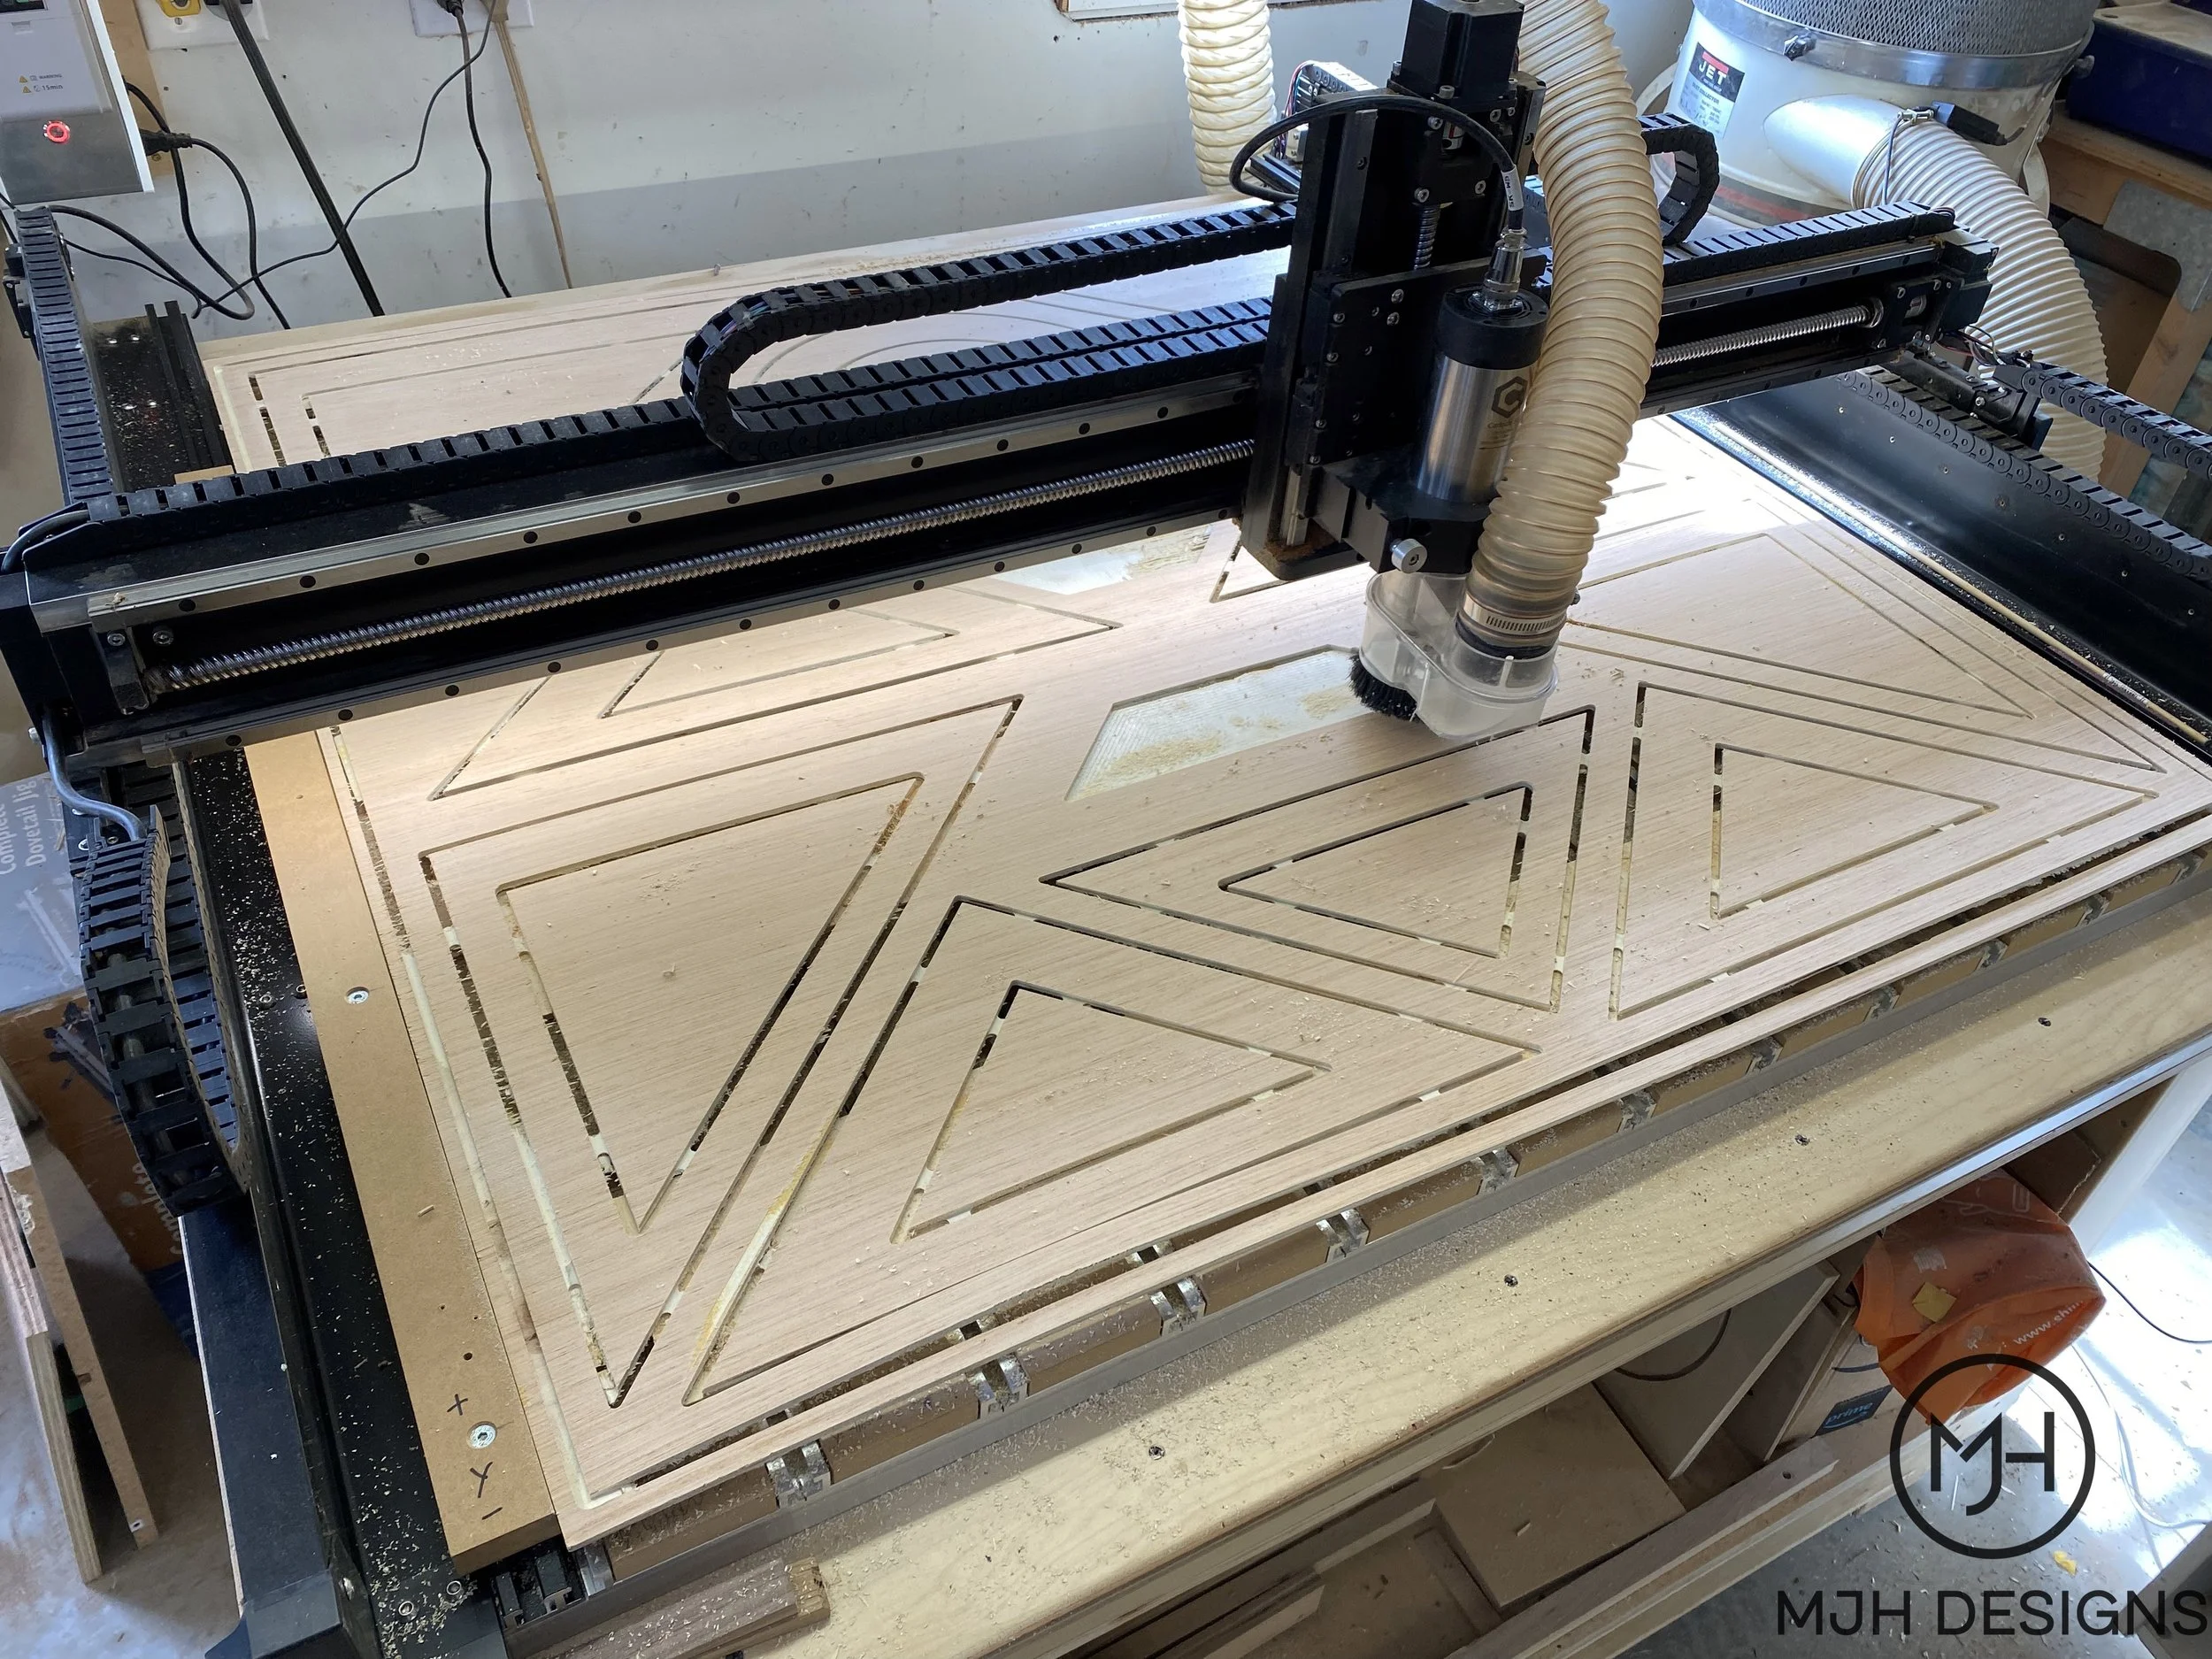
Thin plywood on CNC router.
A quick test fit - everything worked as planned.
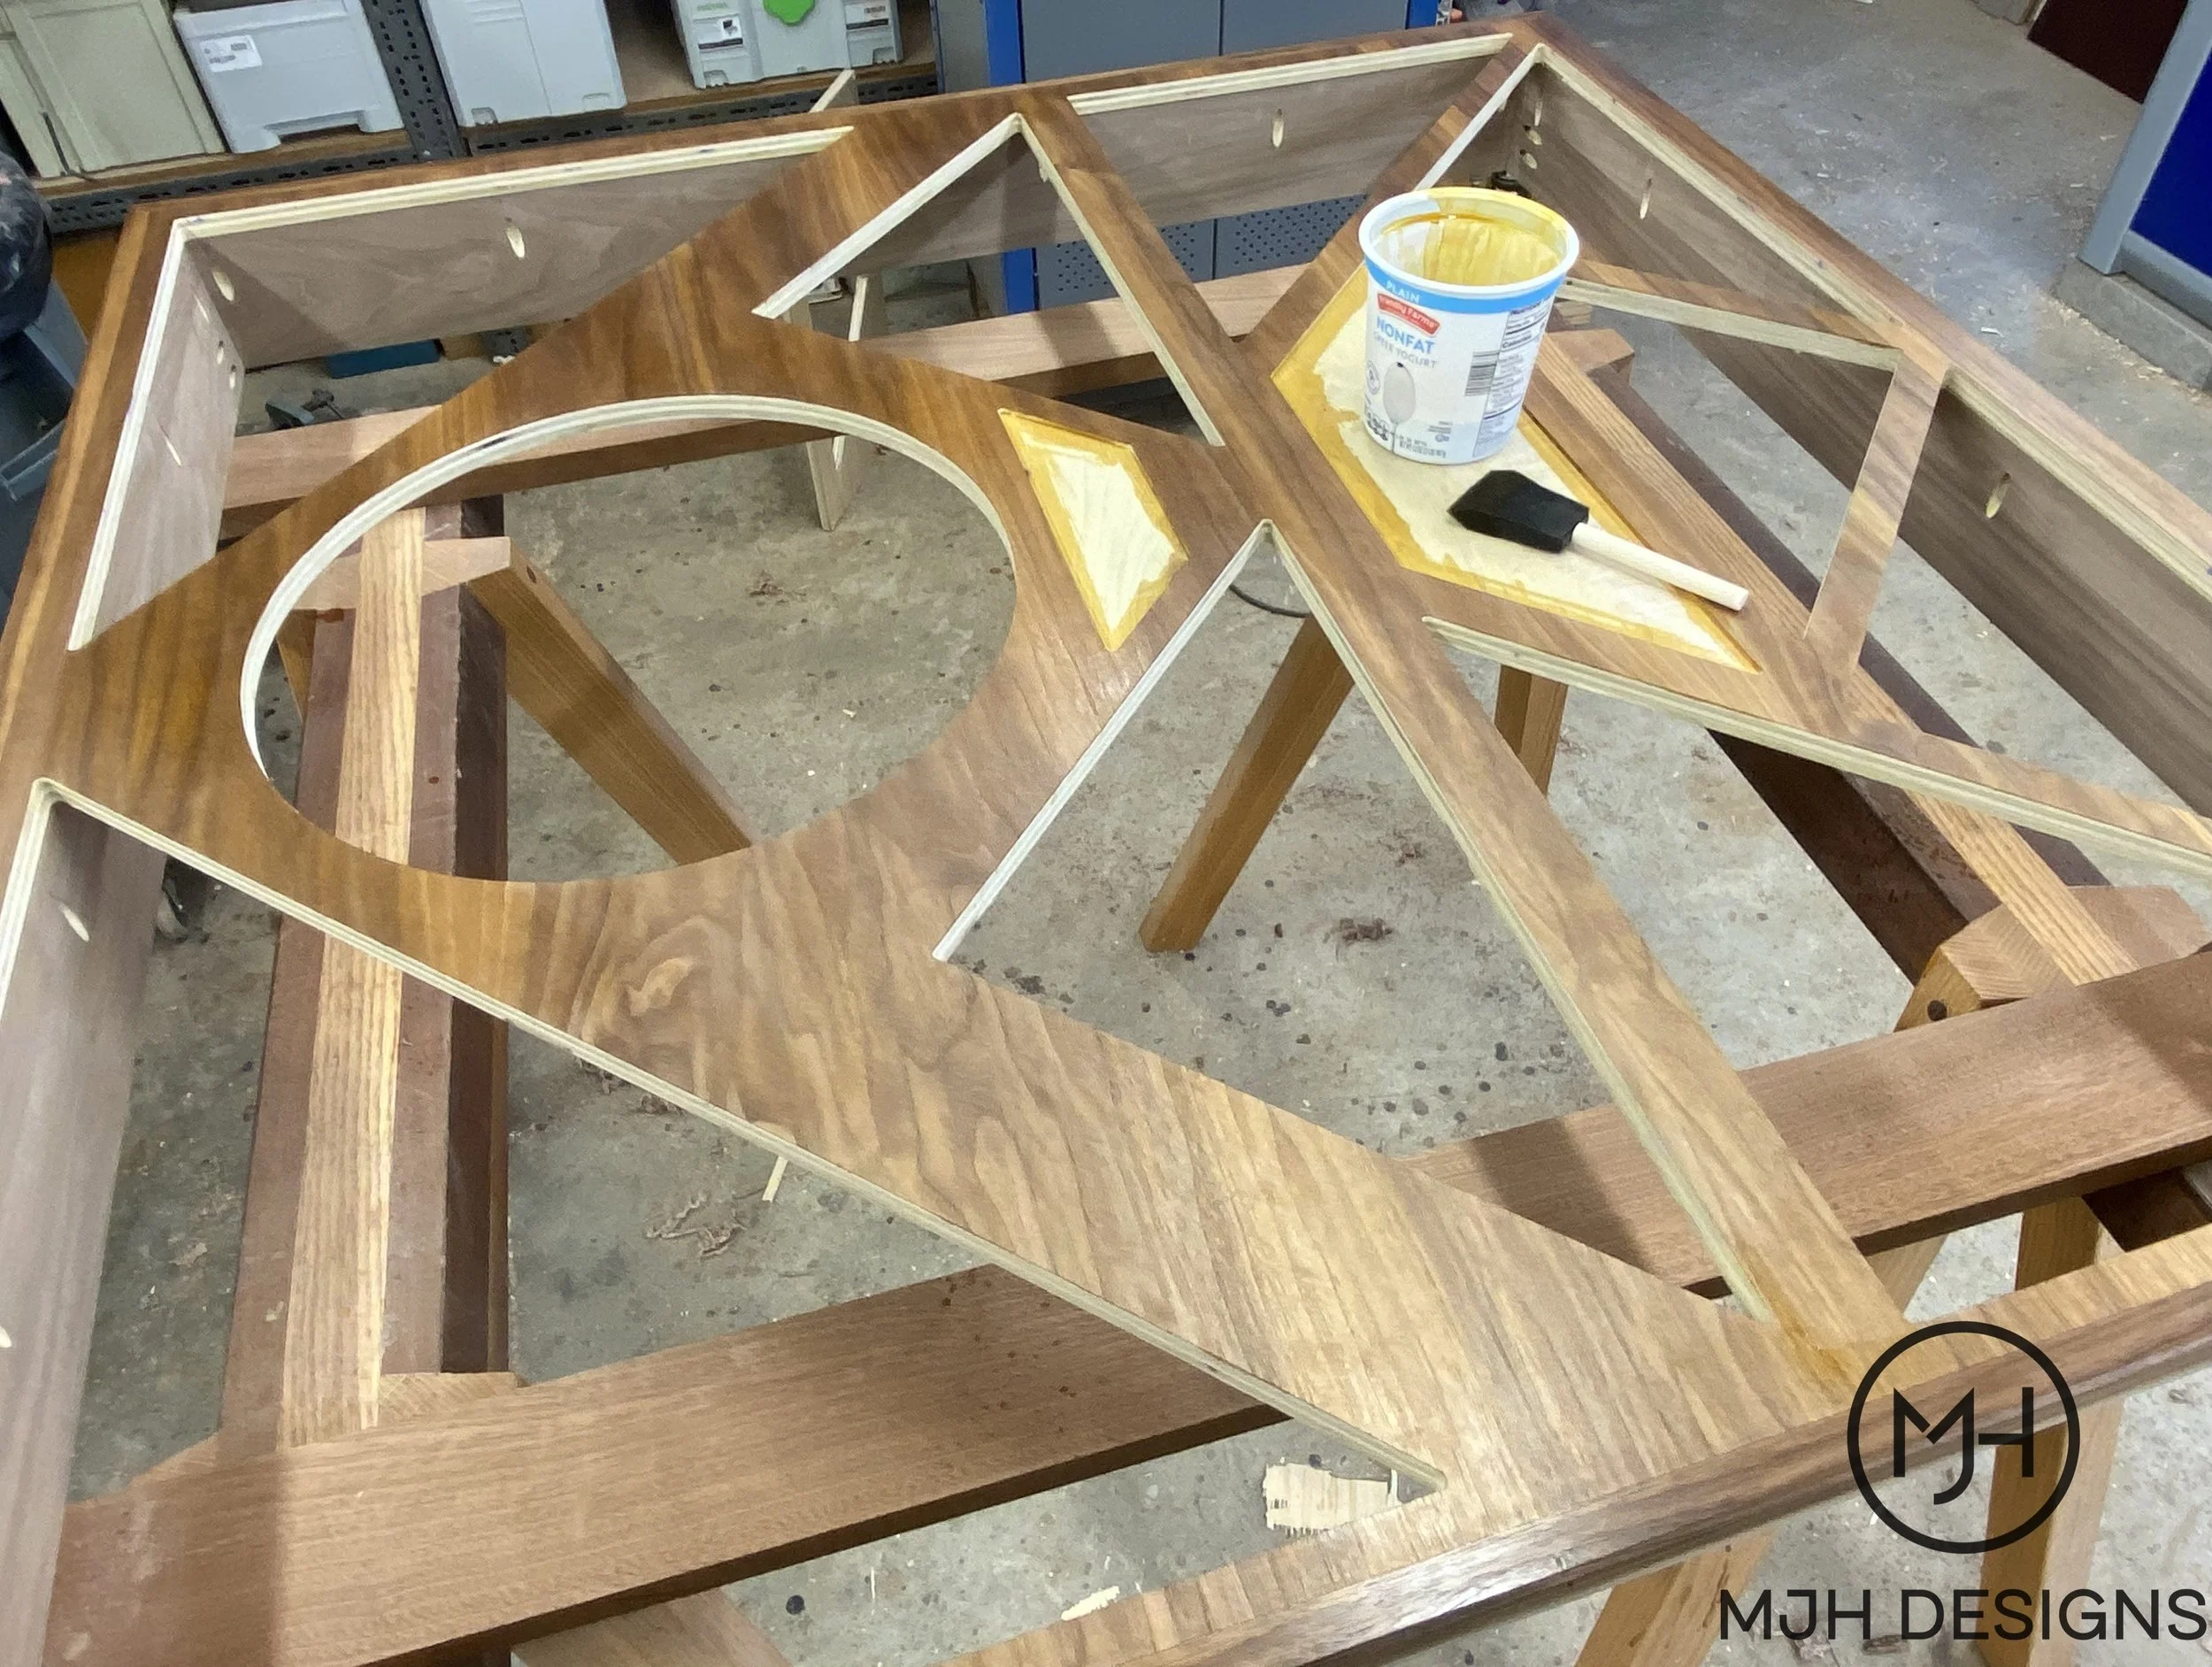
The 3/4’ thick walnut veneered cabinet plywood was cut out and a coat of amber shellac applied before the cubbies were installed.
And while I am working diligently my three shop helpers decided to take another “well deserved” nap. Chasing squirrels is exhausting… :)
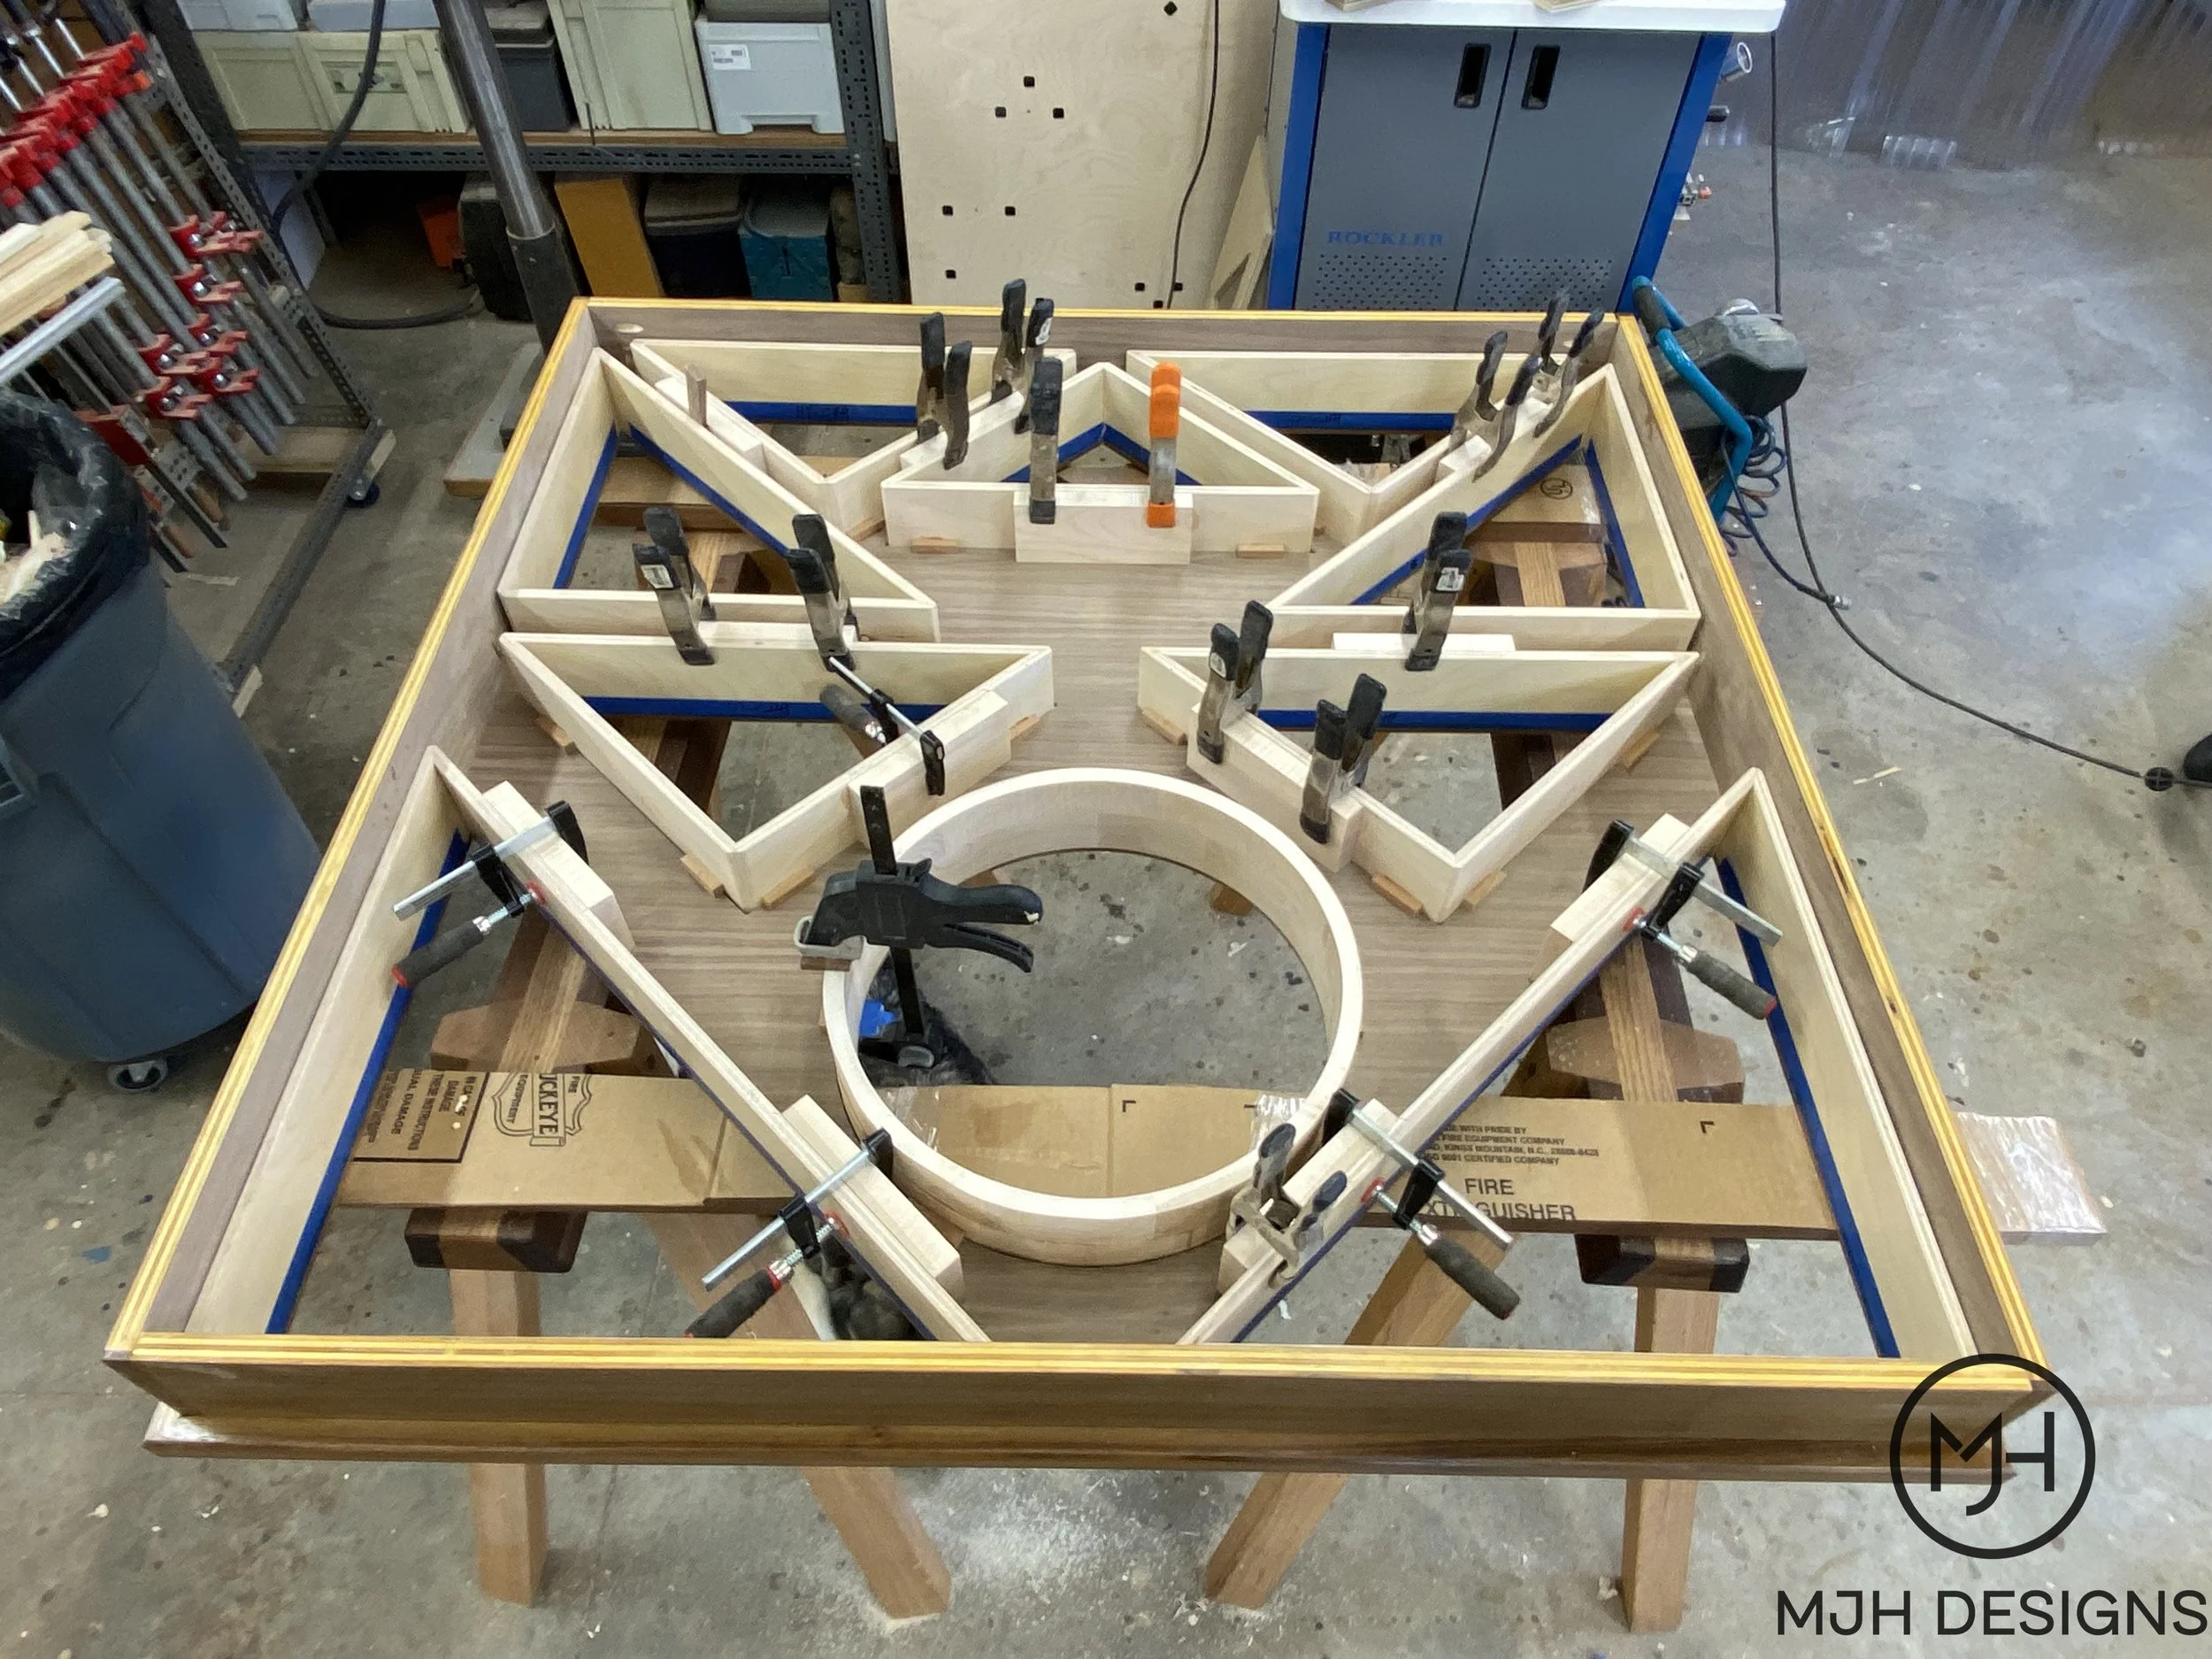
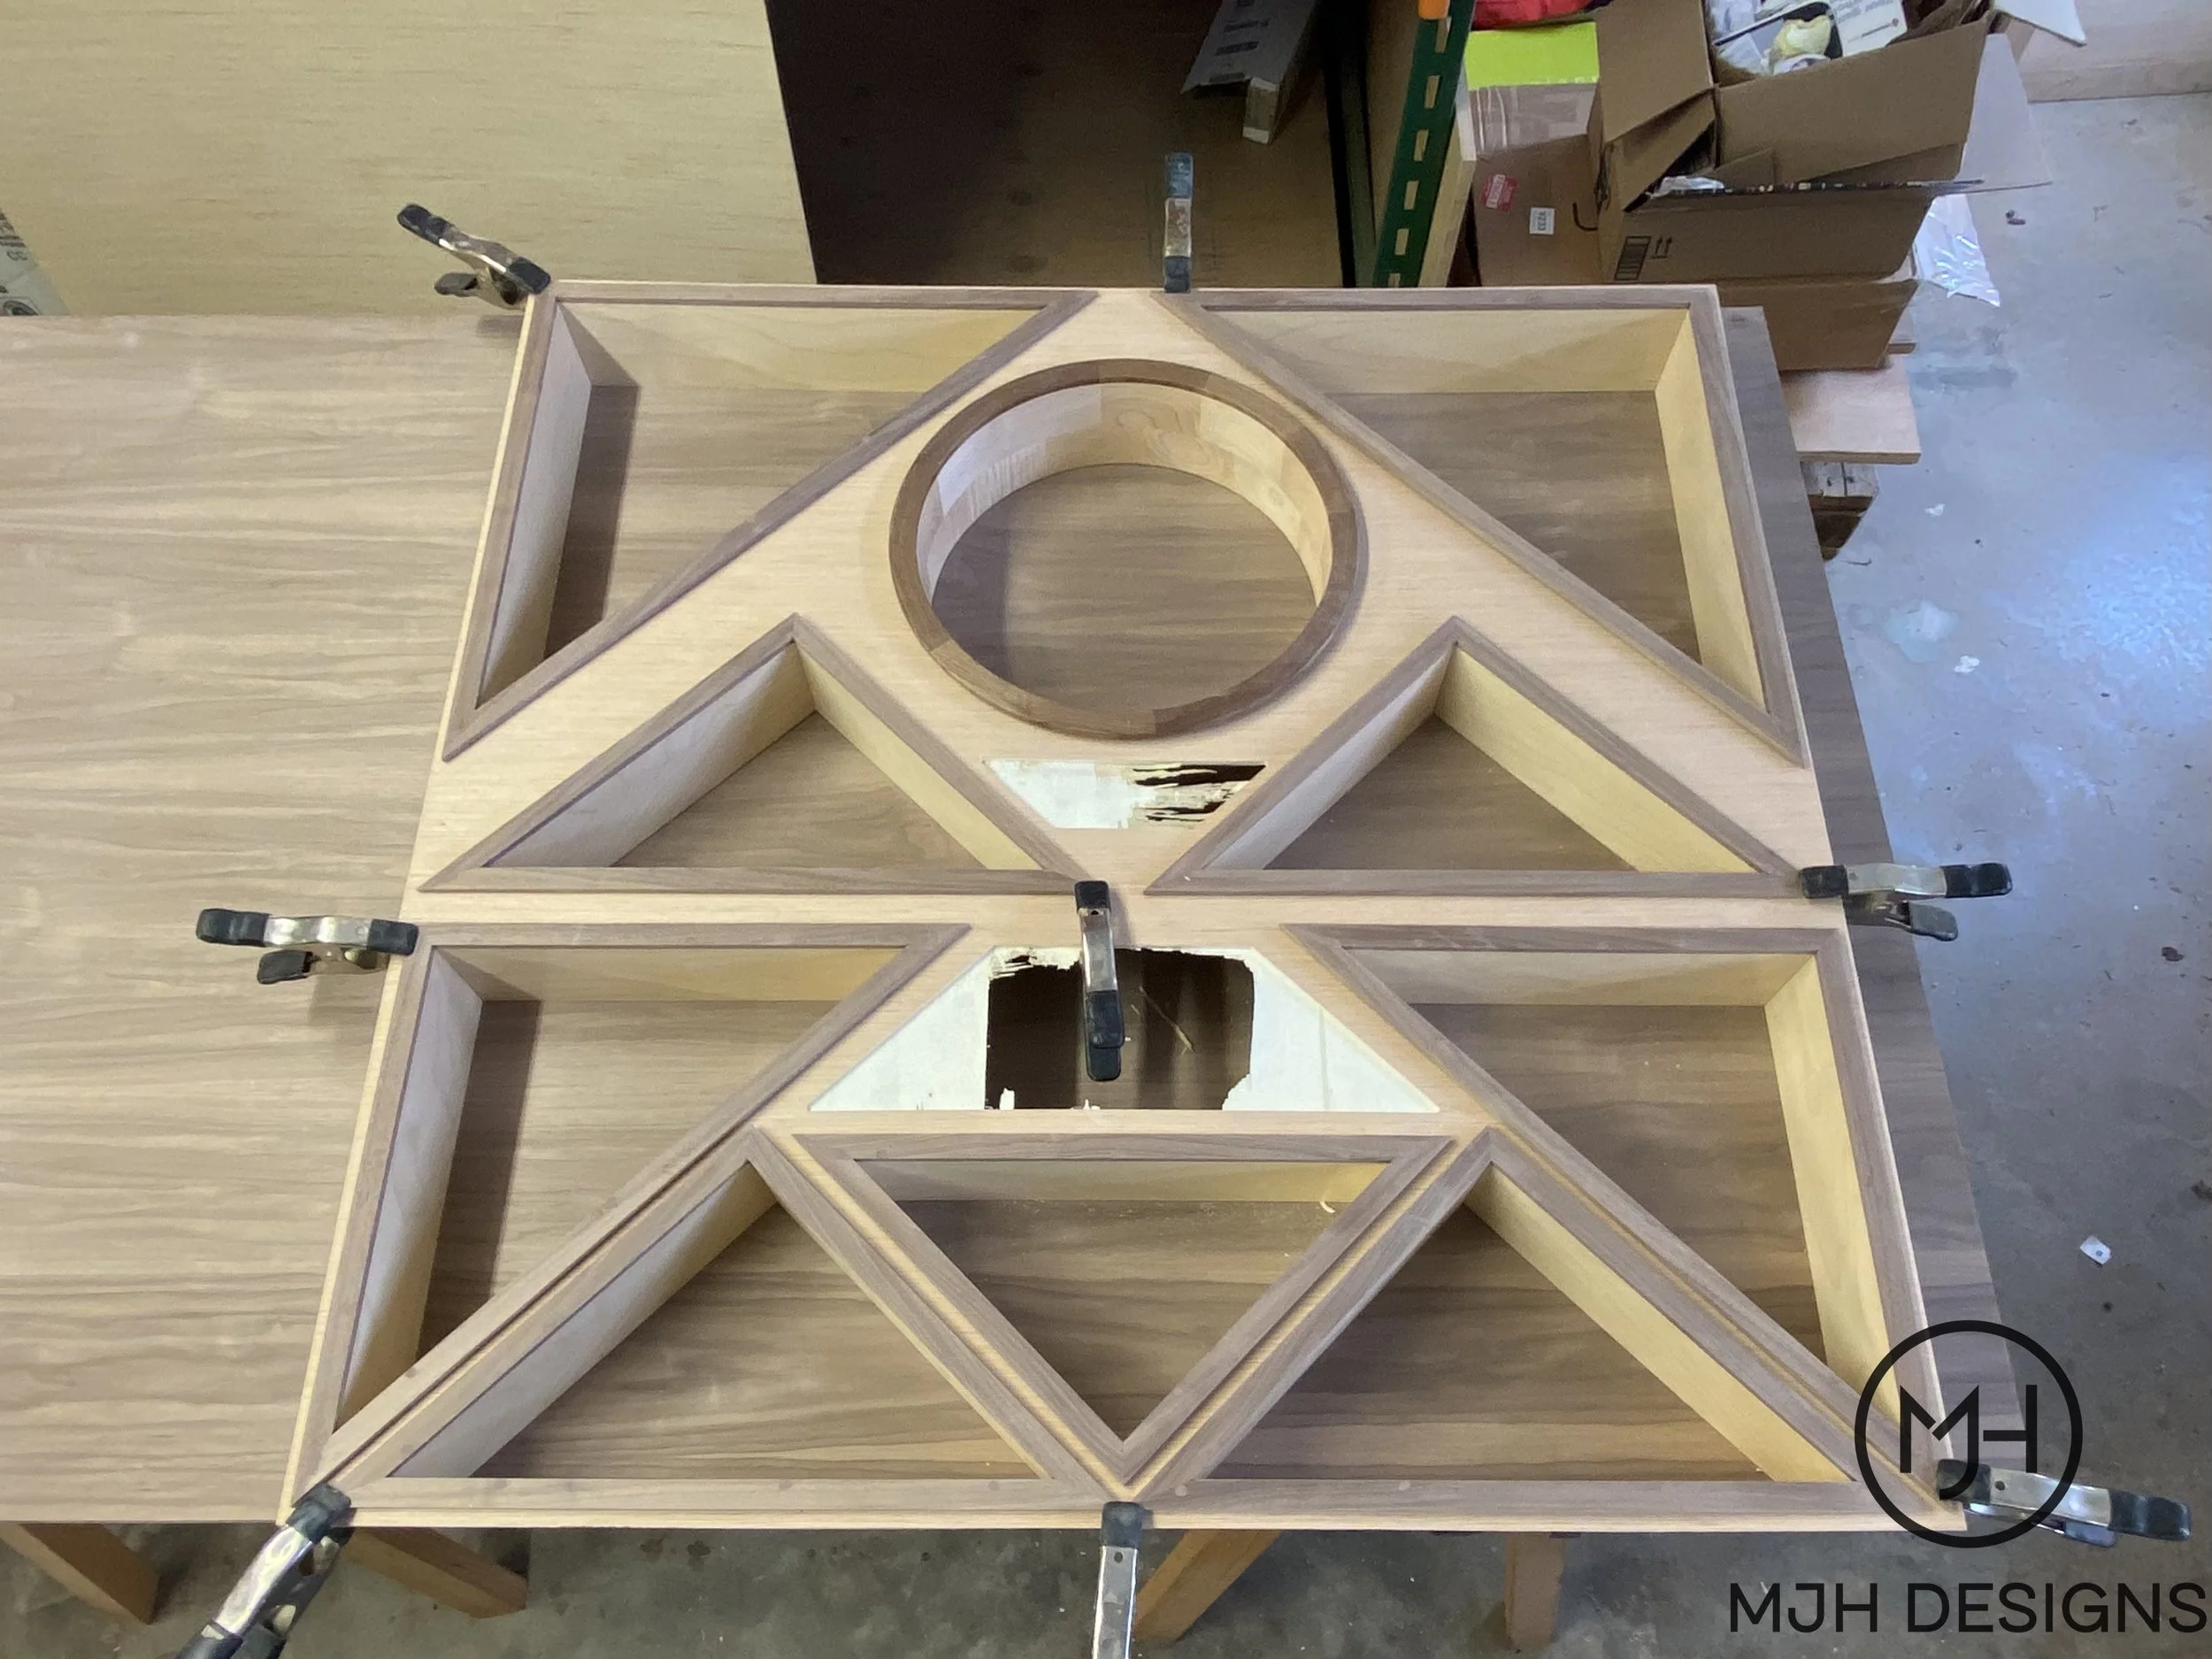
To avoid using any fasteners from the face side the cubbies are held in place with little glue blocks in the back. A 5” tall perimeter frame was also added at the same time.
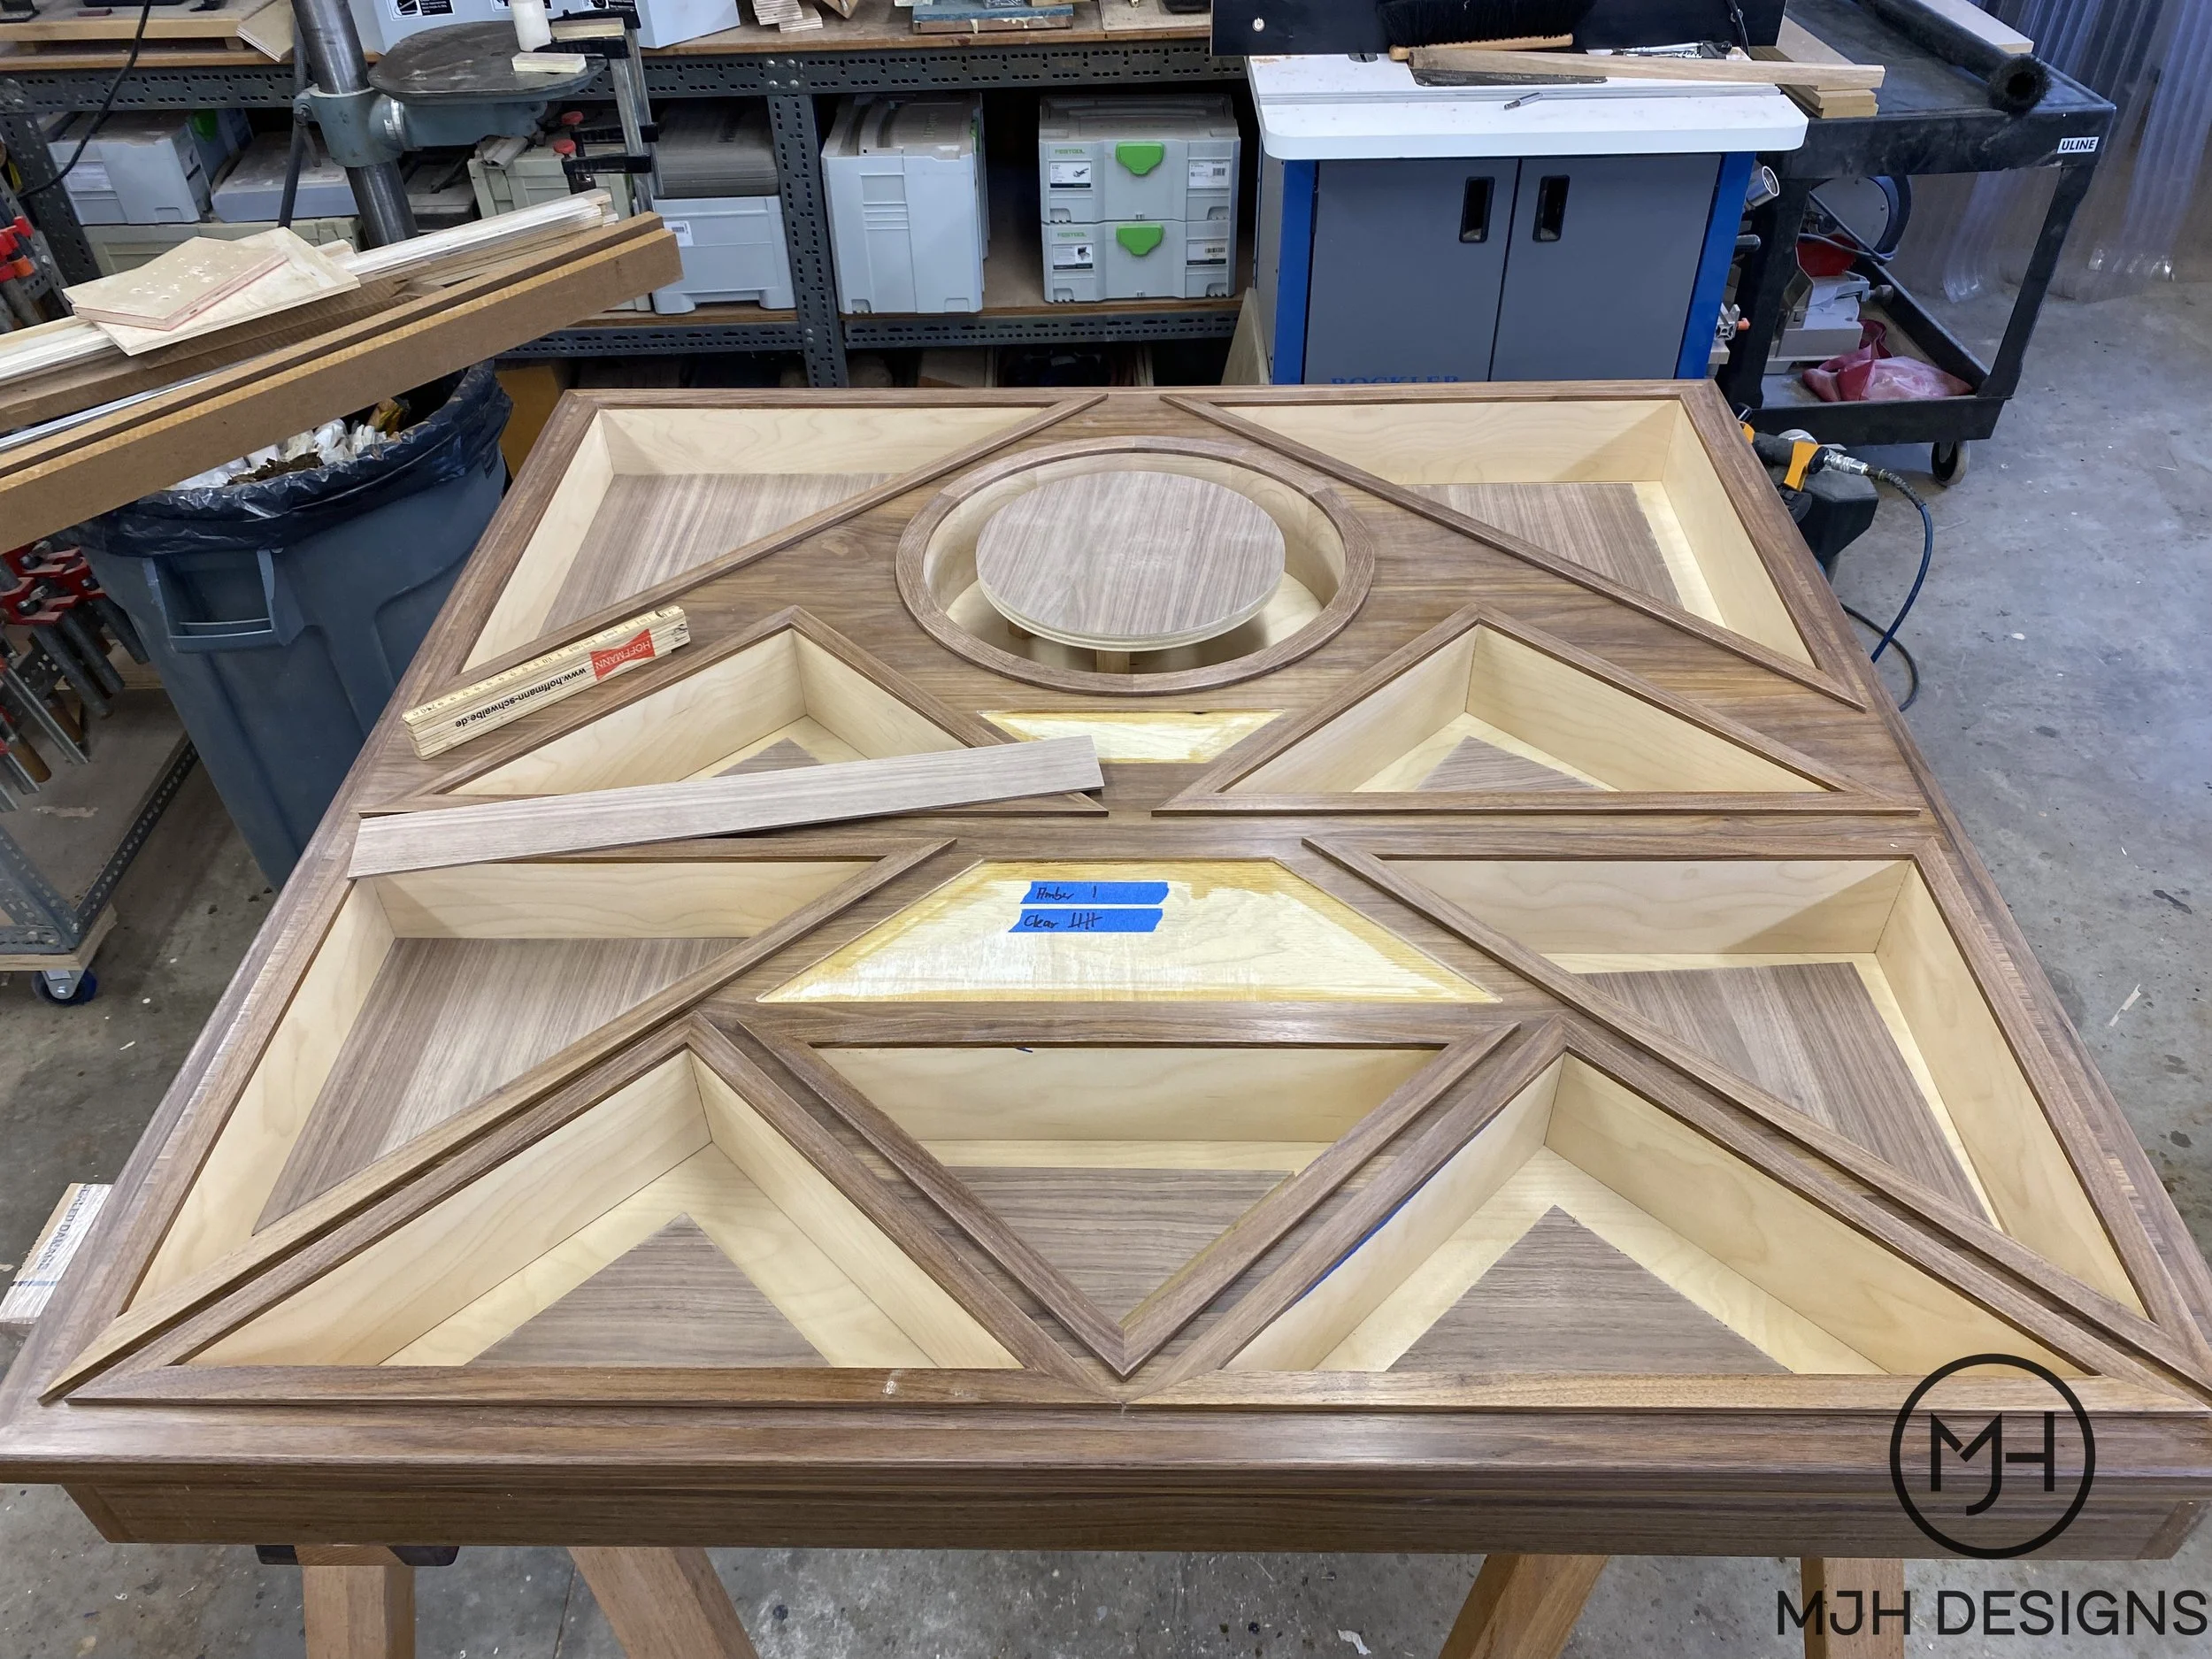
First look from the front - things are taking shape but still a ways to go.
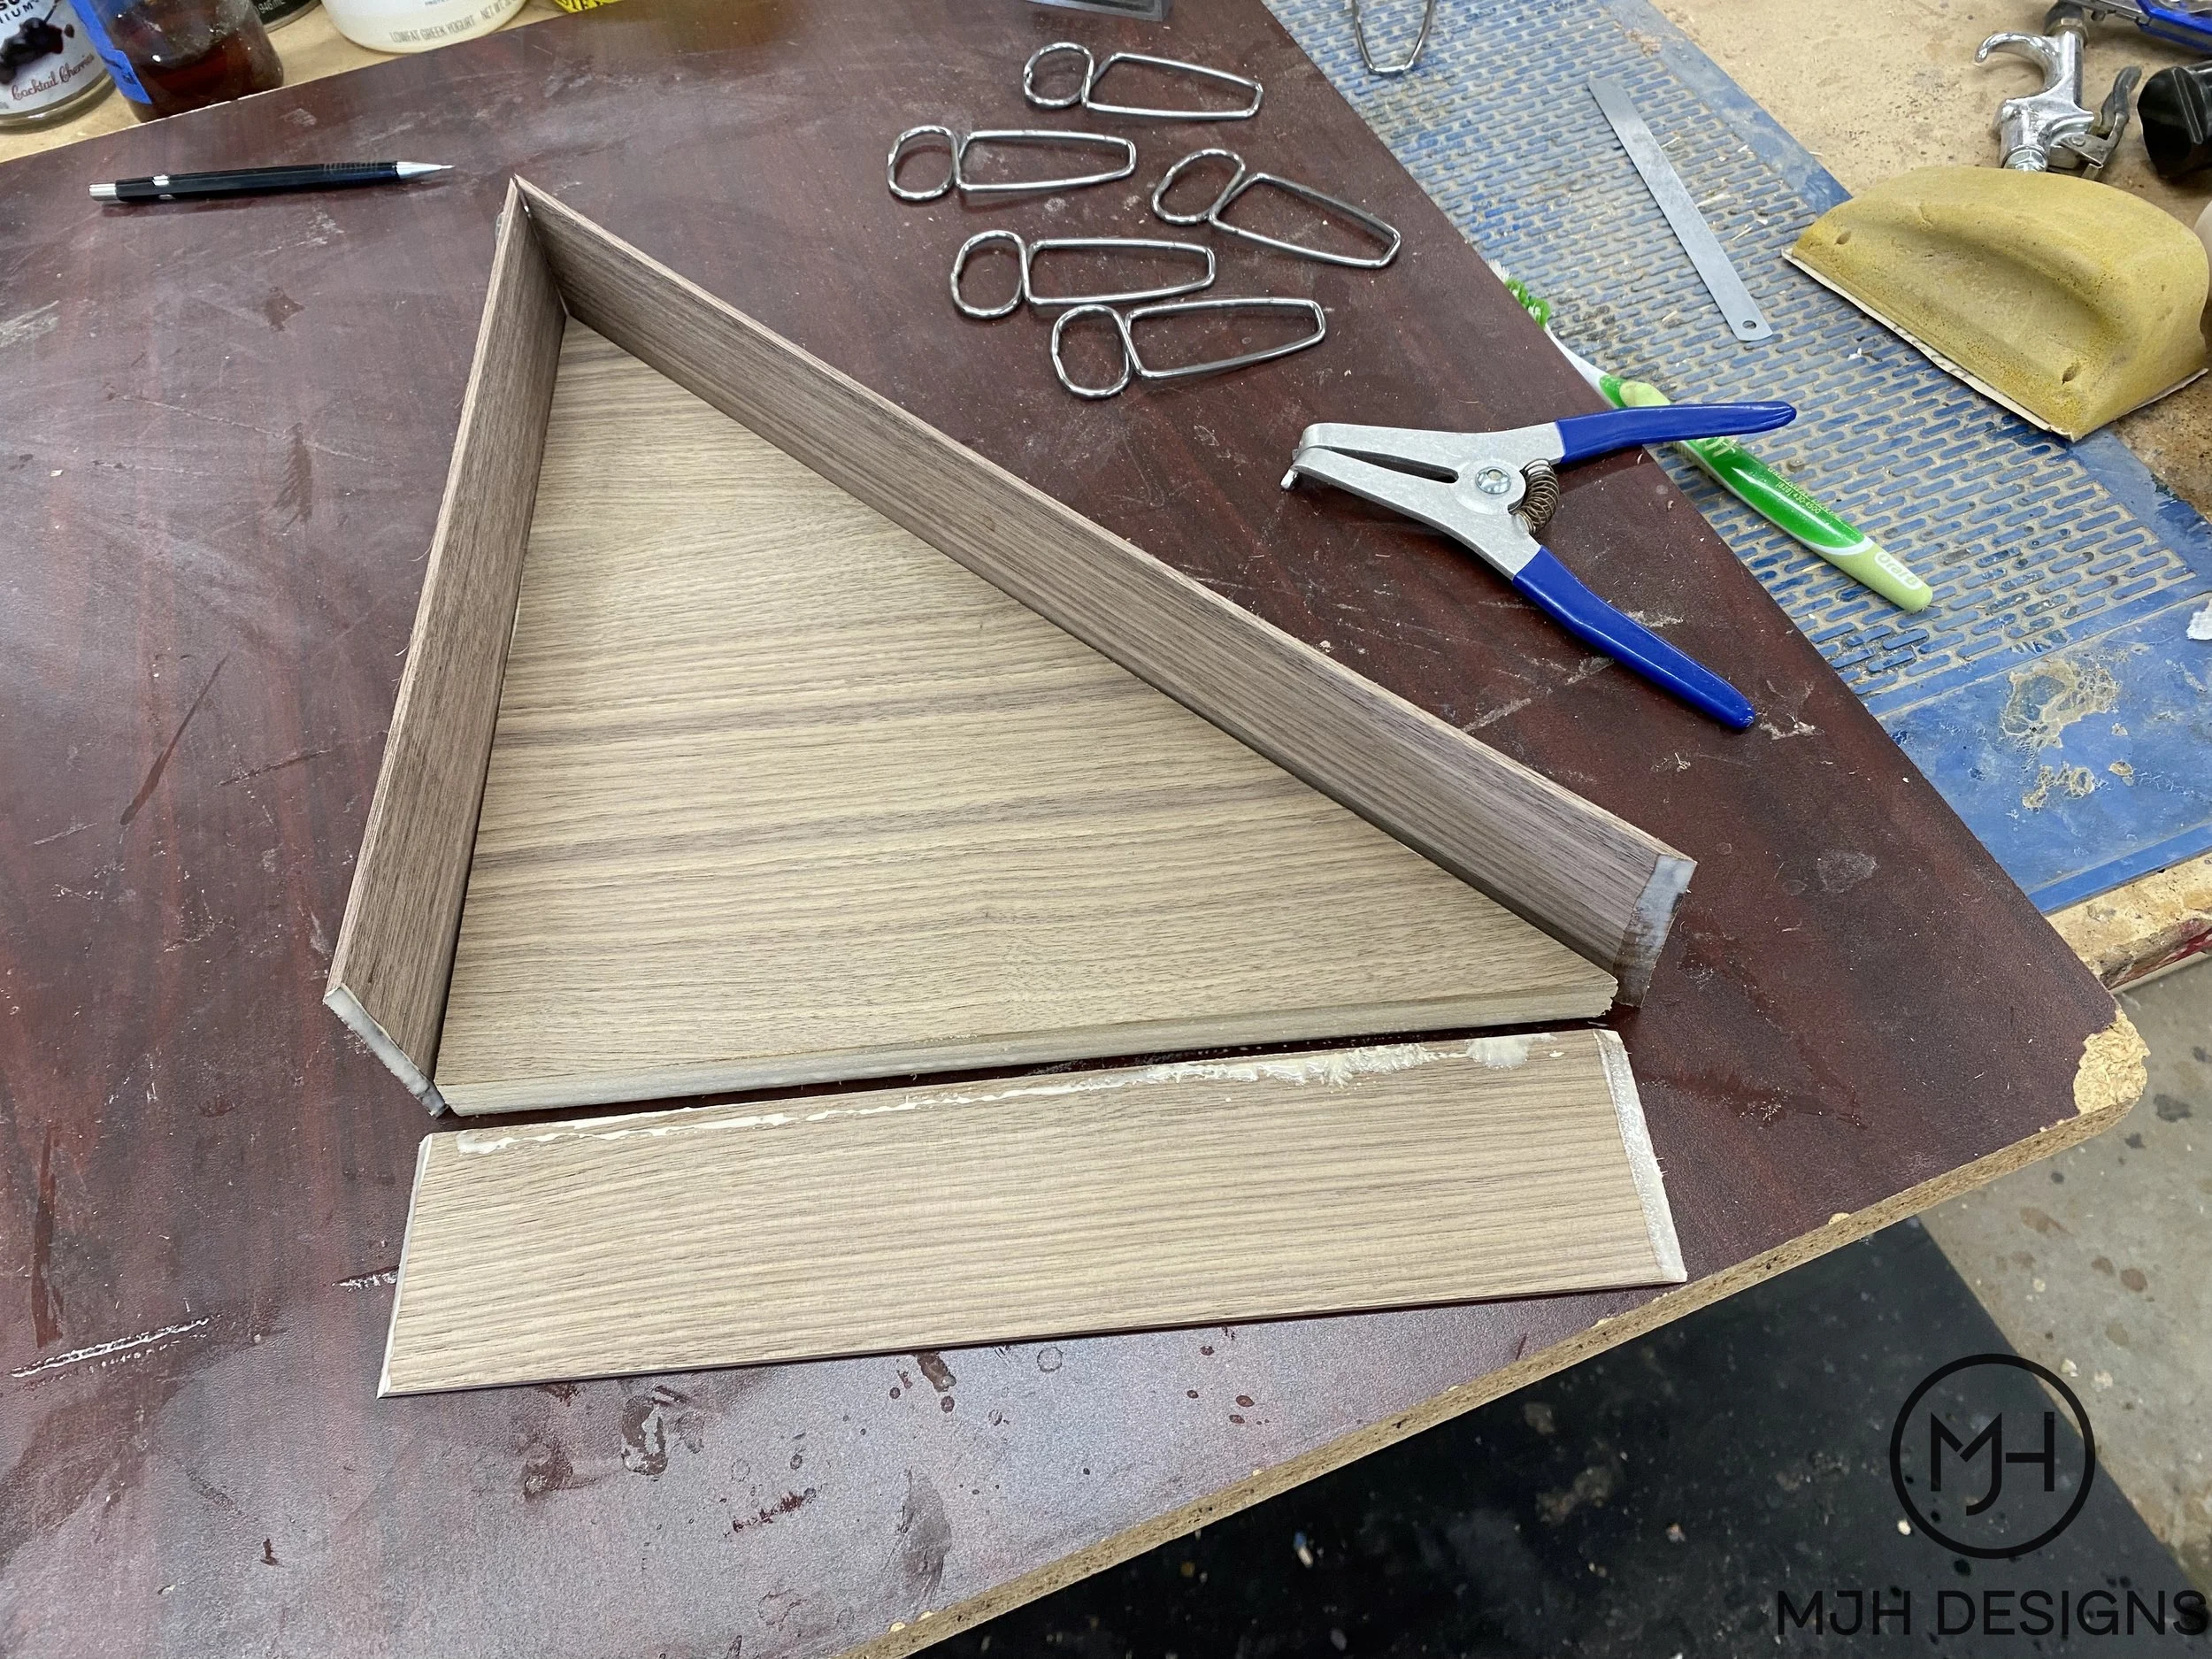
Next I made fitted flag holders - triangles that are smaller than the cubby openings and sized for a semi-tight fit of the folded flags. The back panels are veneered plywood, the sides are solid walnut strips.

Small spring clamps really help.
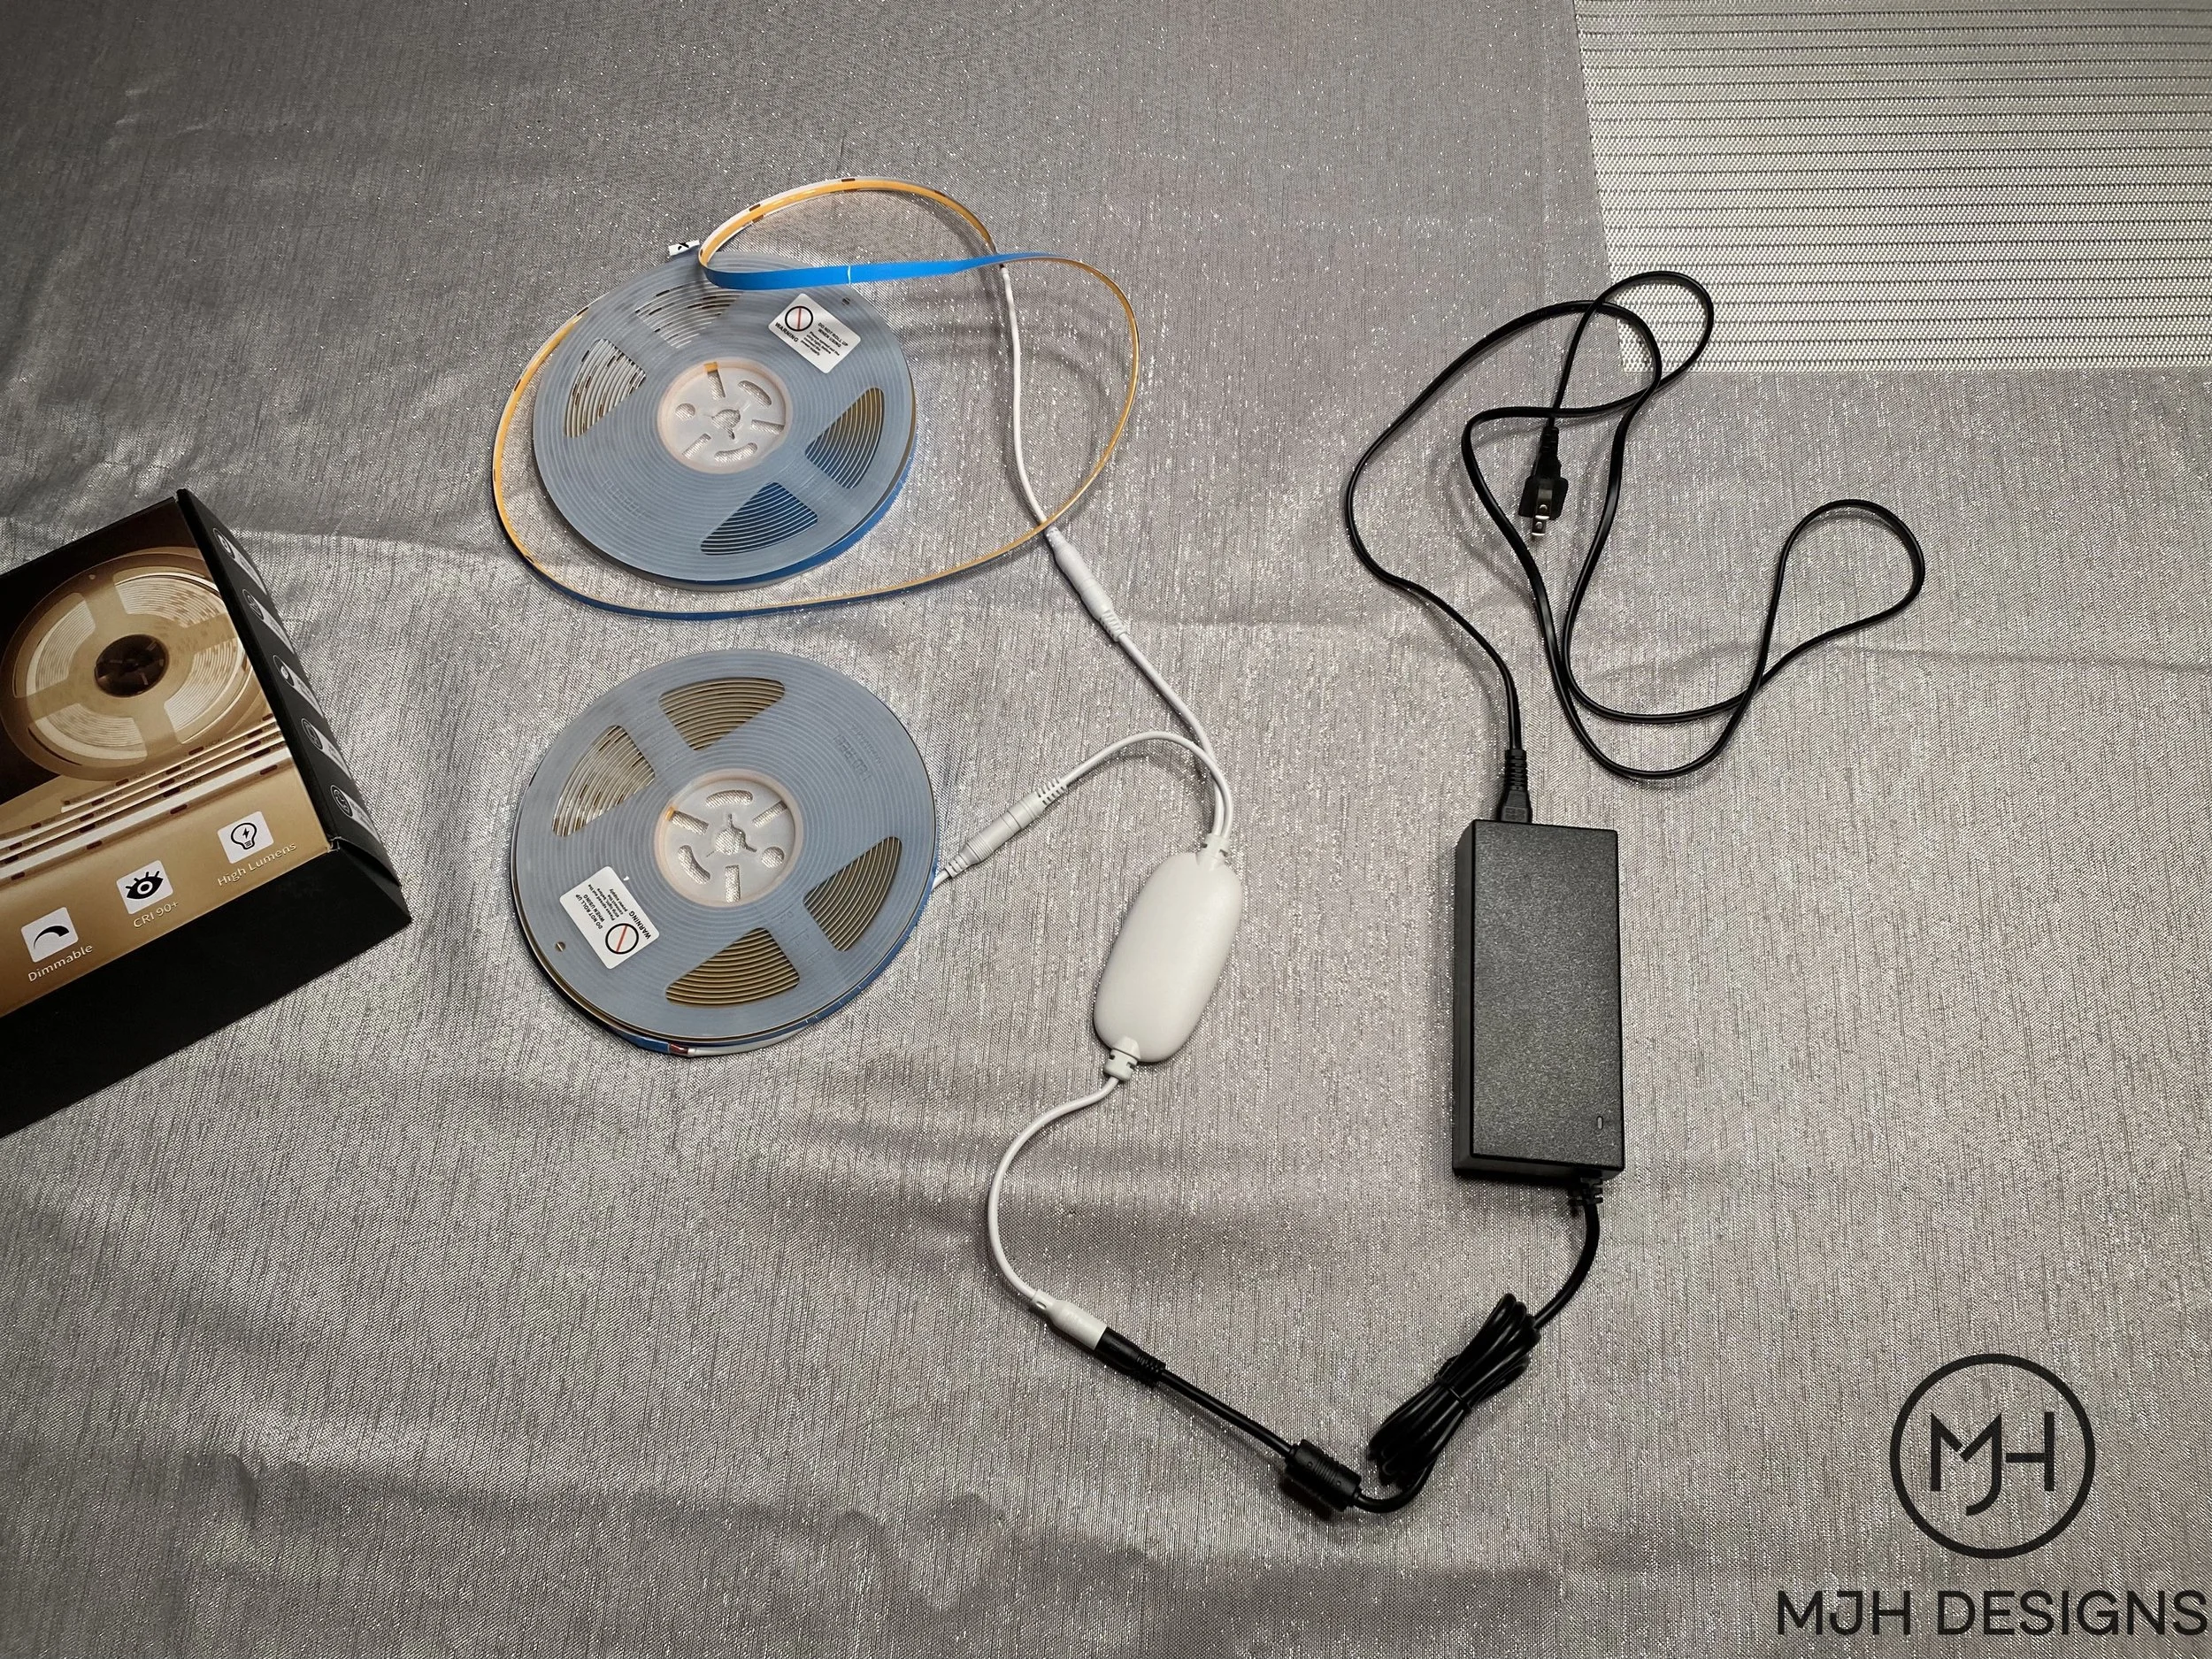
I wanted to give each flag a backlit glow so I used remote controlled LED strips.
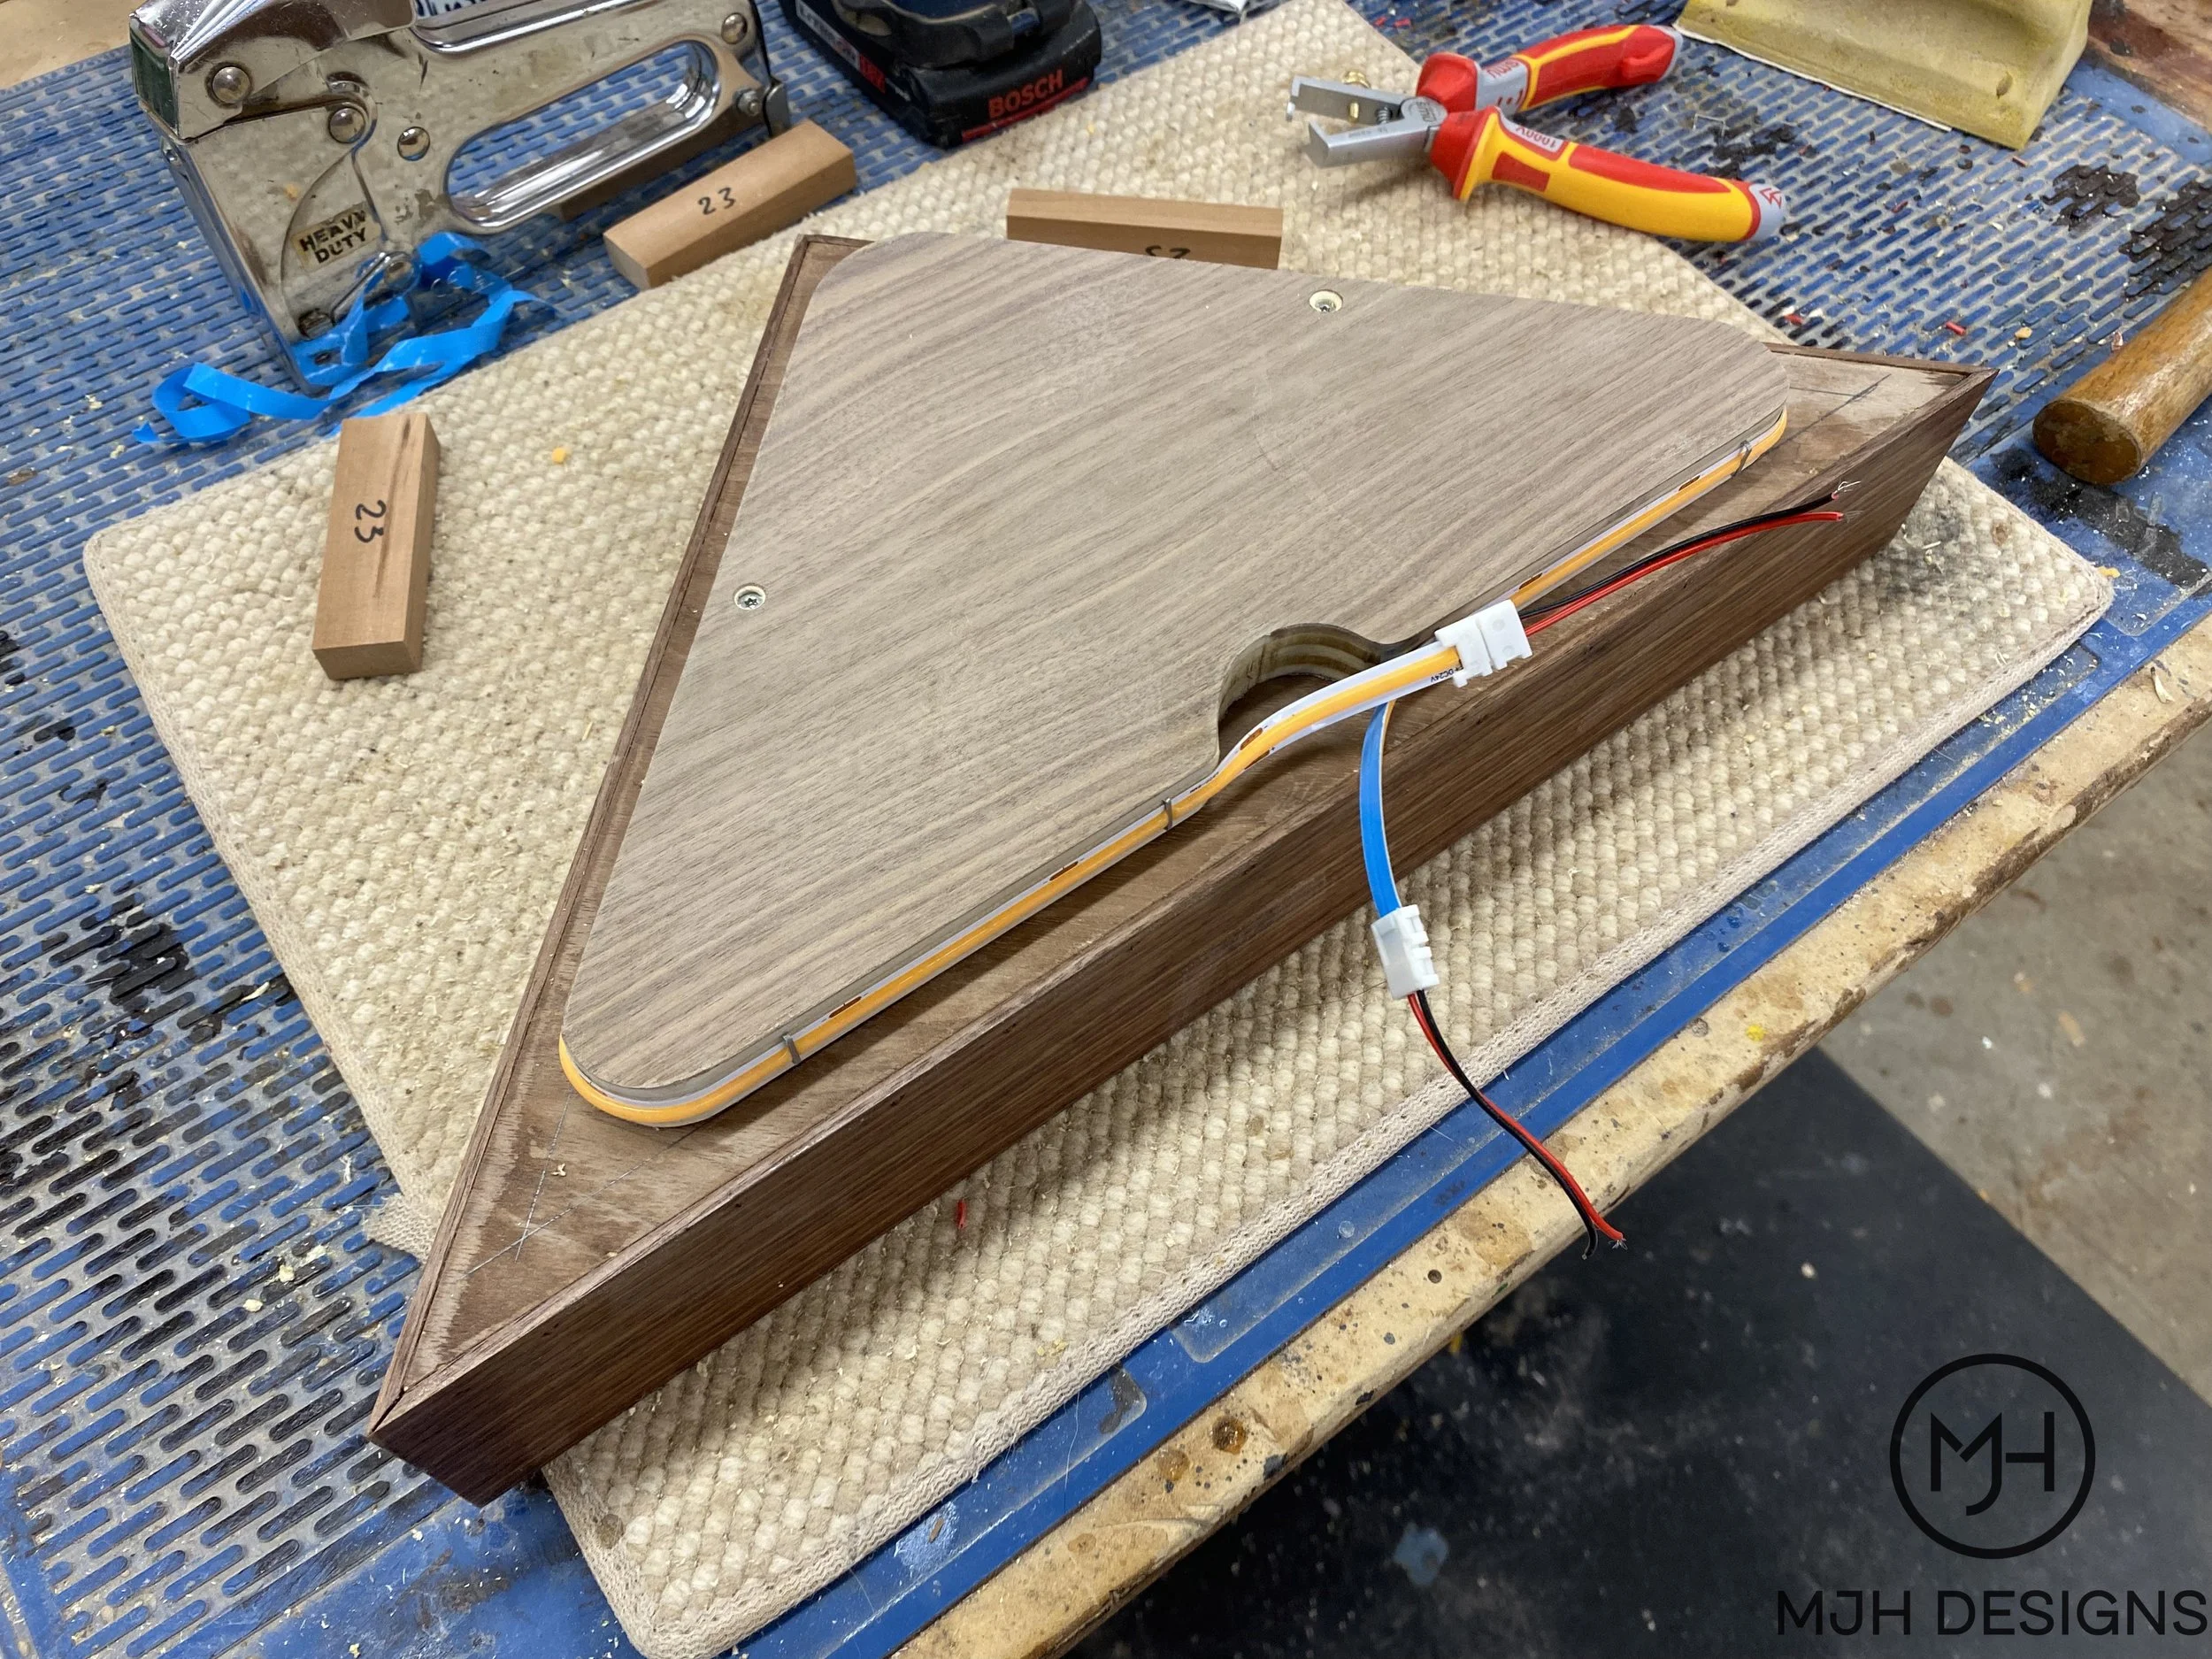
Another set of plywood triangles was cut, sized 1'“ smaller than the flag holders and with rounded corners to avoid damaging the LEDs.

Carefully placed staples in addition to the self-adhesive backing should keep the strips in place.
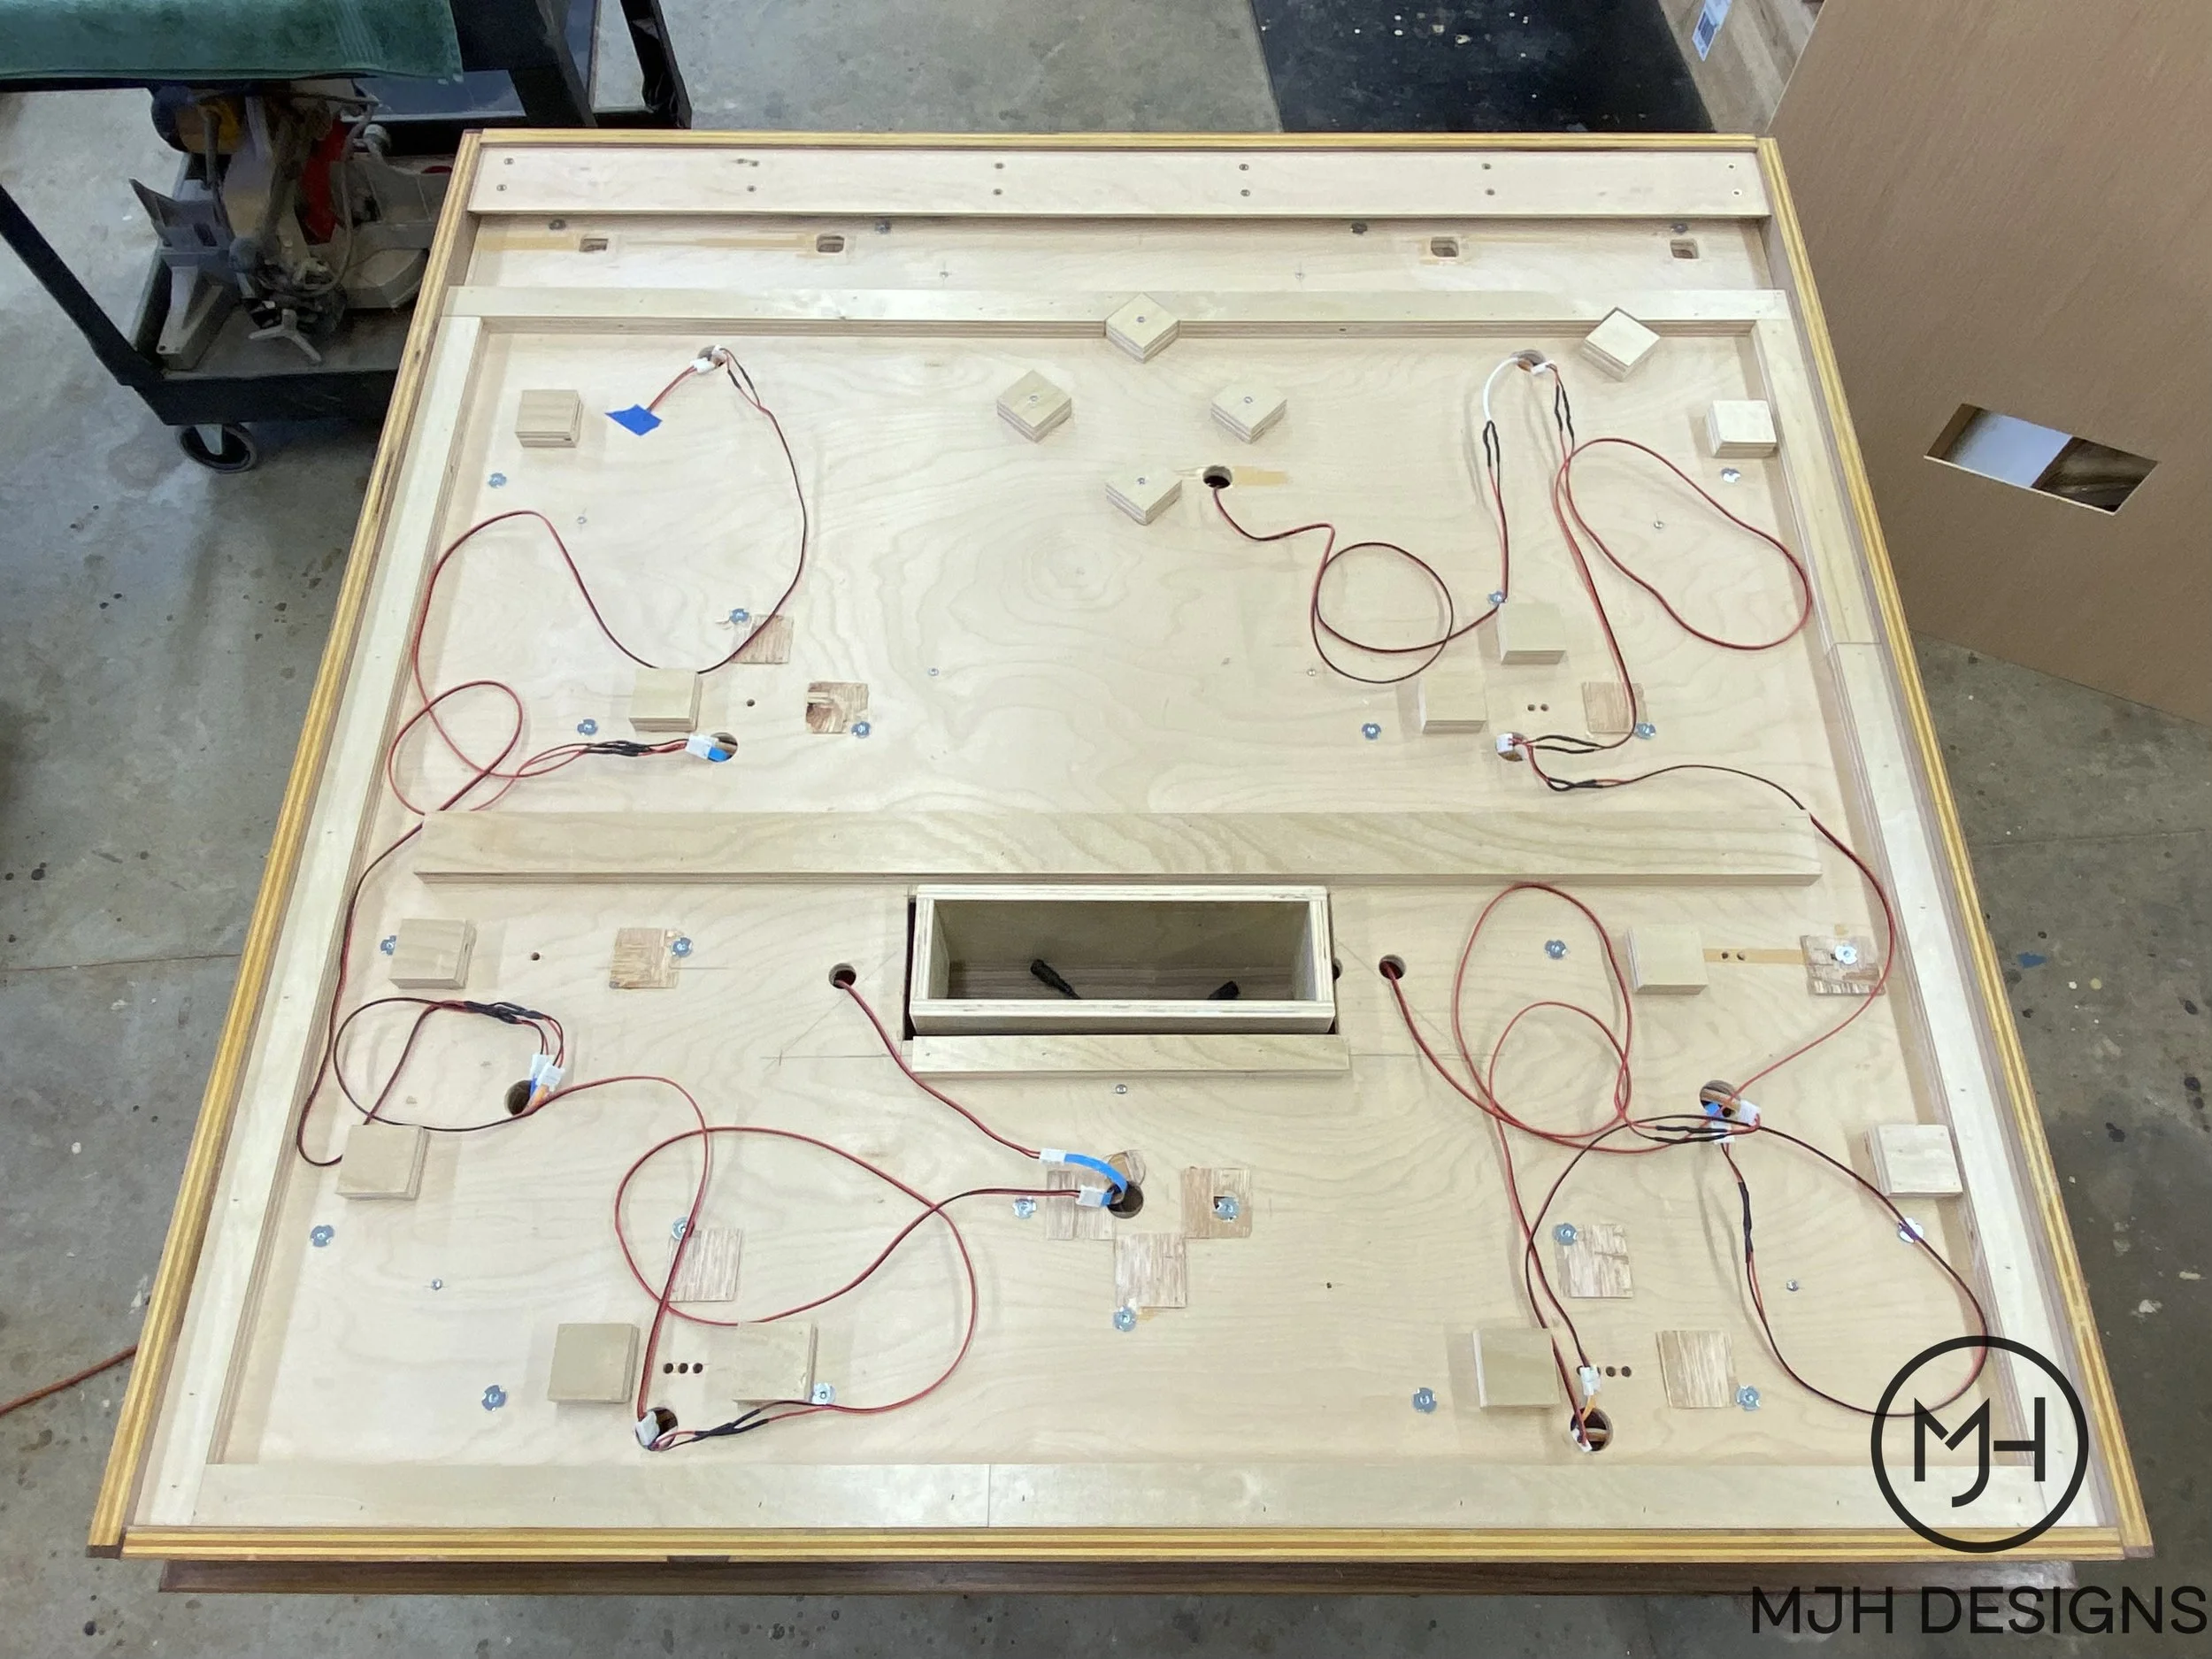
Rear view with the wiring in place. The rectangular opening is for the LED power supply.
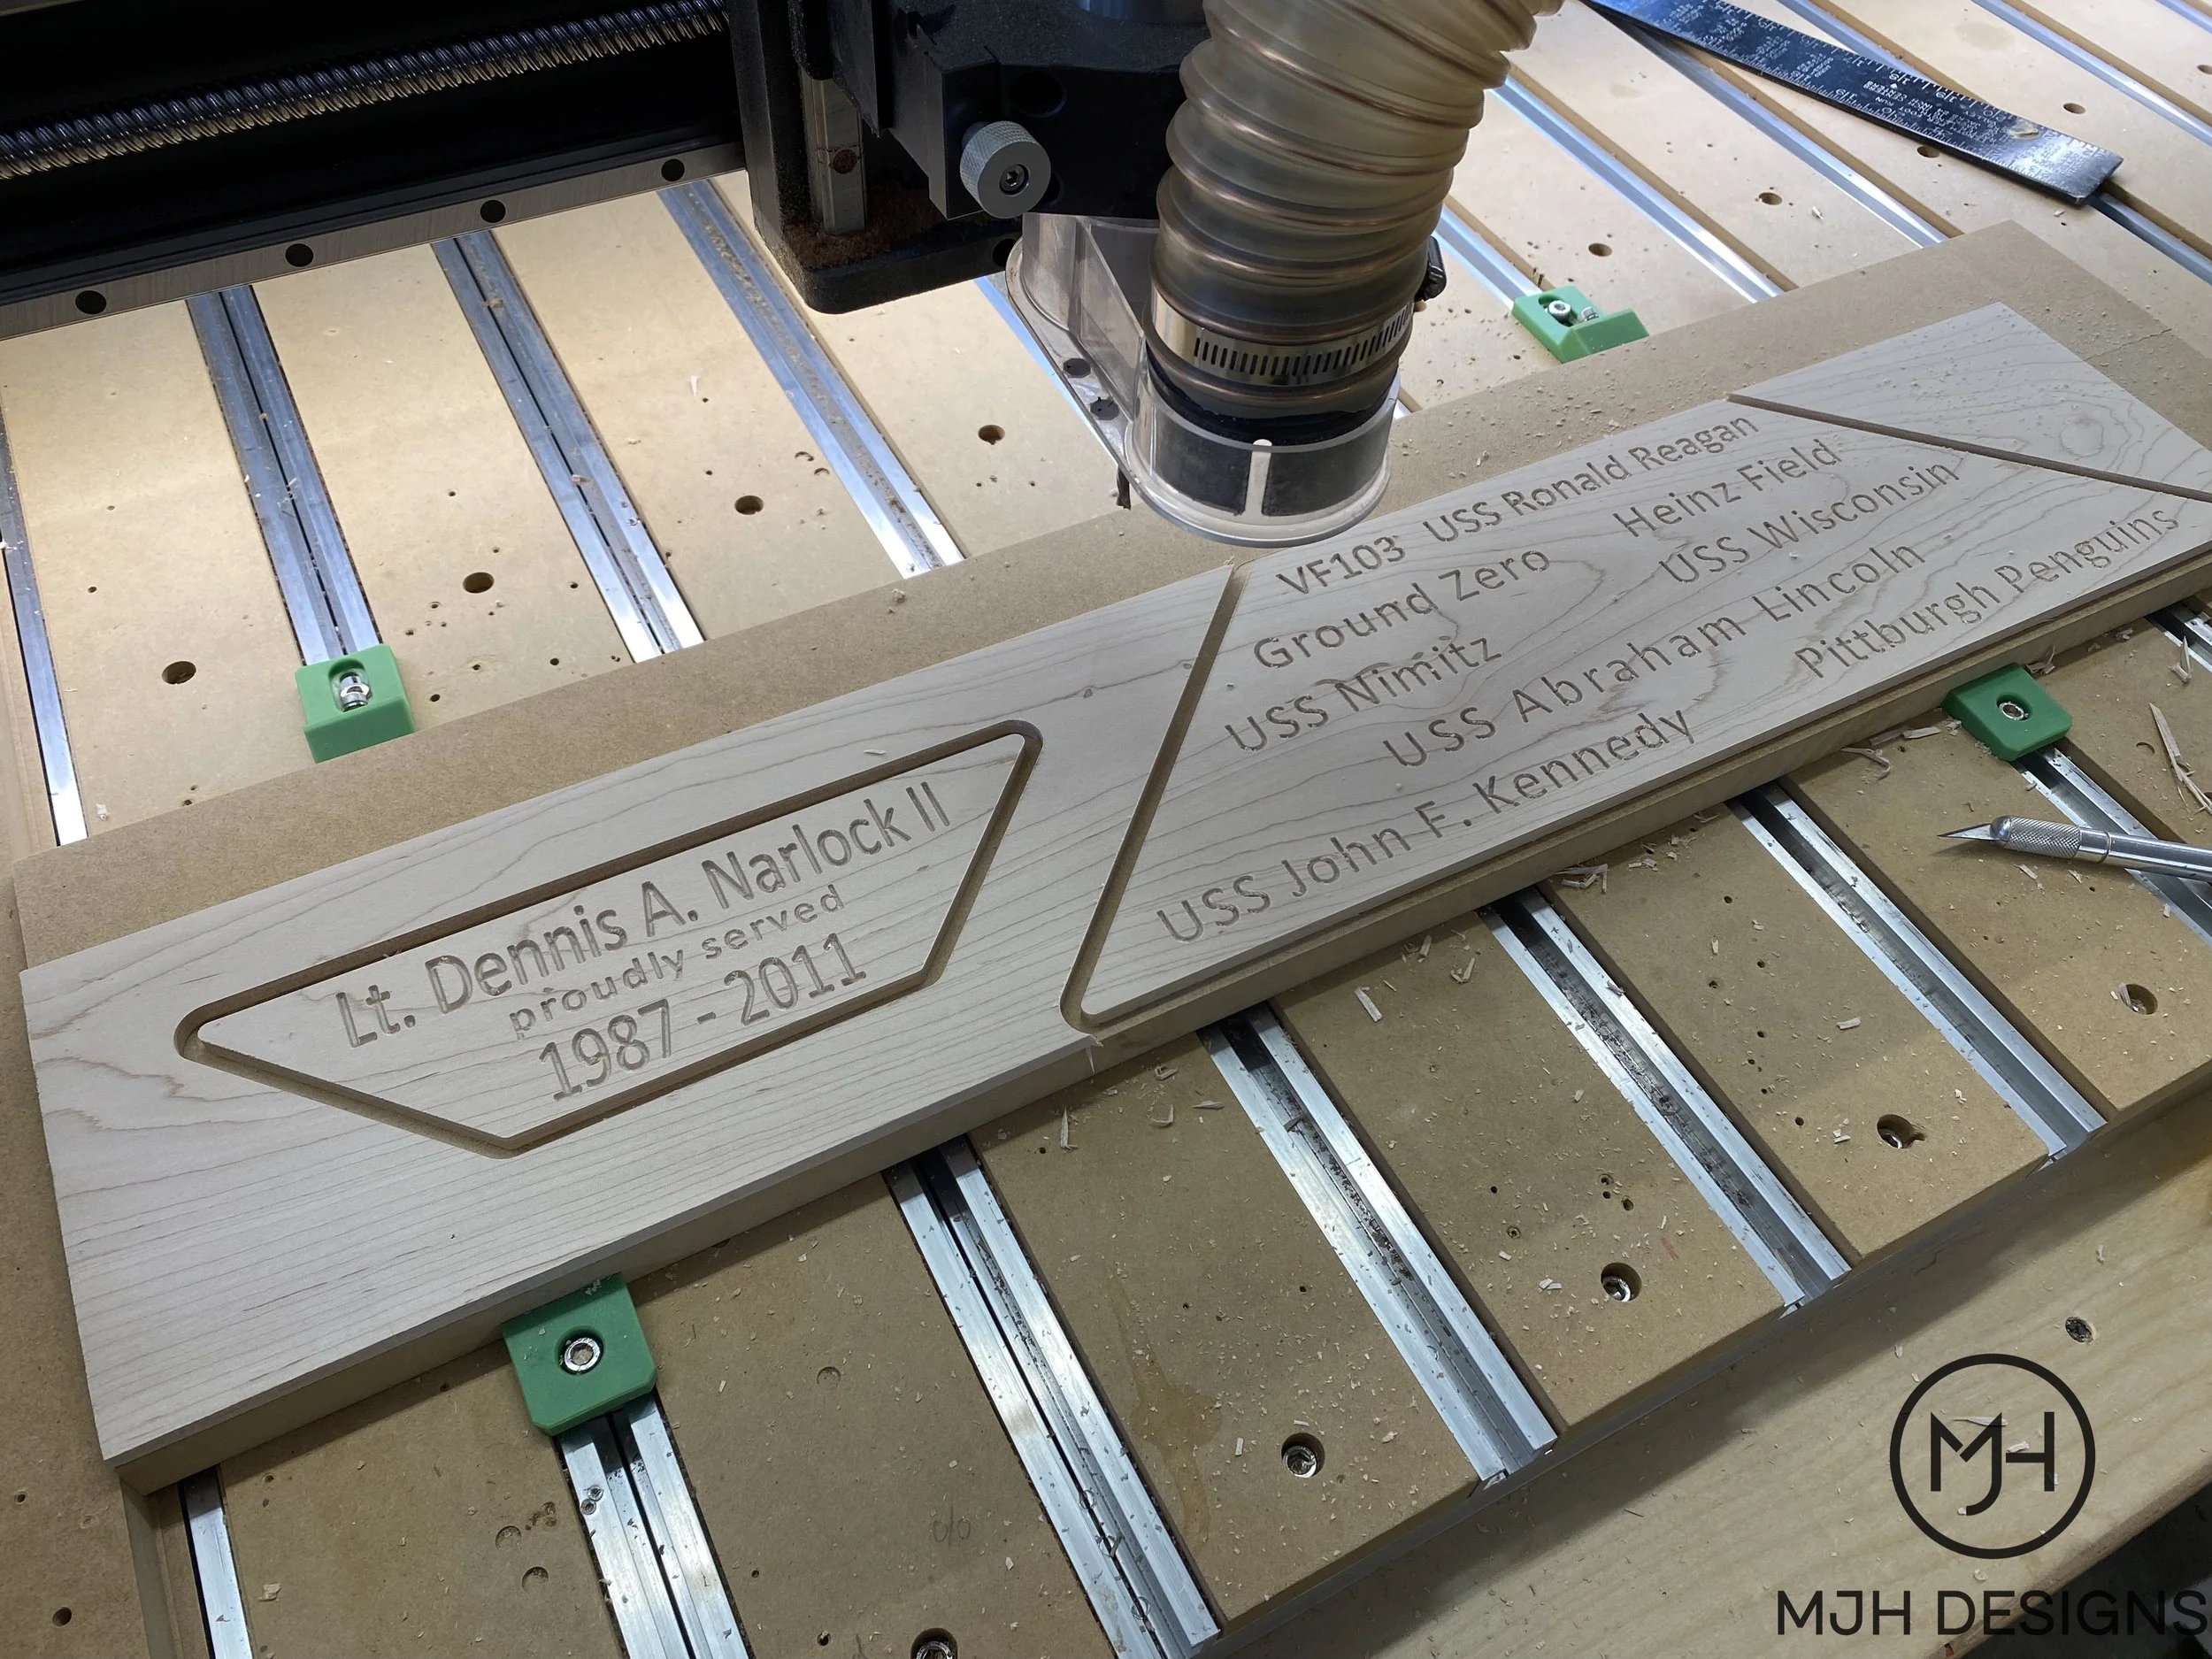
The name and location plaques were routed out of maple and a little hand fitting assured a tight fit in the front panel.
The back of the Navy emblem.
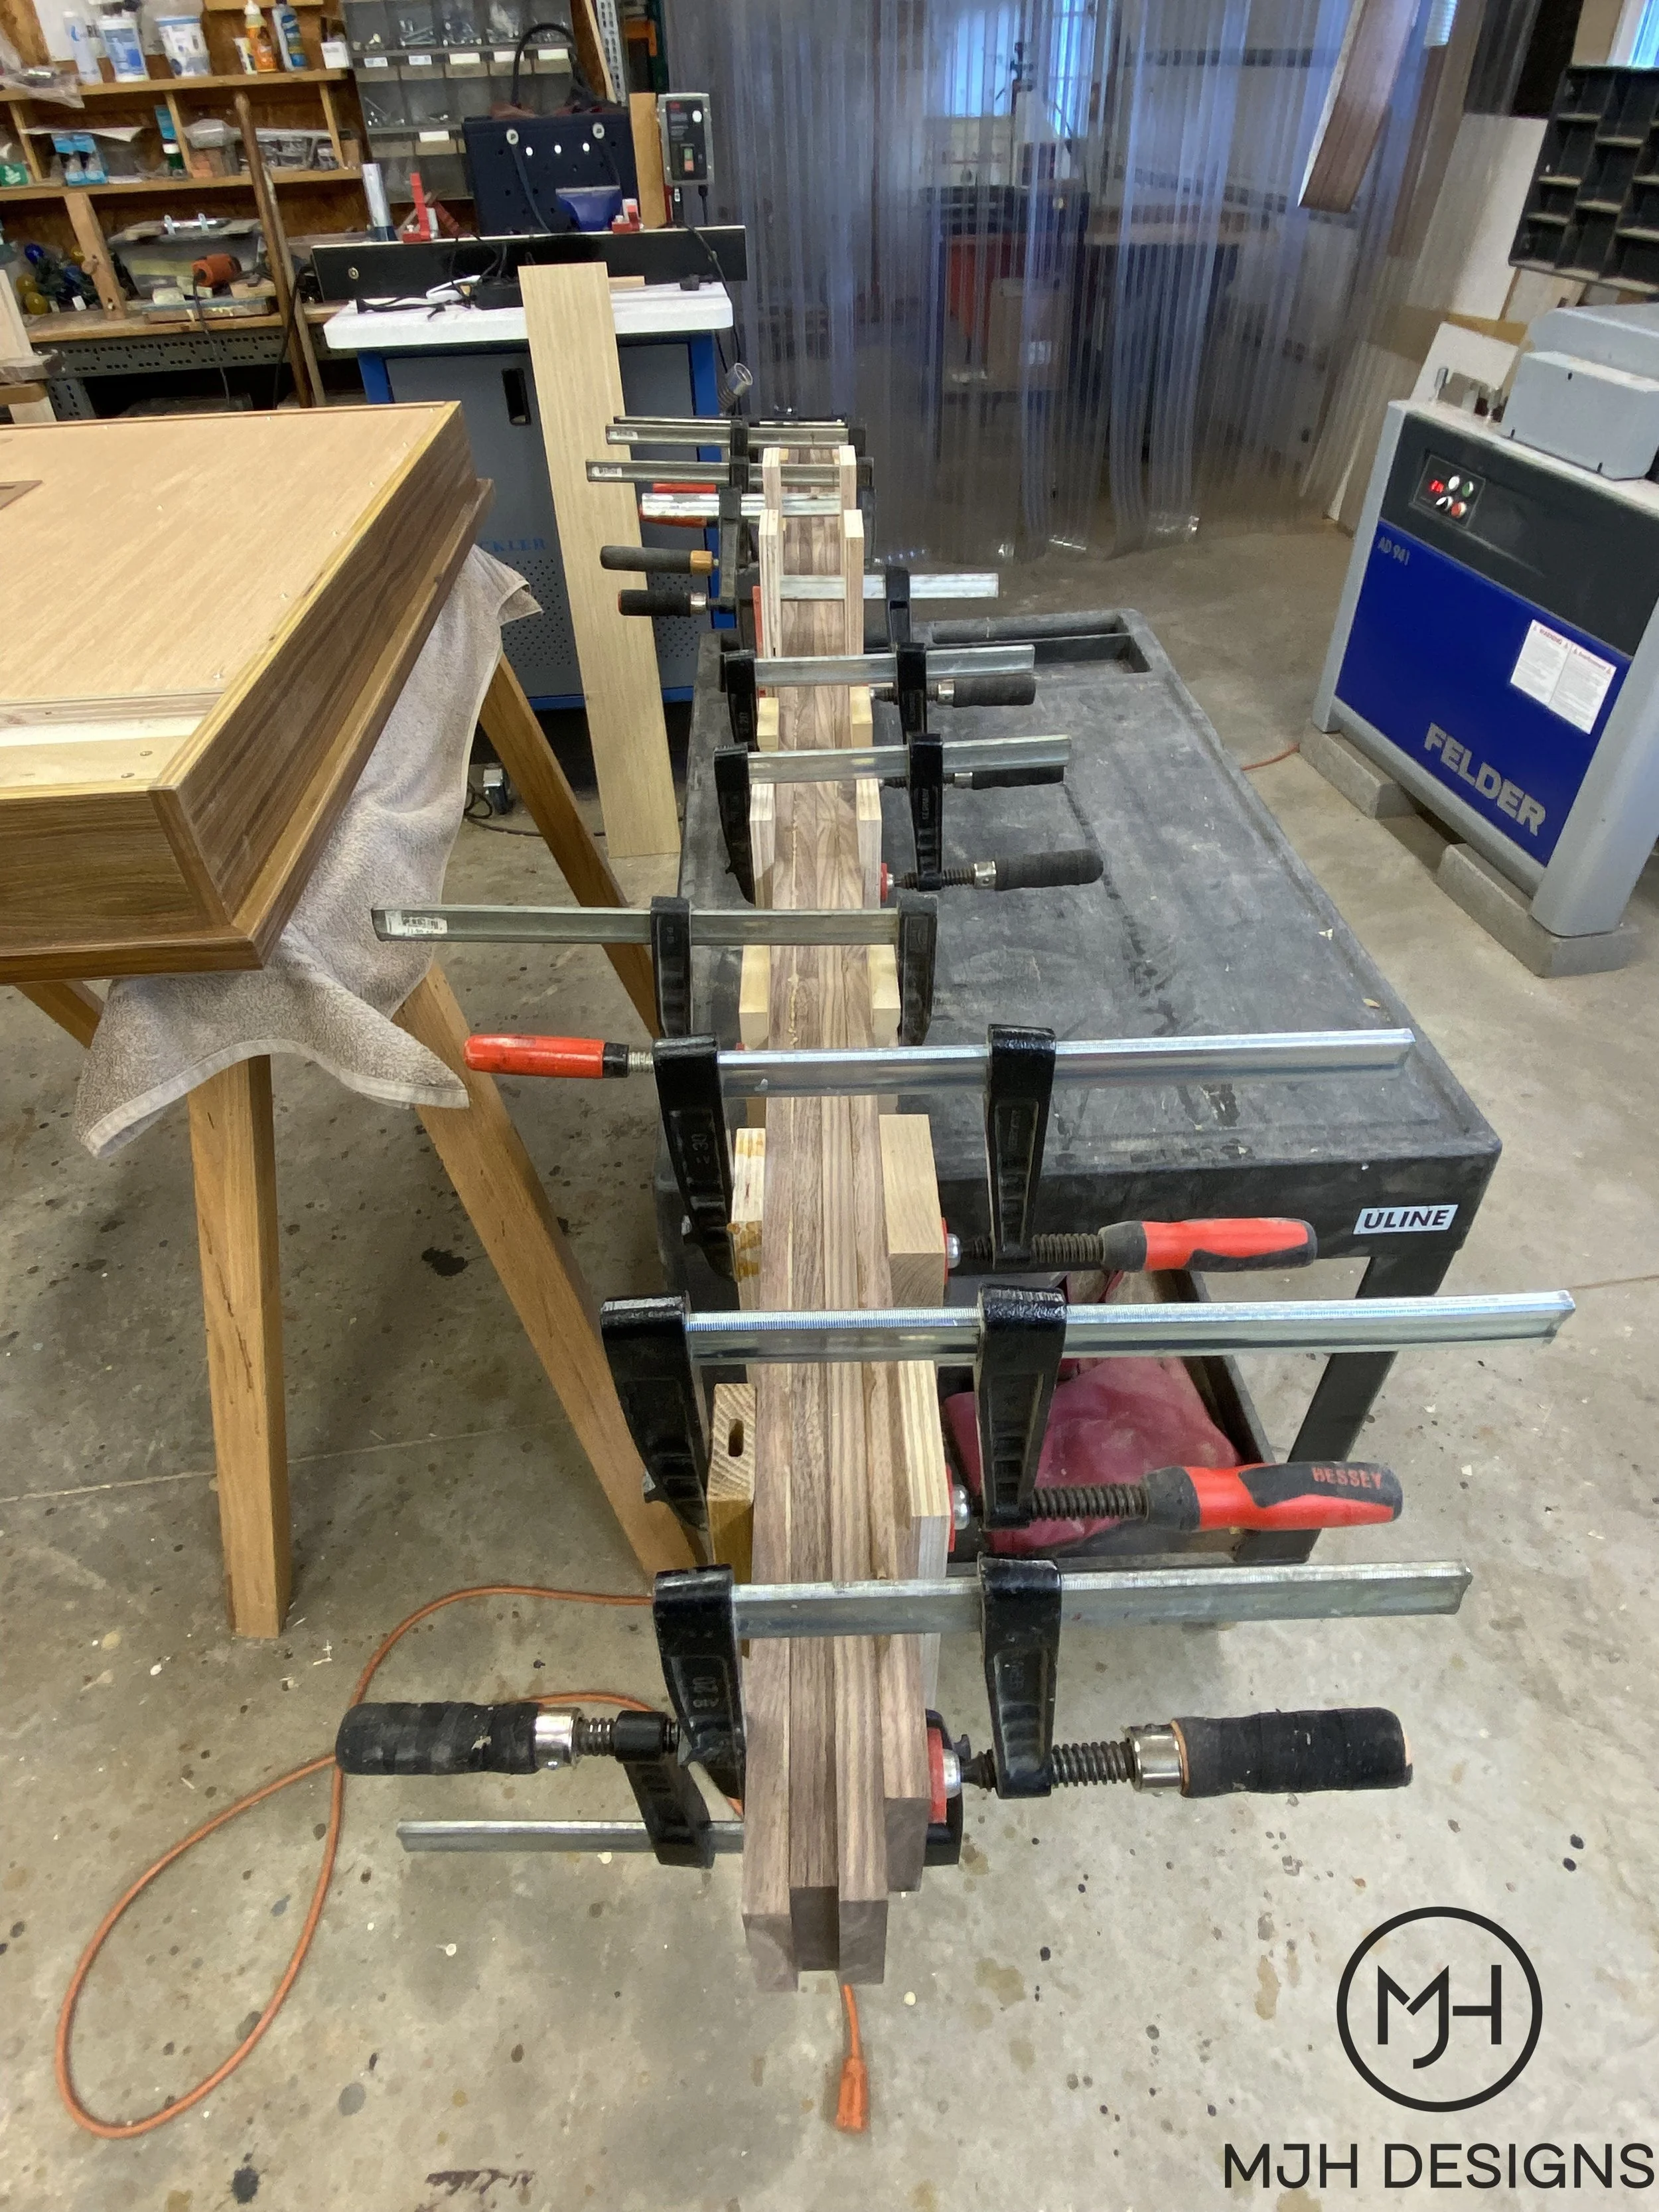
Walnut is glued up for the upright posts and cross braces.
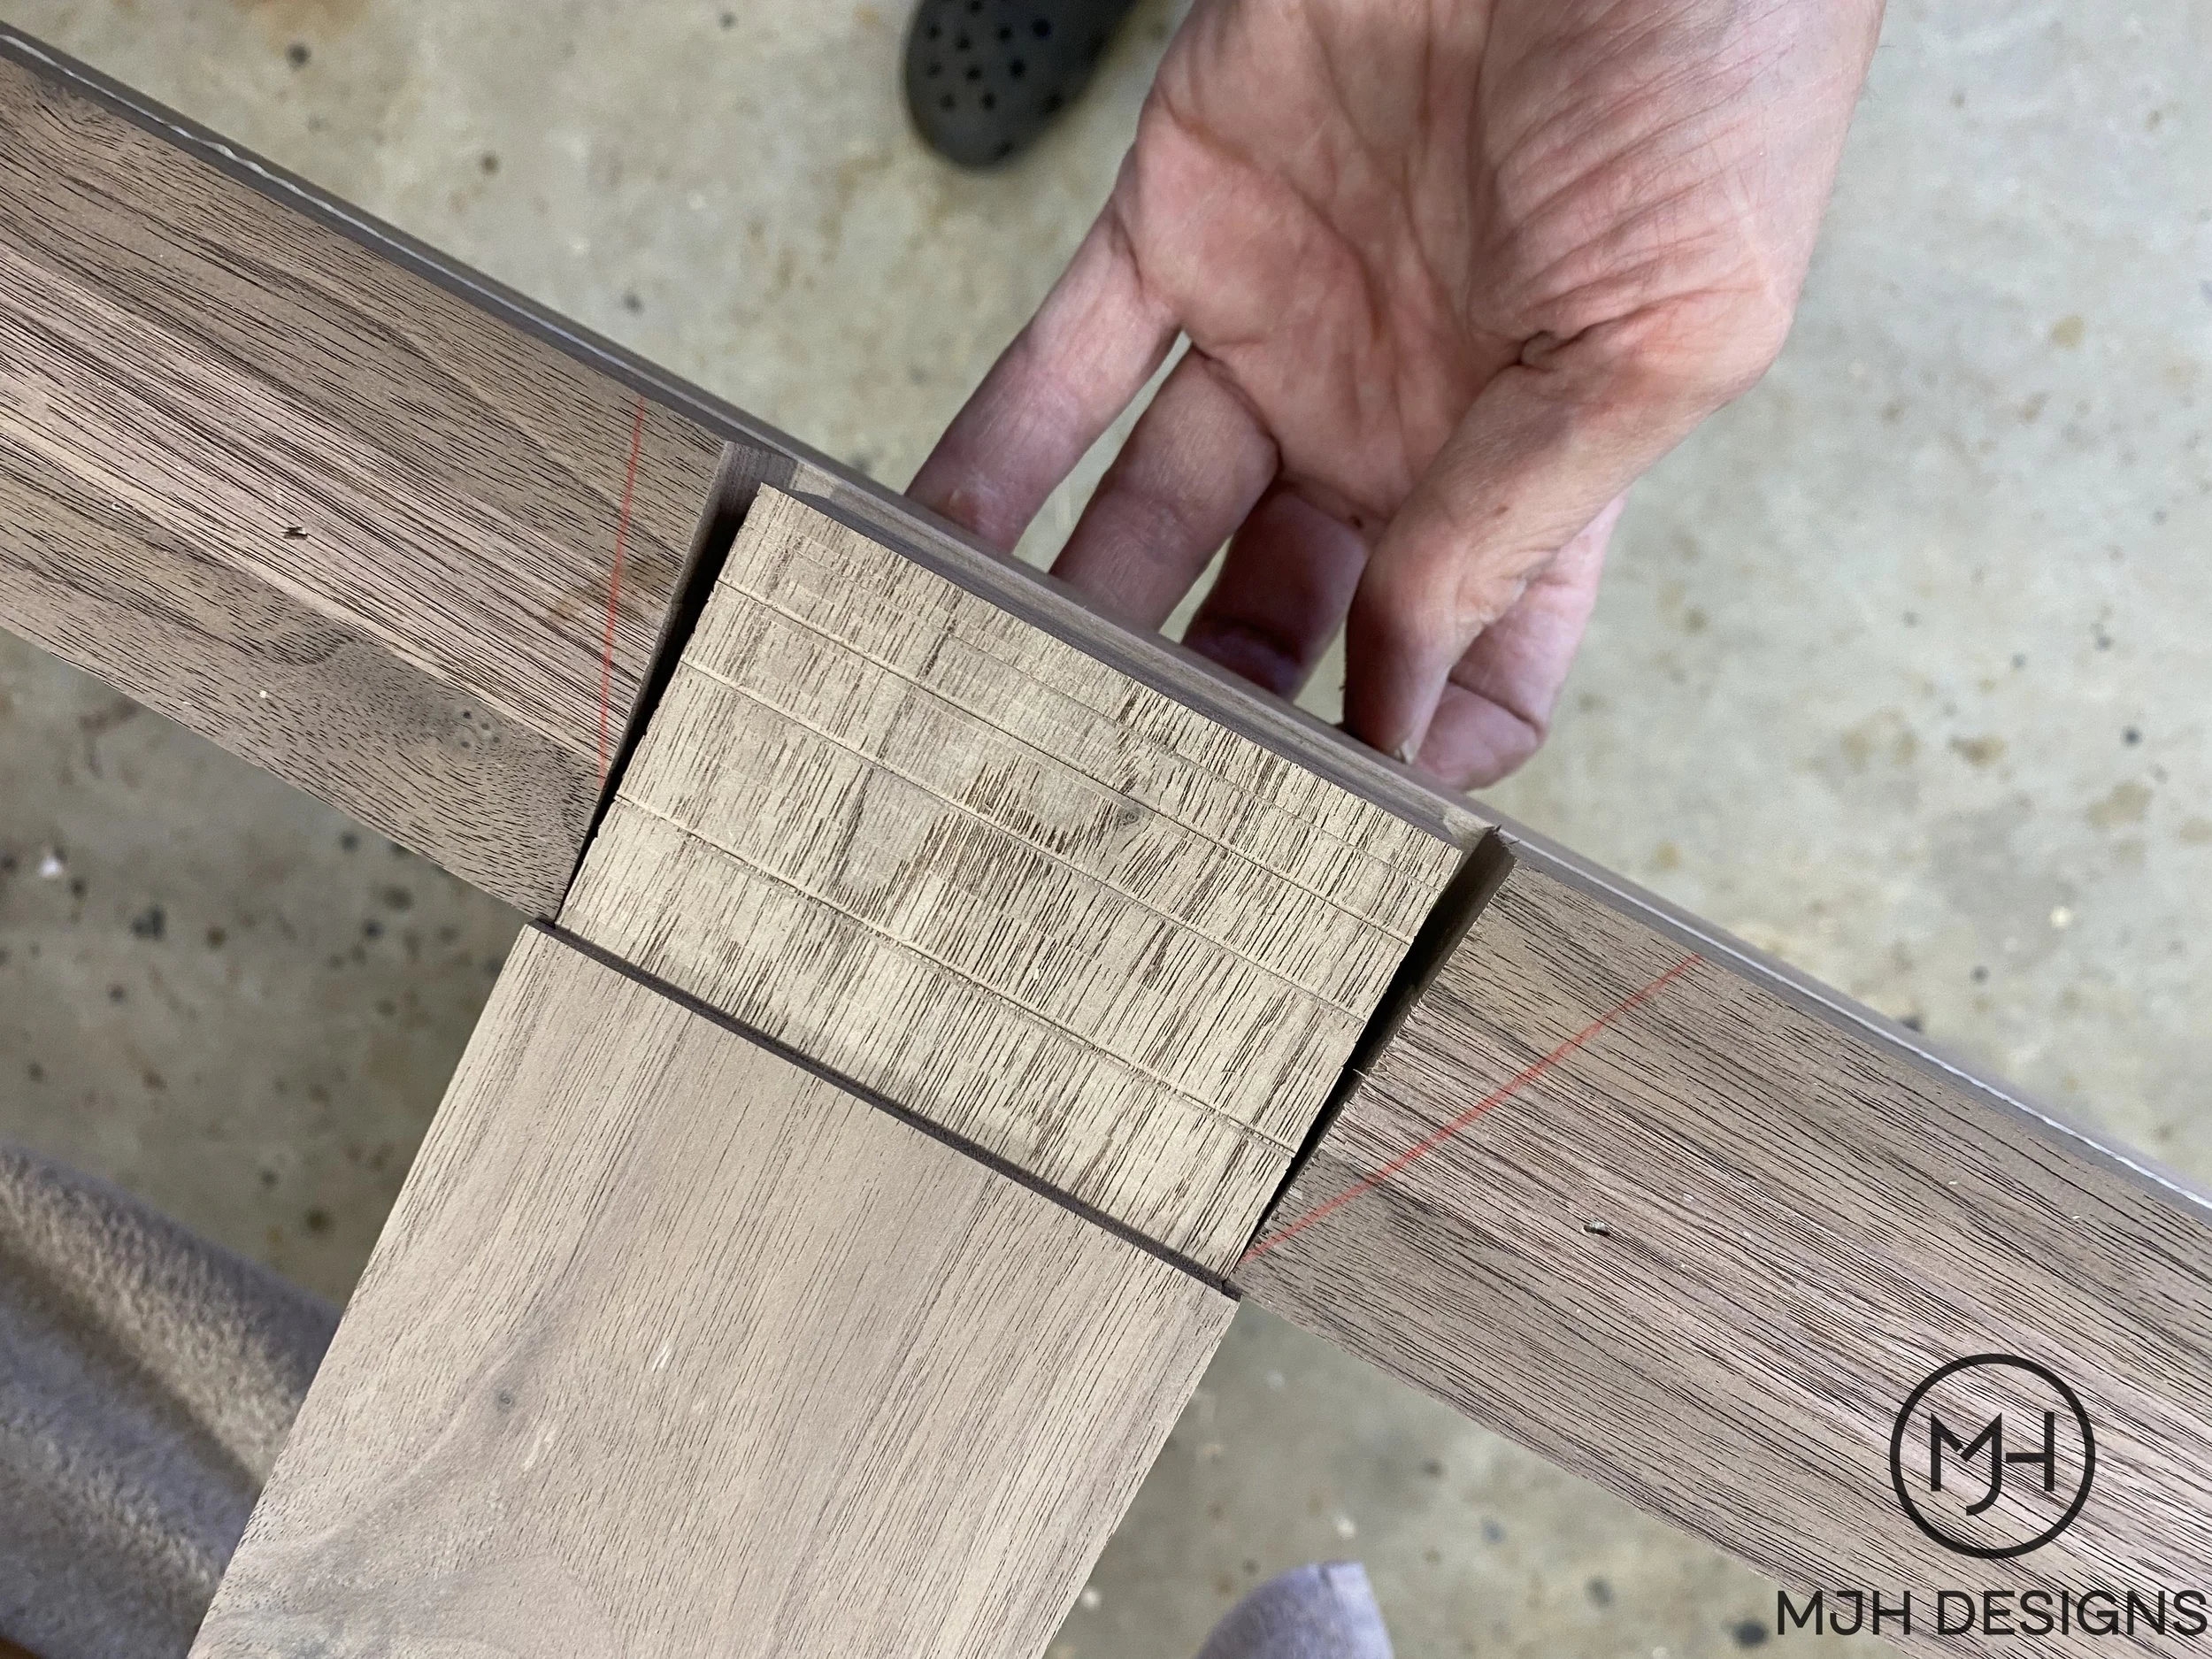
The post has a tenon sized to fit into a tapered mortise in the cross brace. Later wedges and glue will be used to lock the parts together for good.
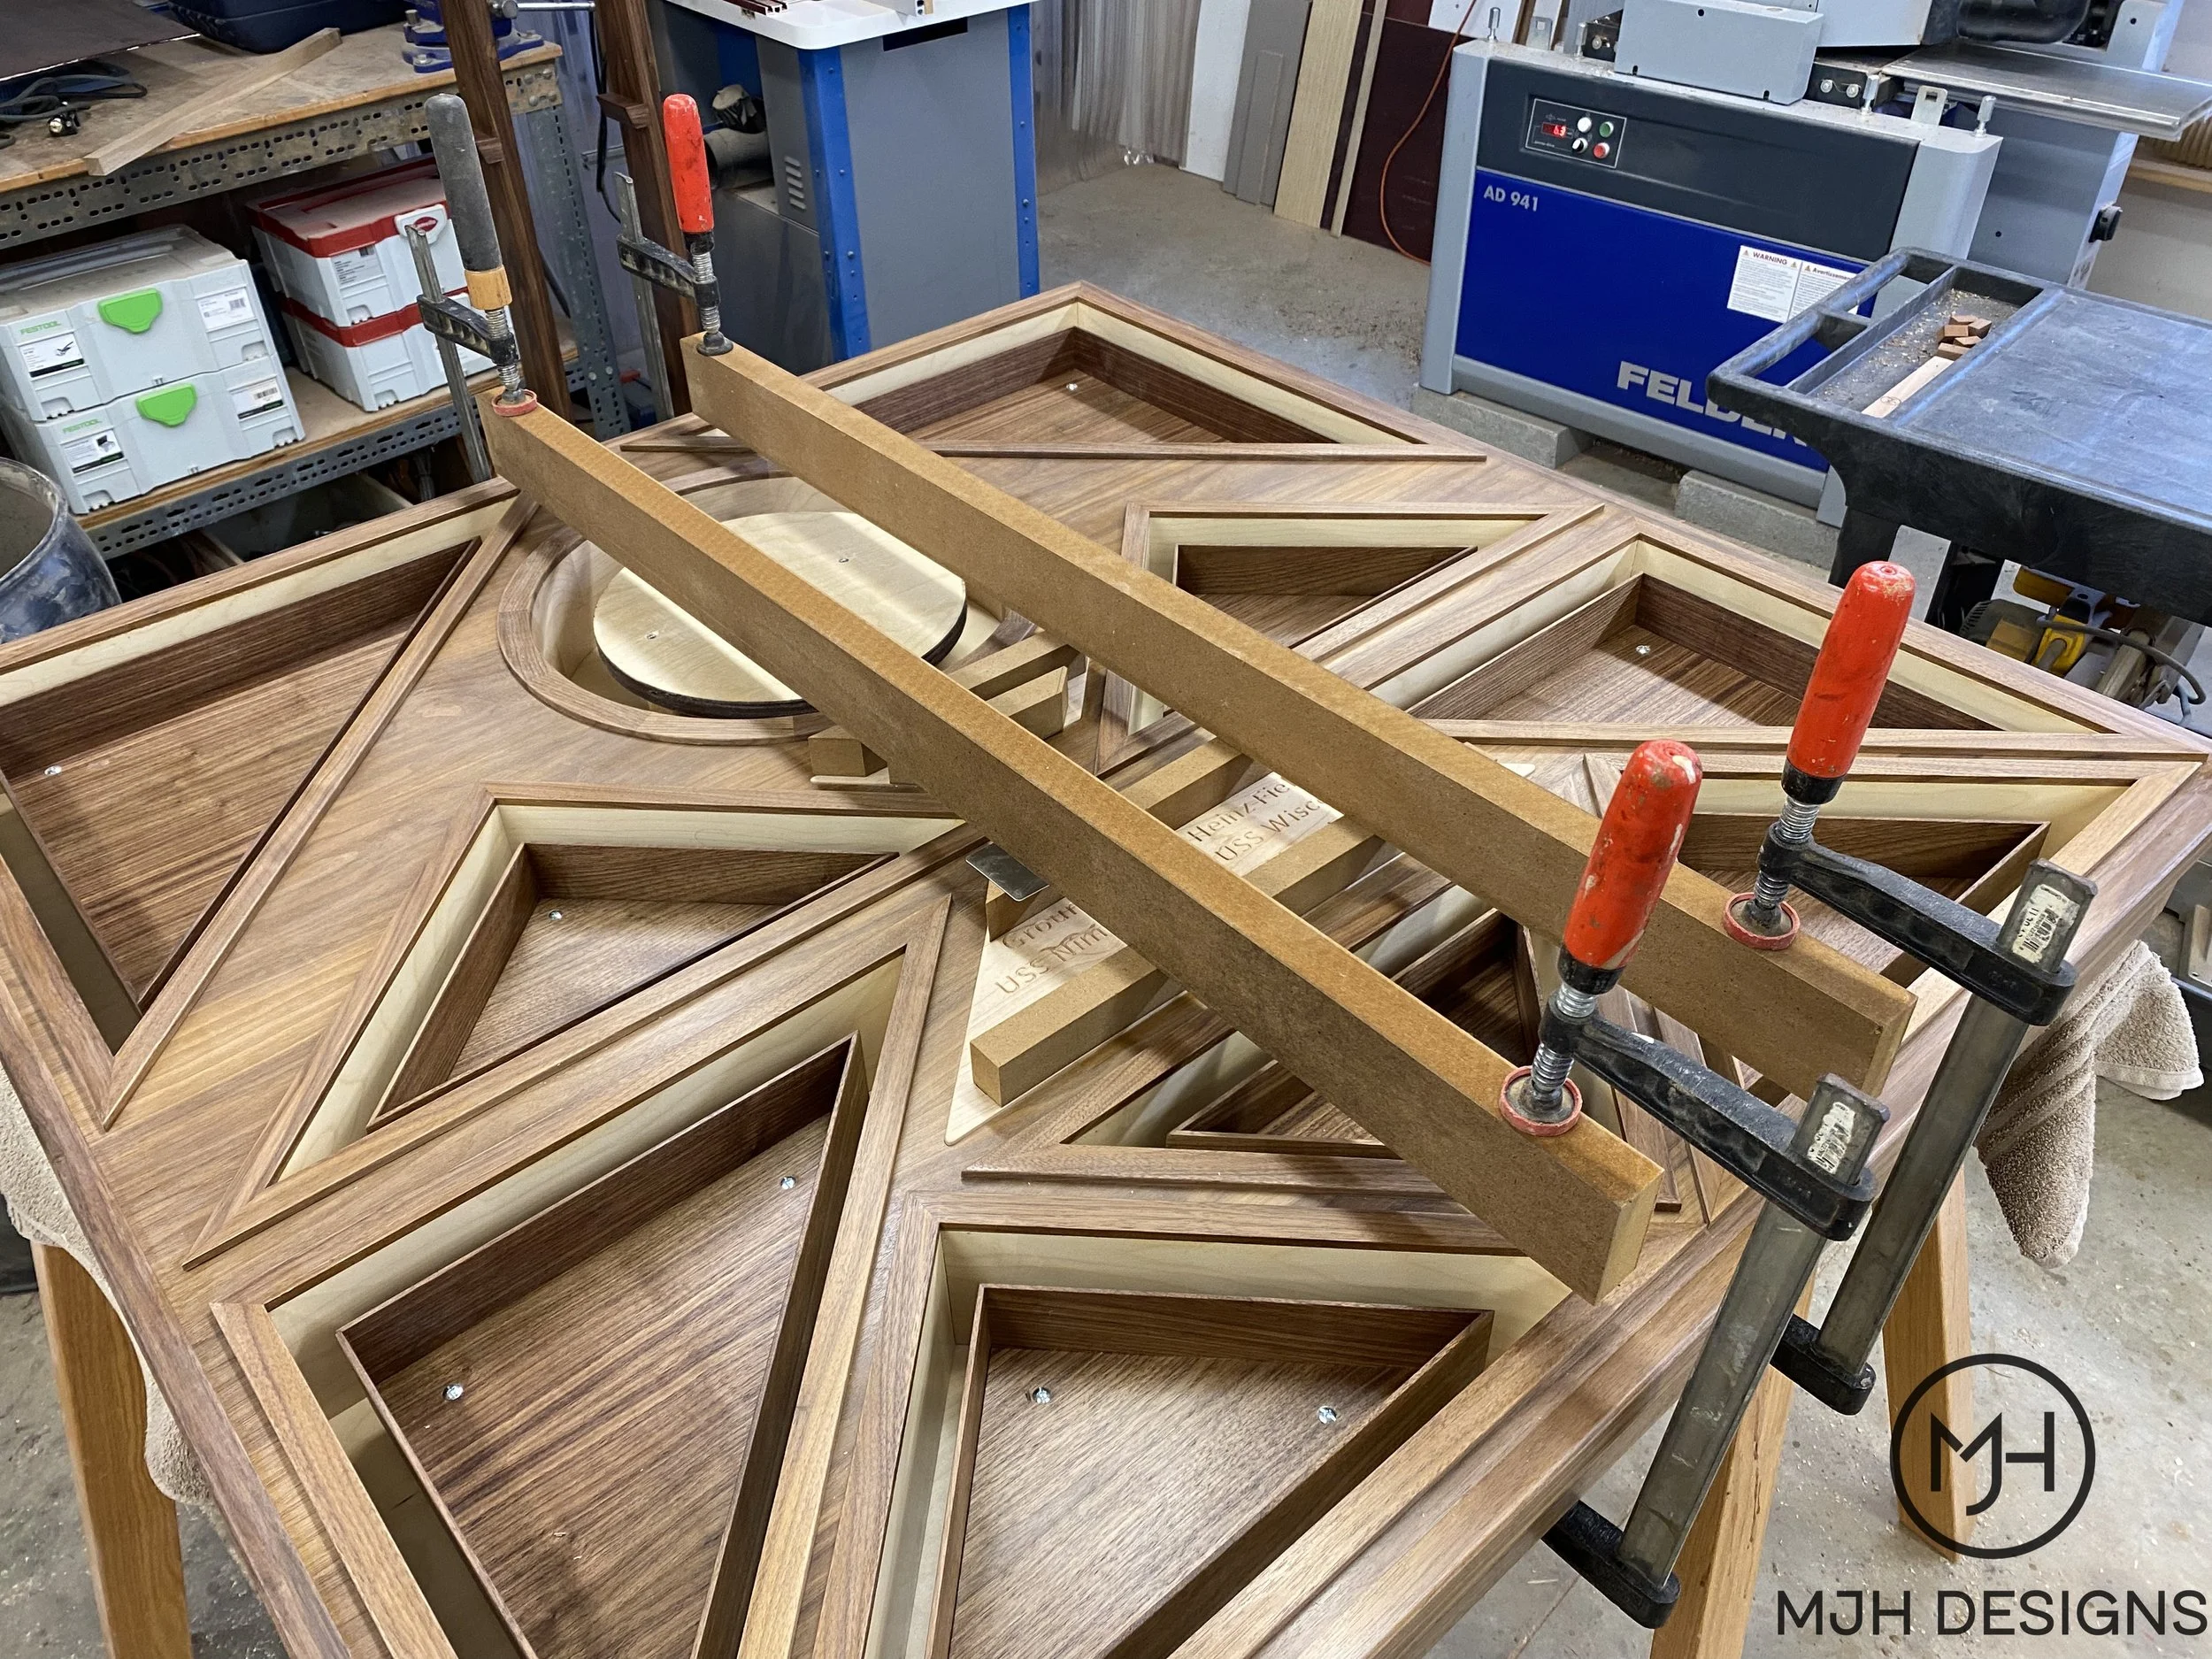
The plaques are glued onto the front panel and the display is ready.
And now - time for some beauty shots!
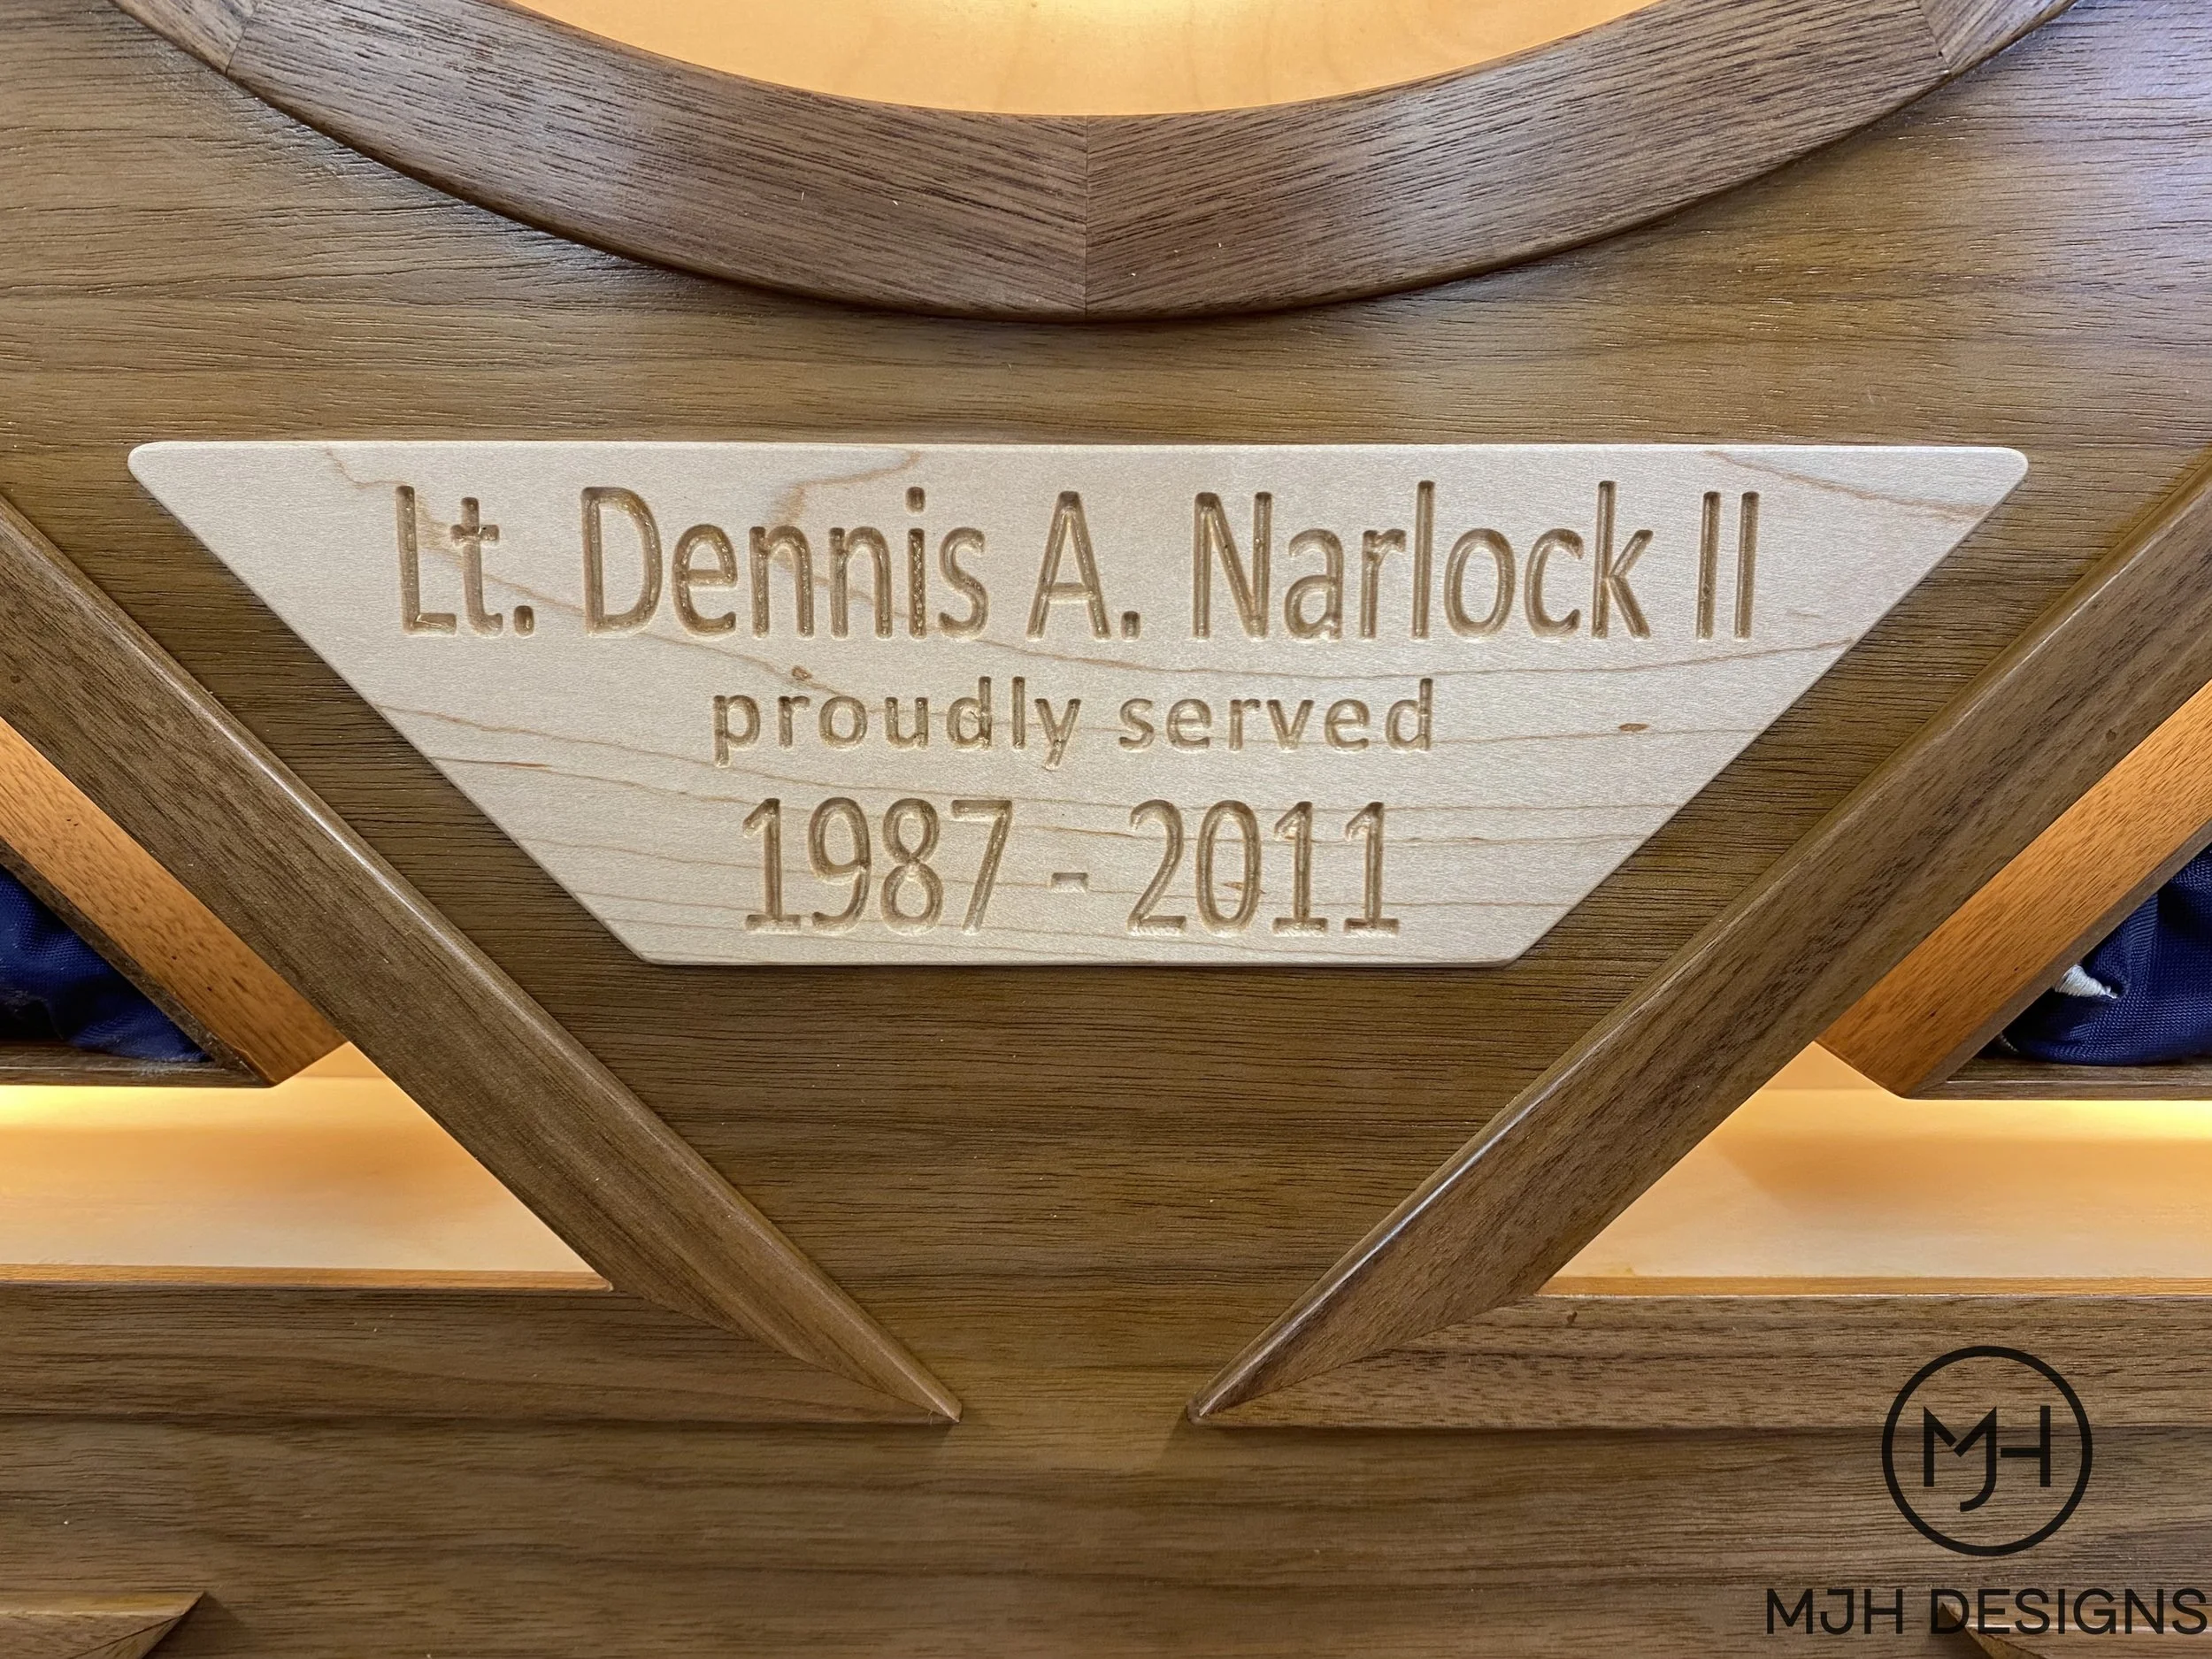
The name plaque.
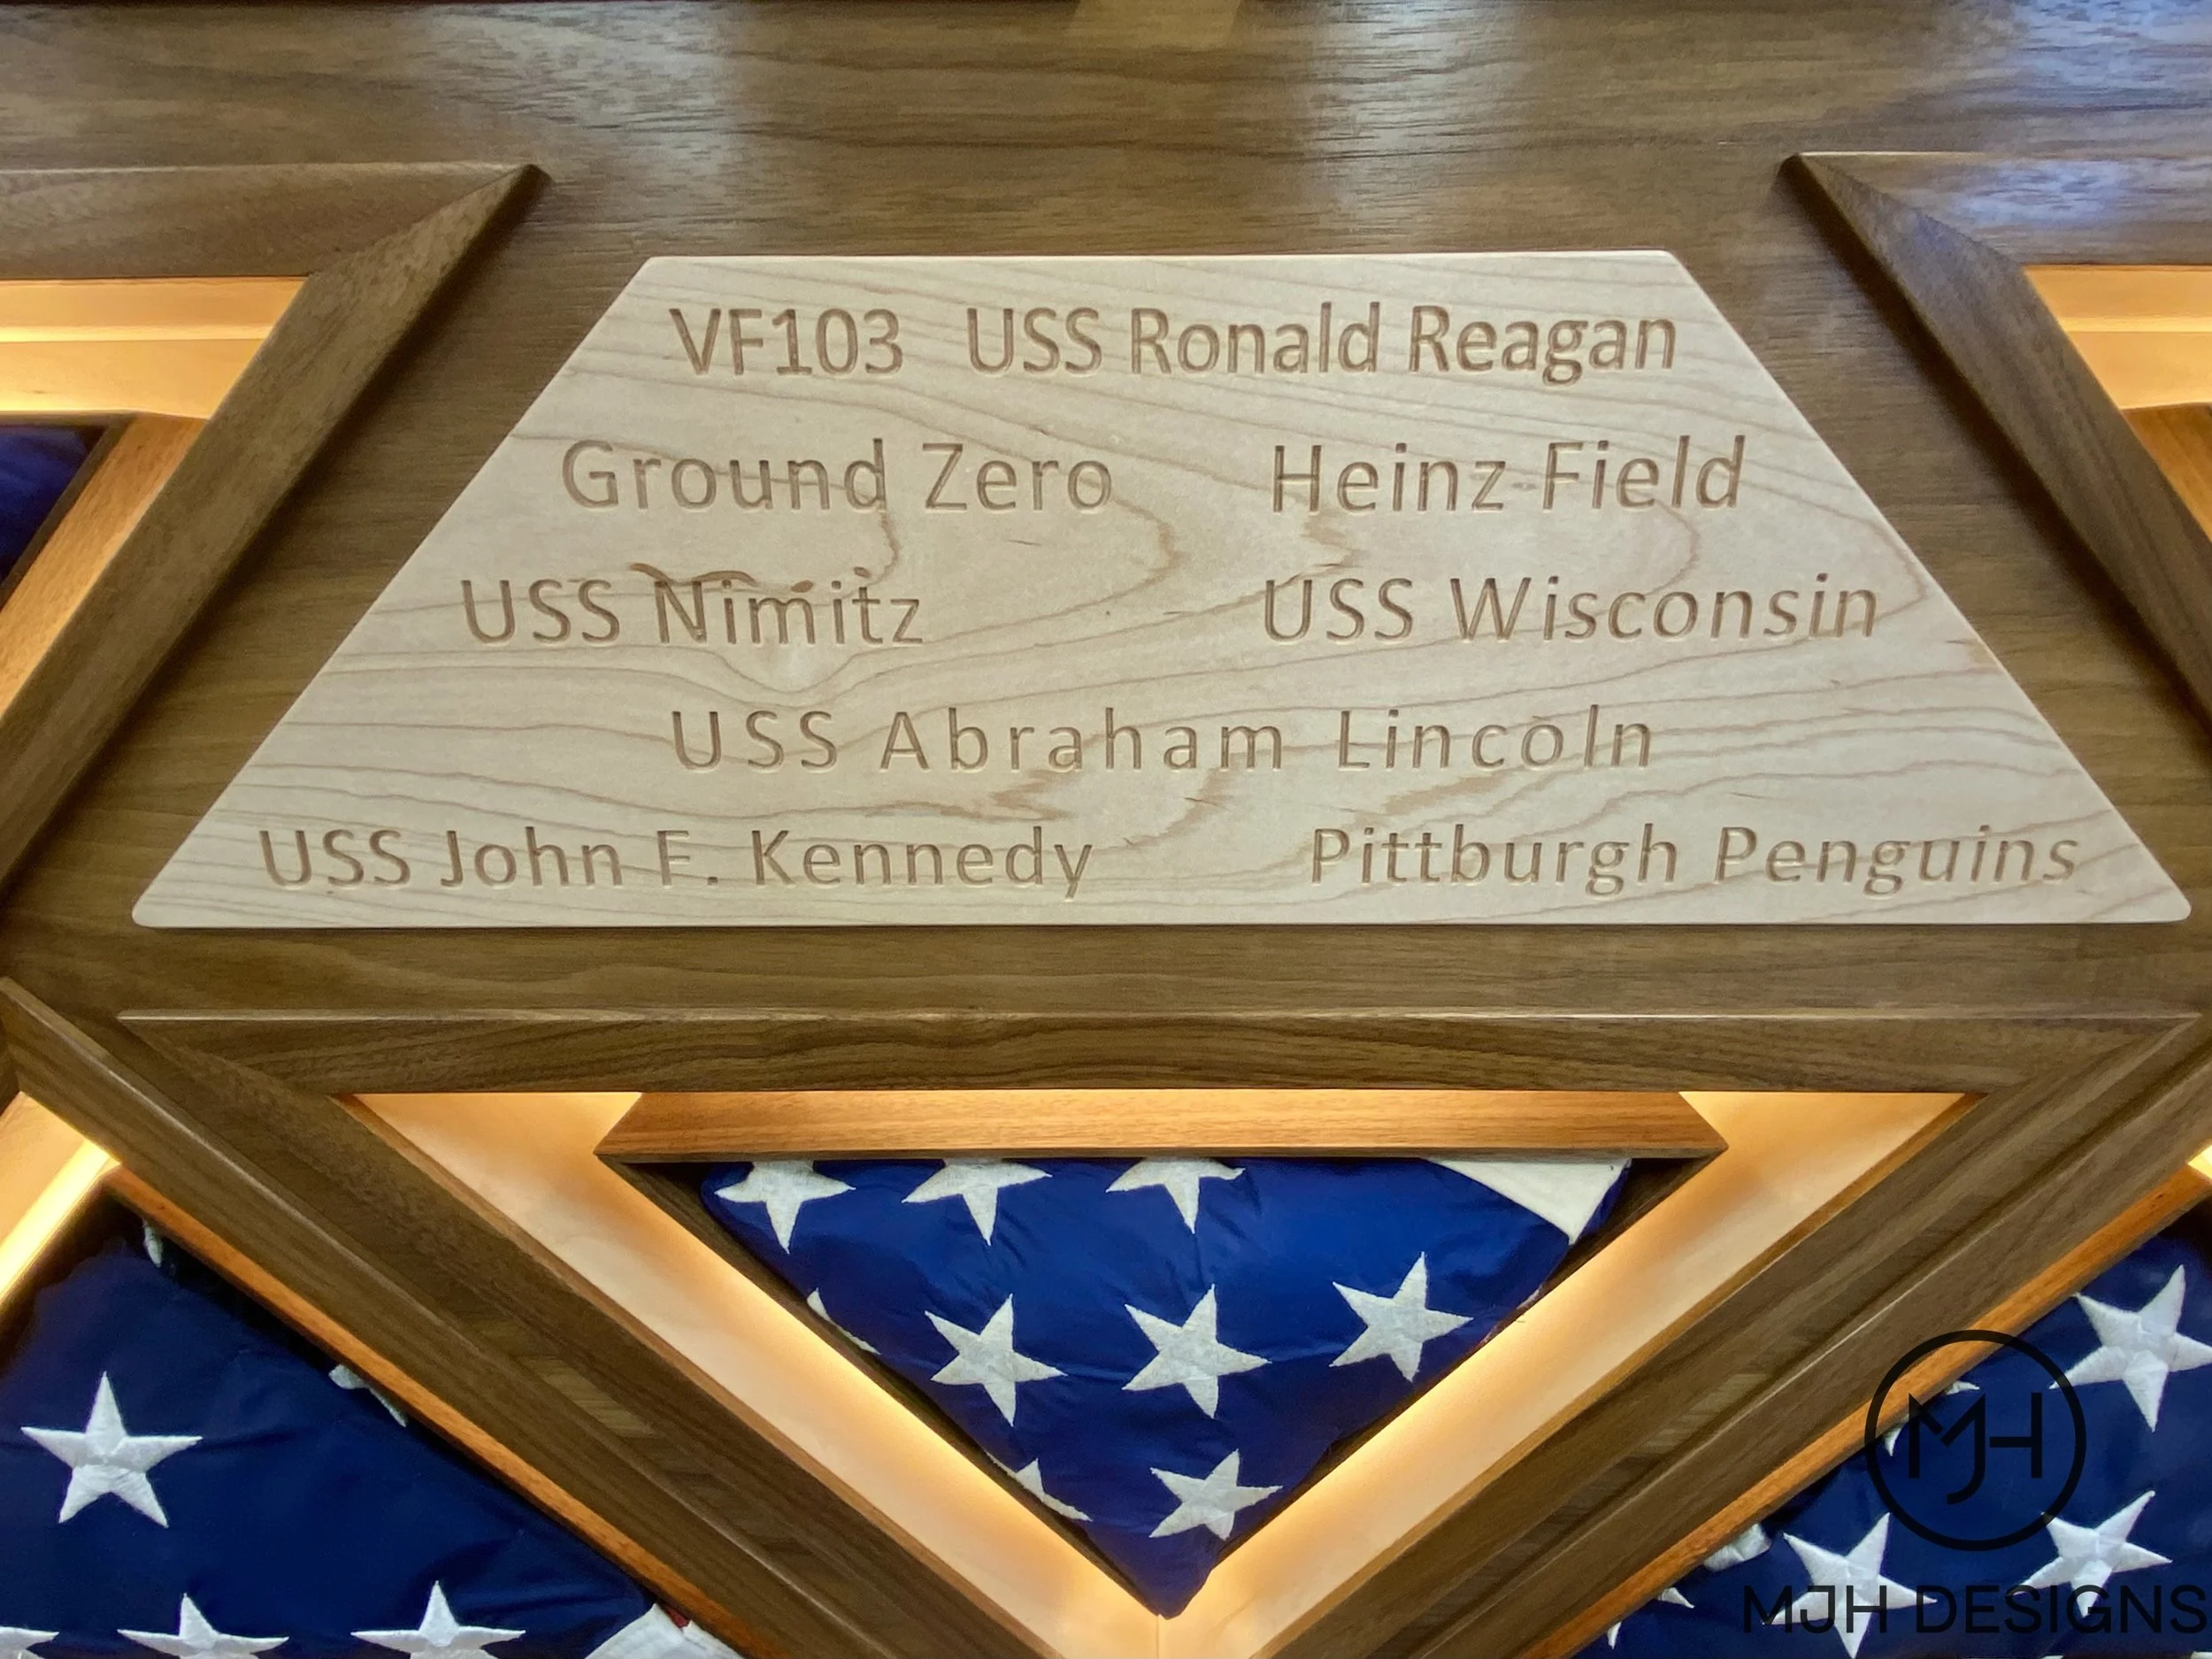
The location plaque.
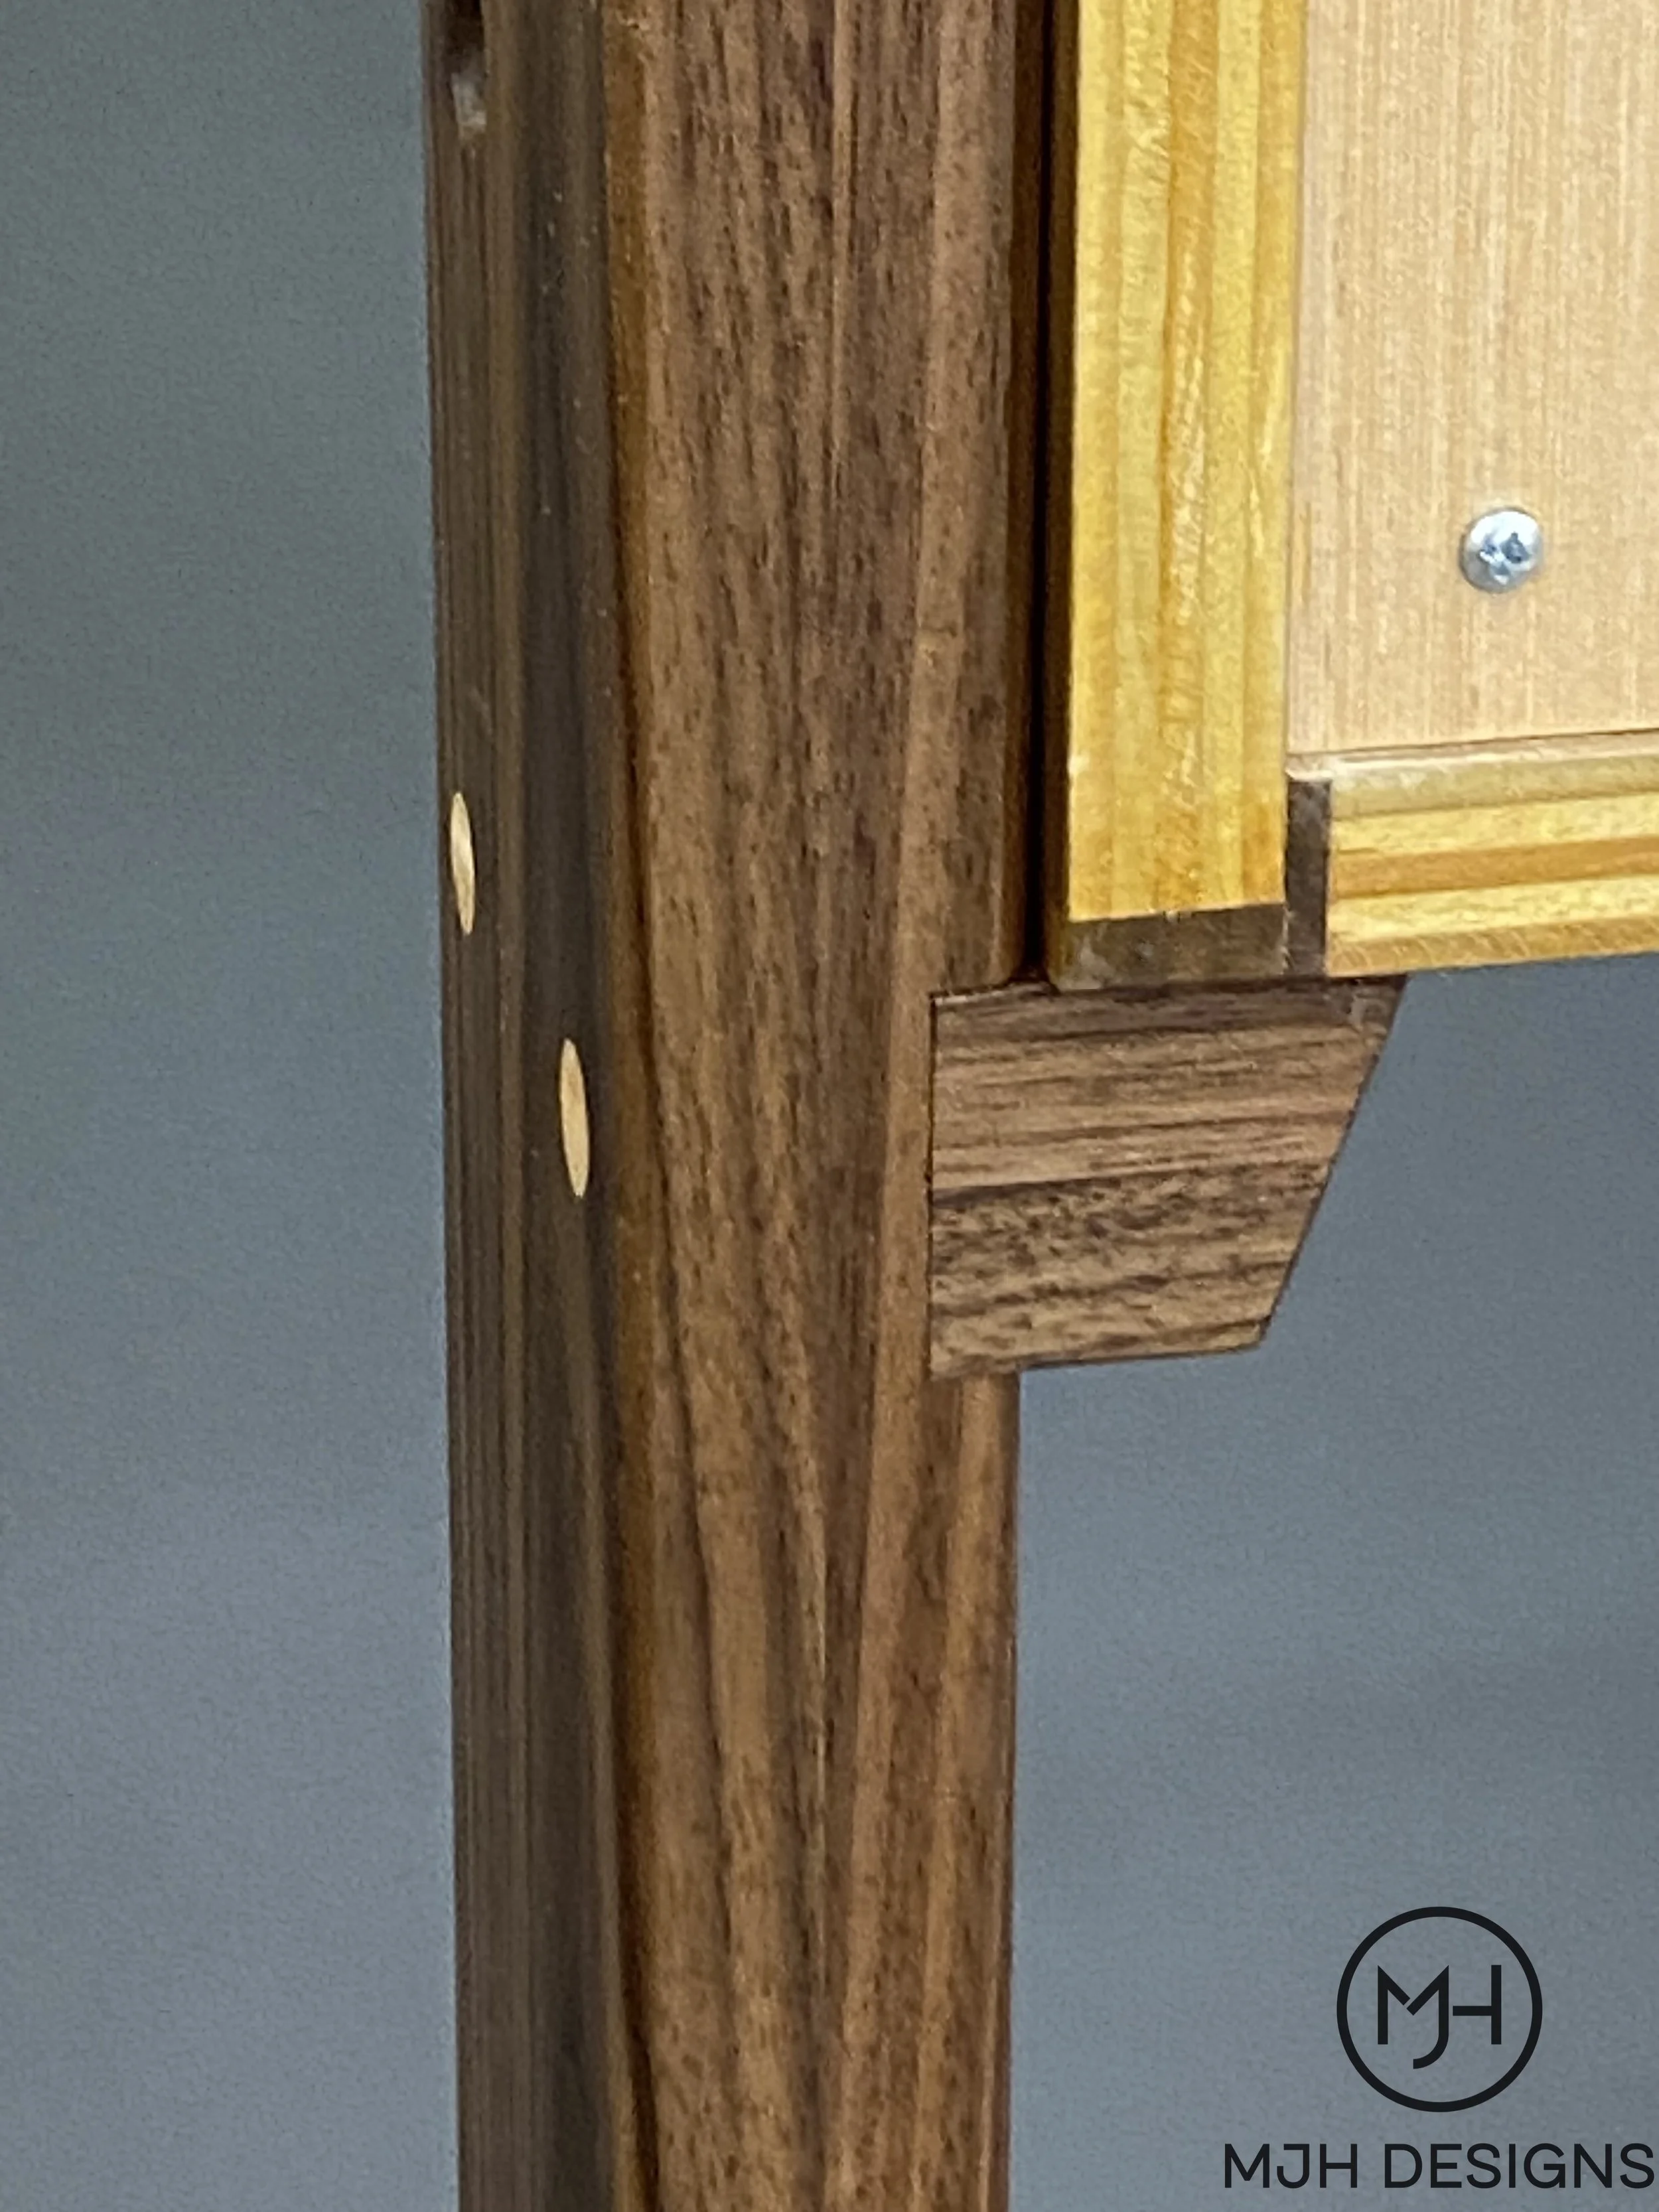
Support blocks holding the display weight are notched into the upright posts.
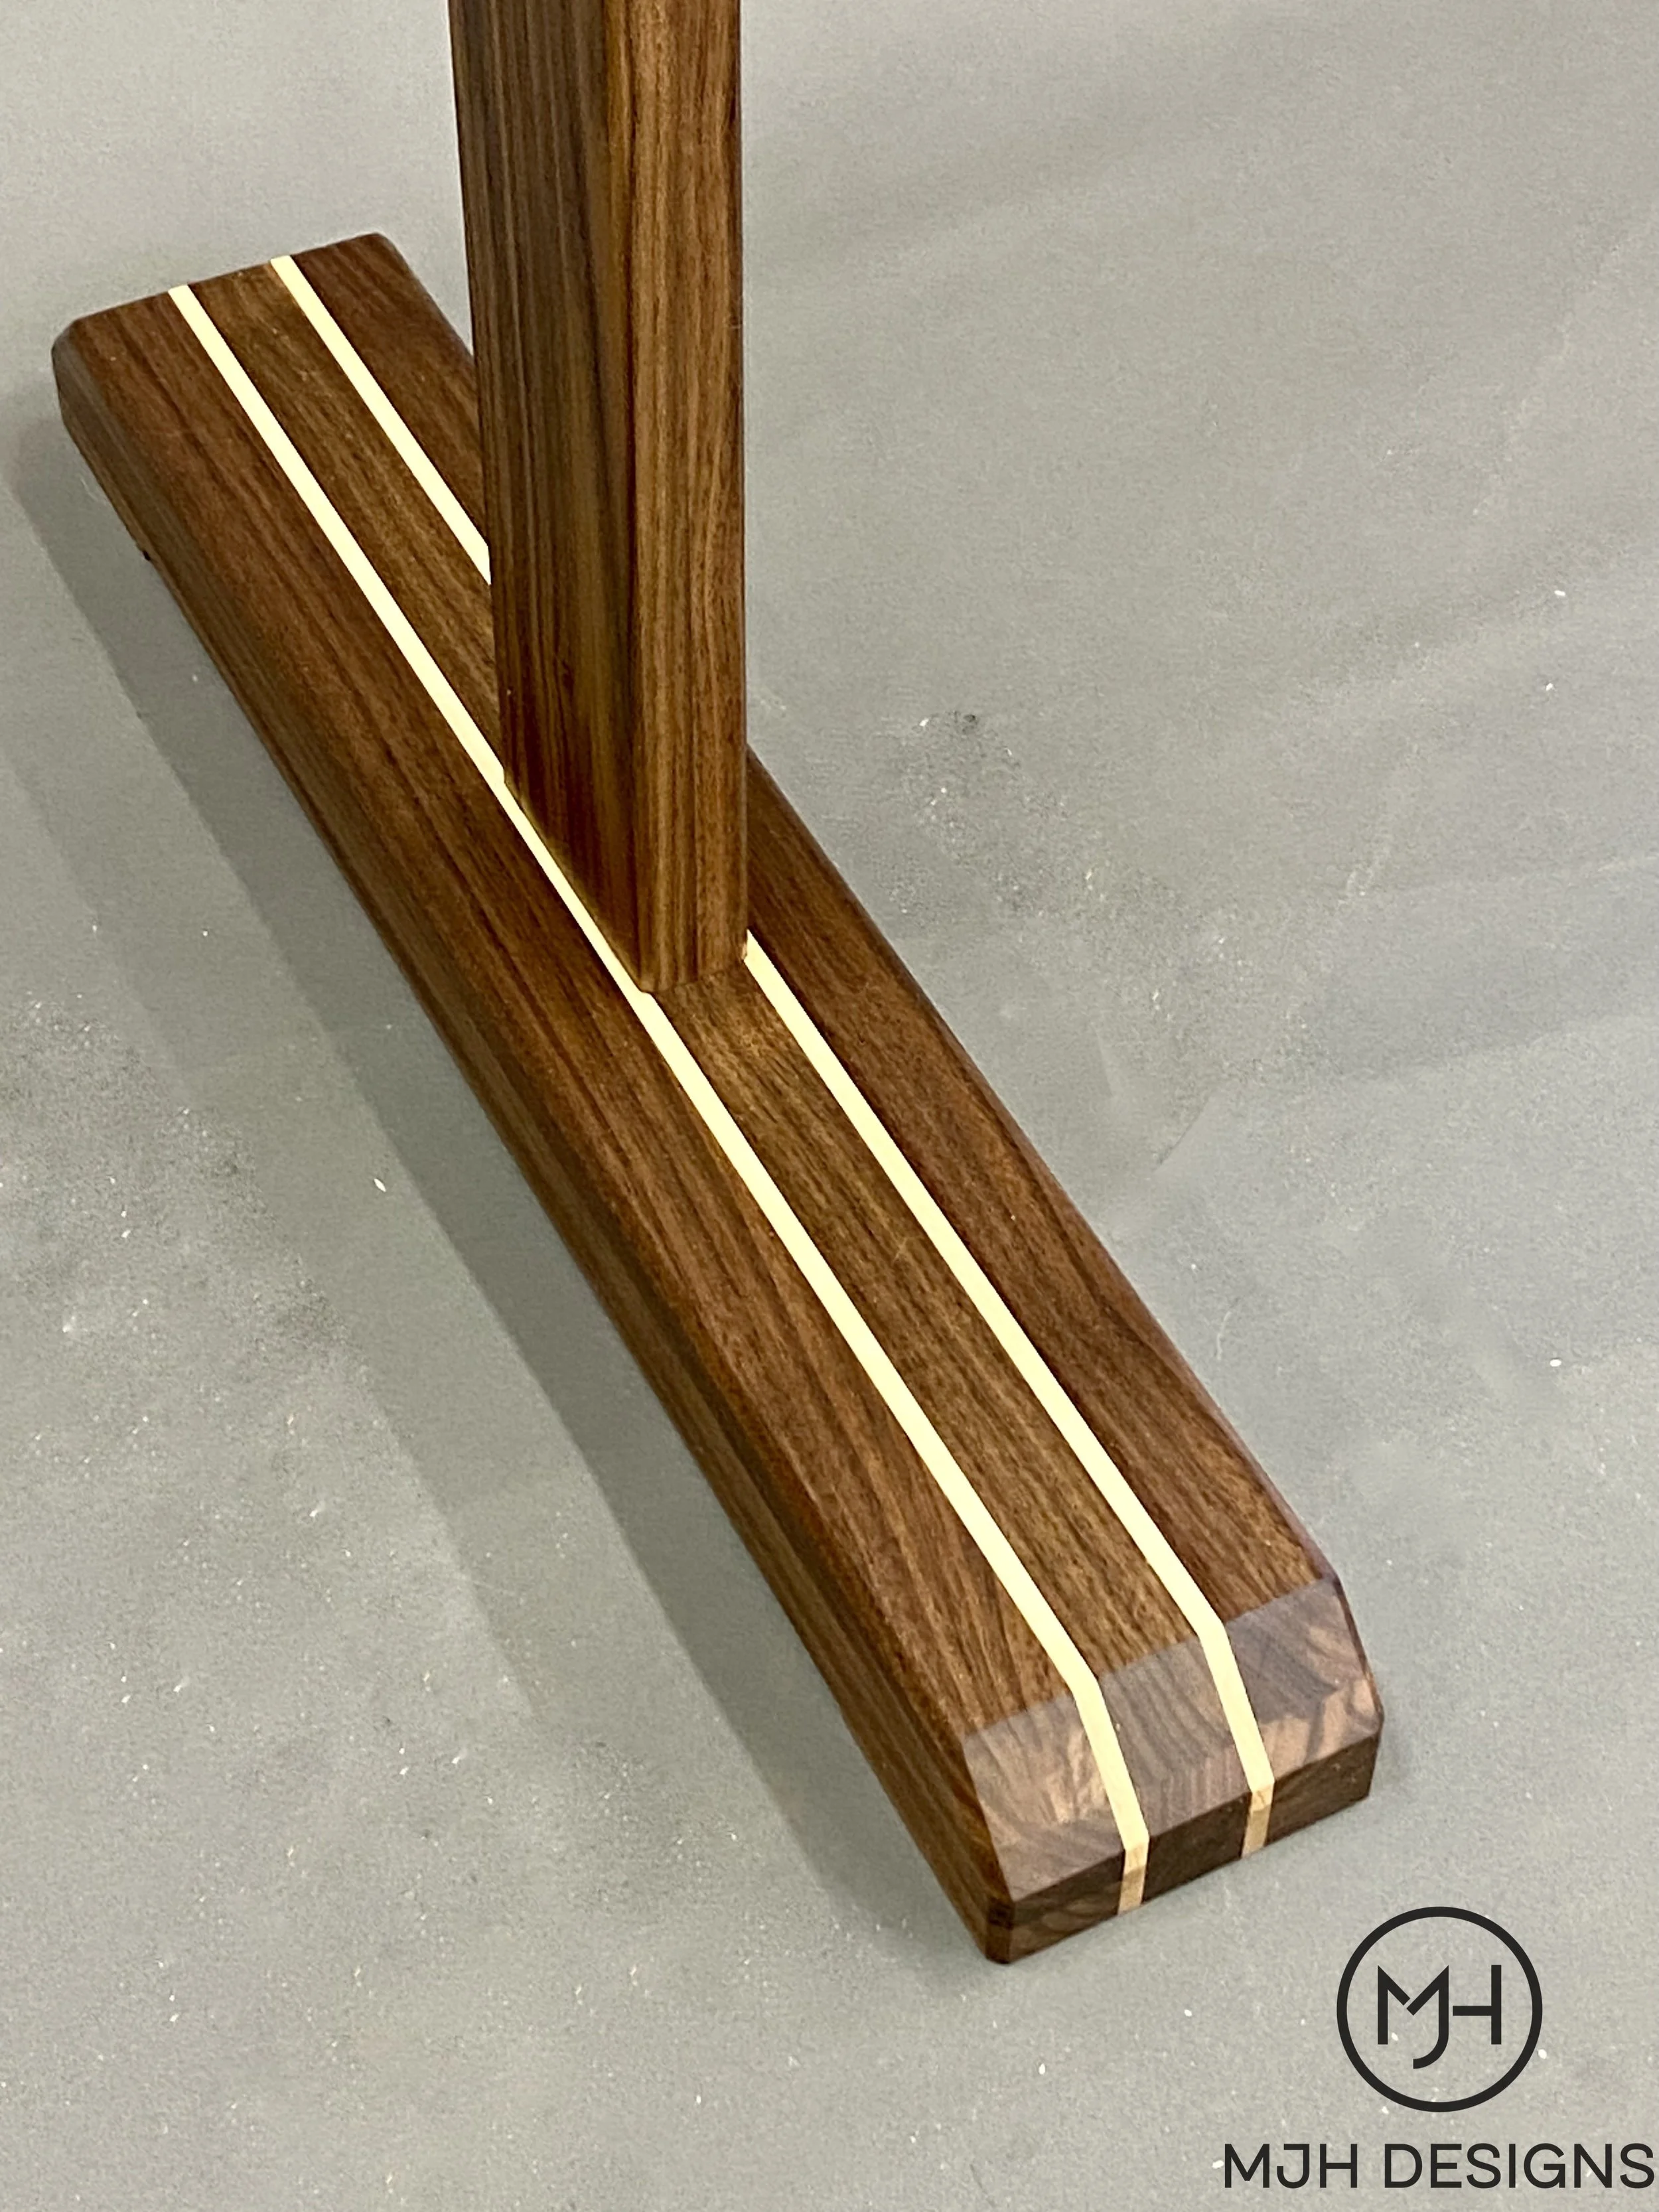
Spruced up the cross legs with maple inlays.

Rear view with opening for LED power supply.
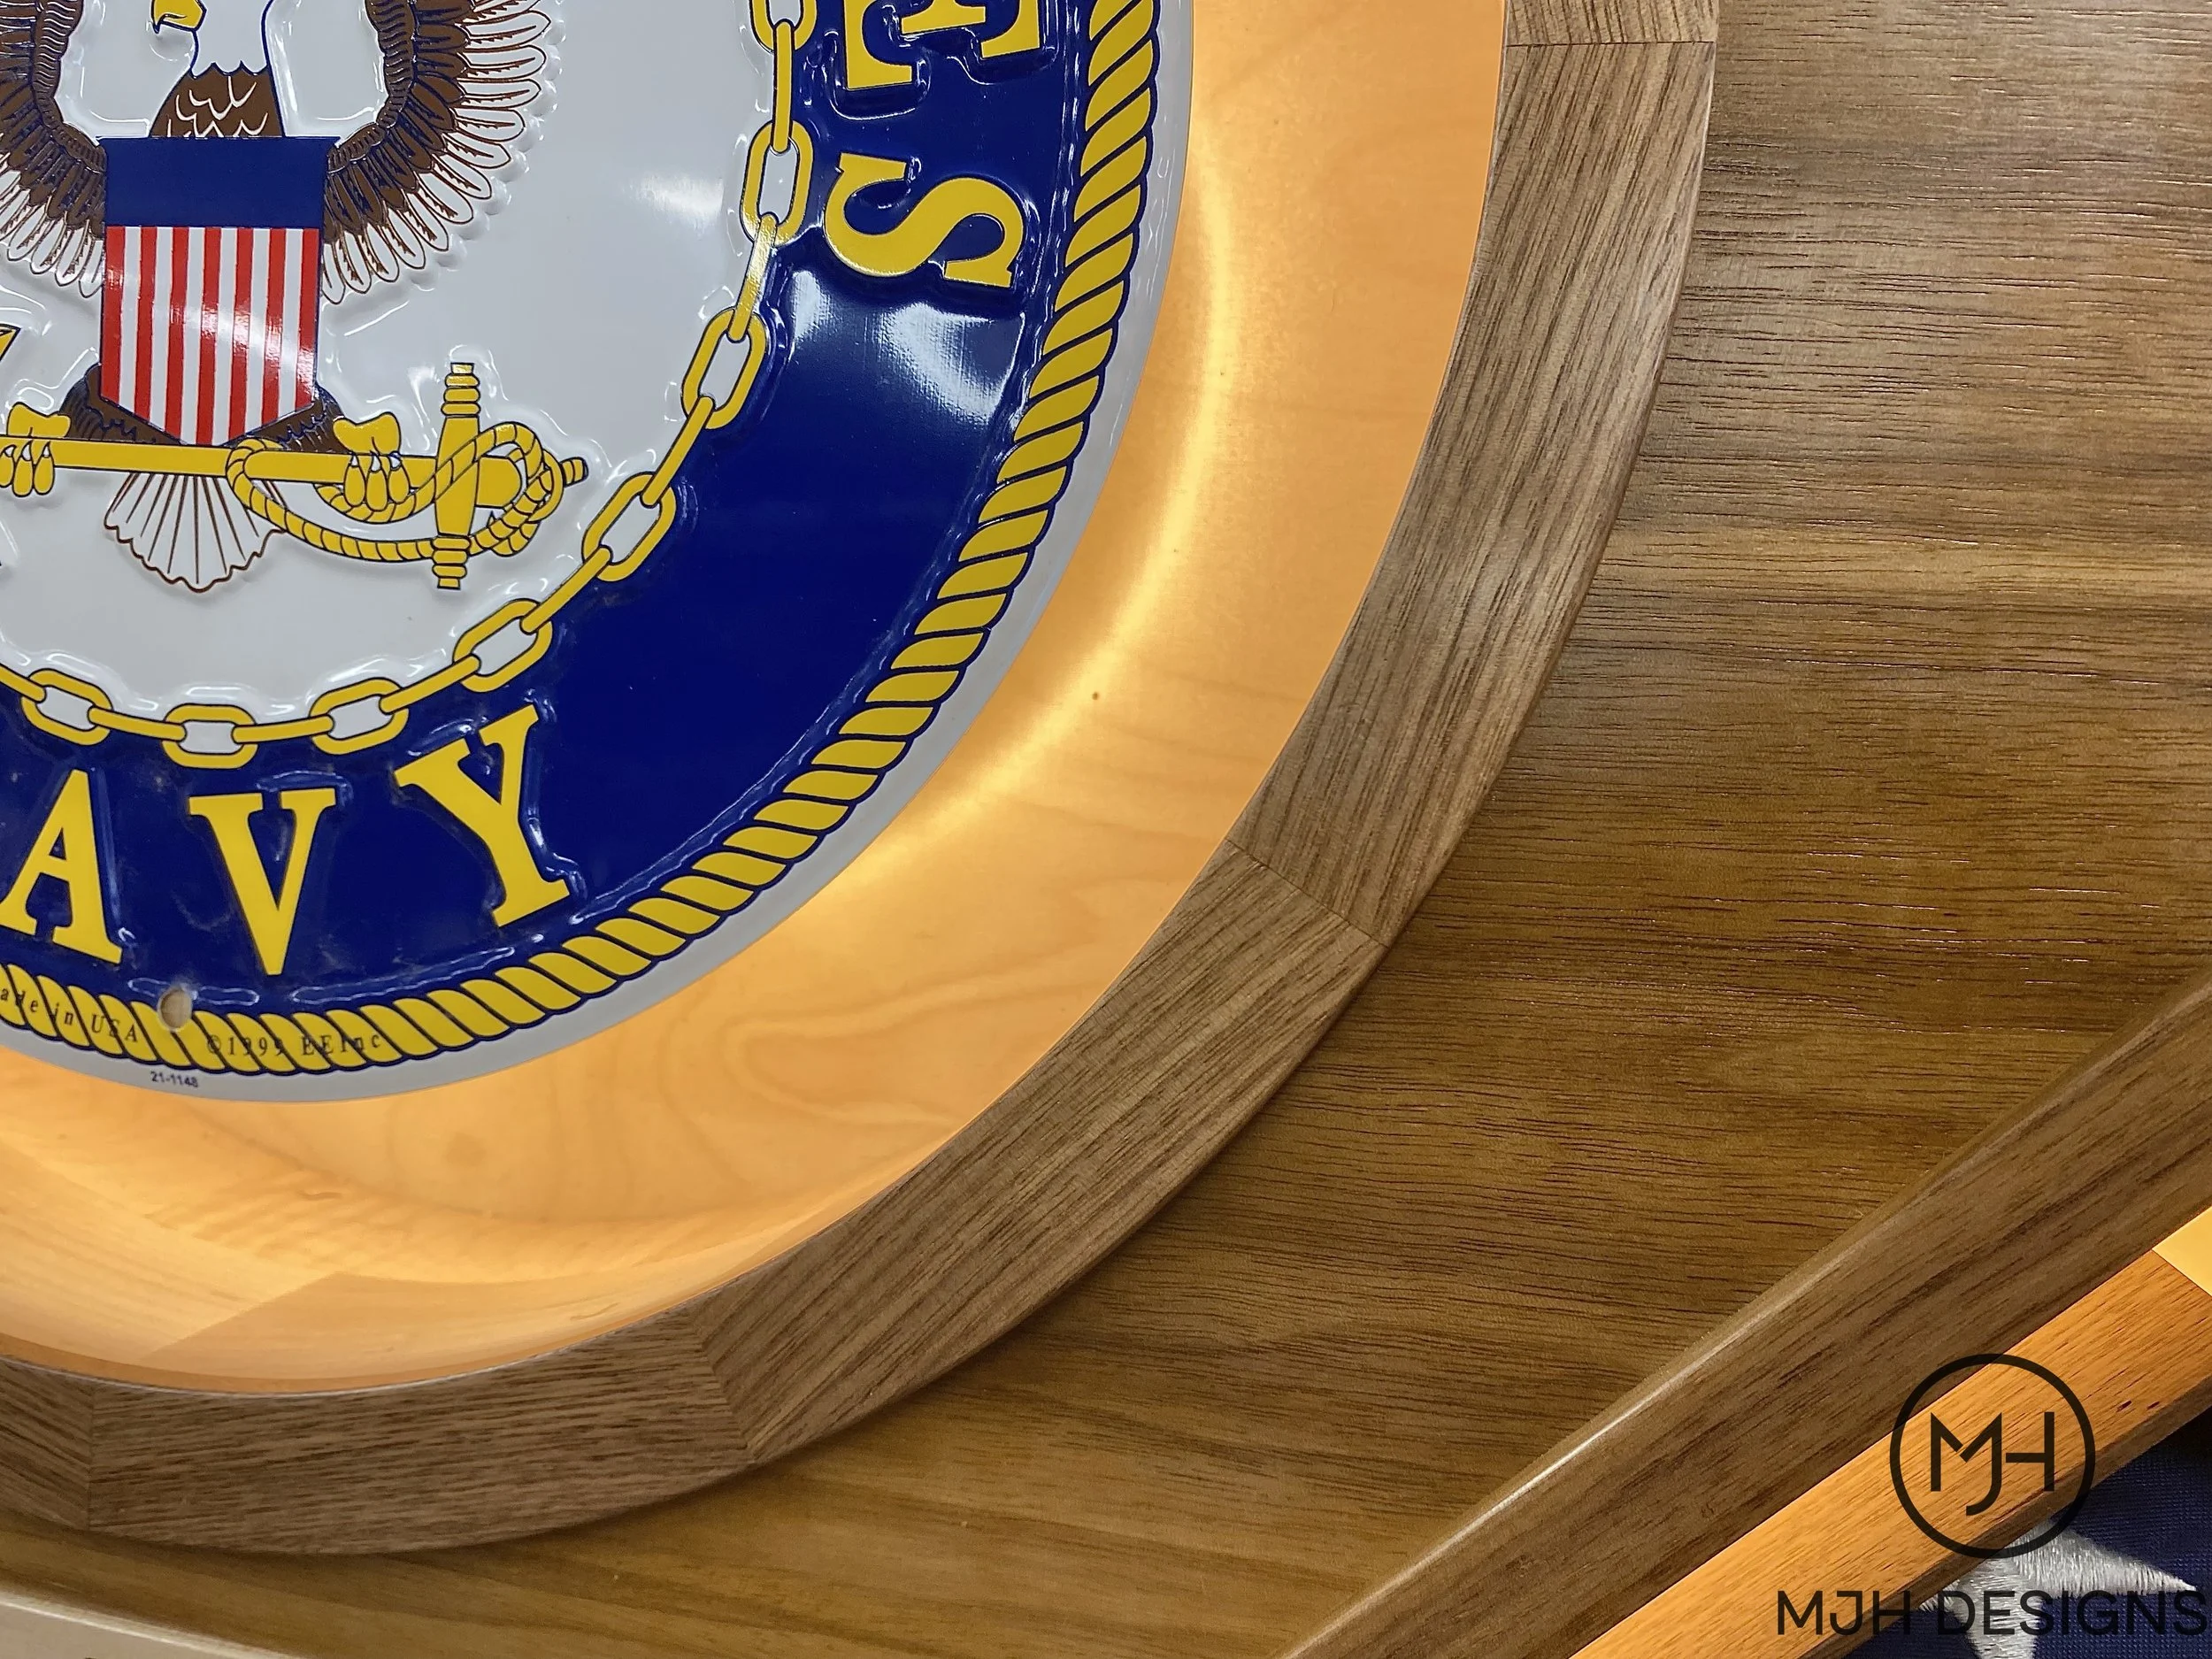
Detail of the trim around the emblem ring.
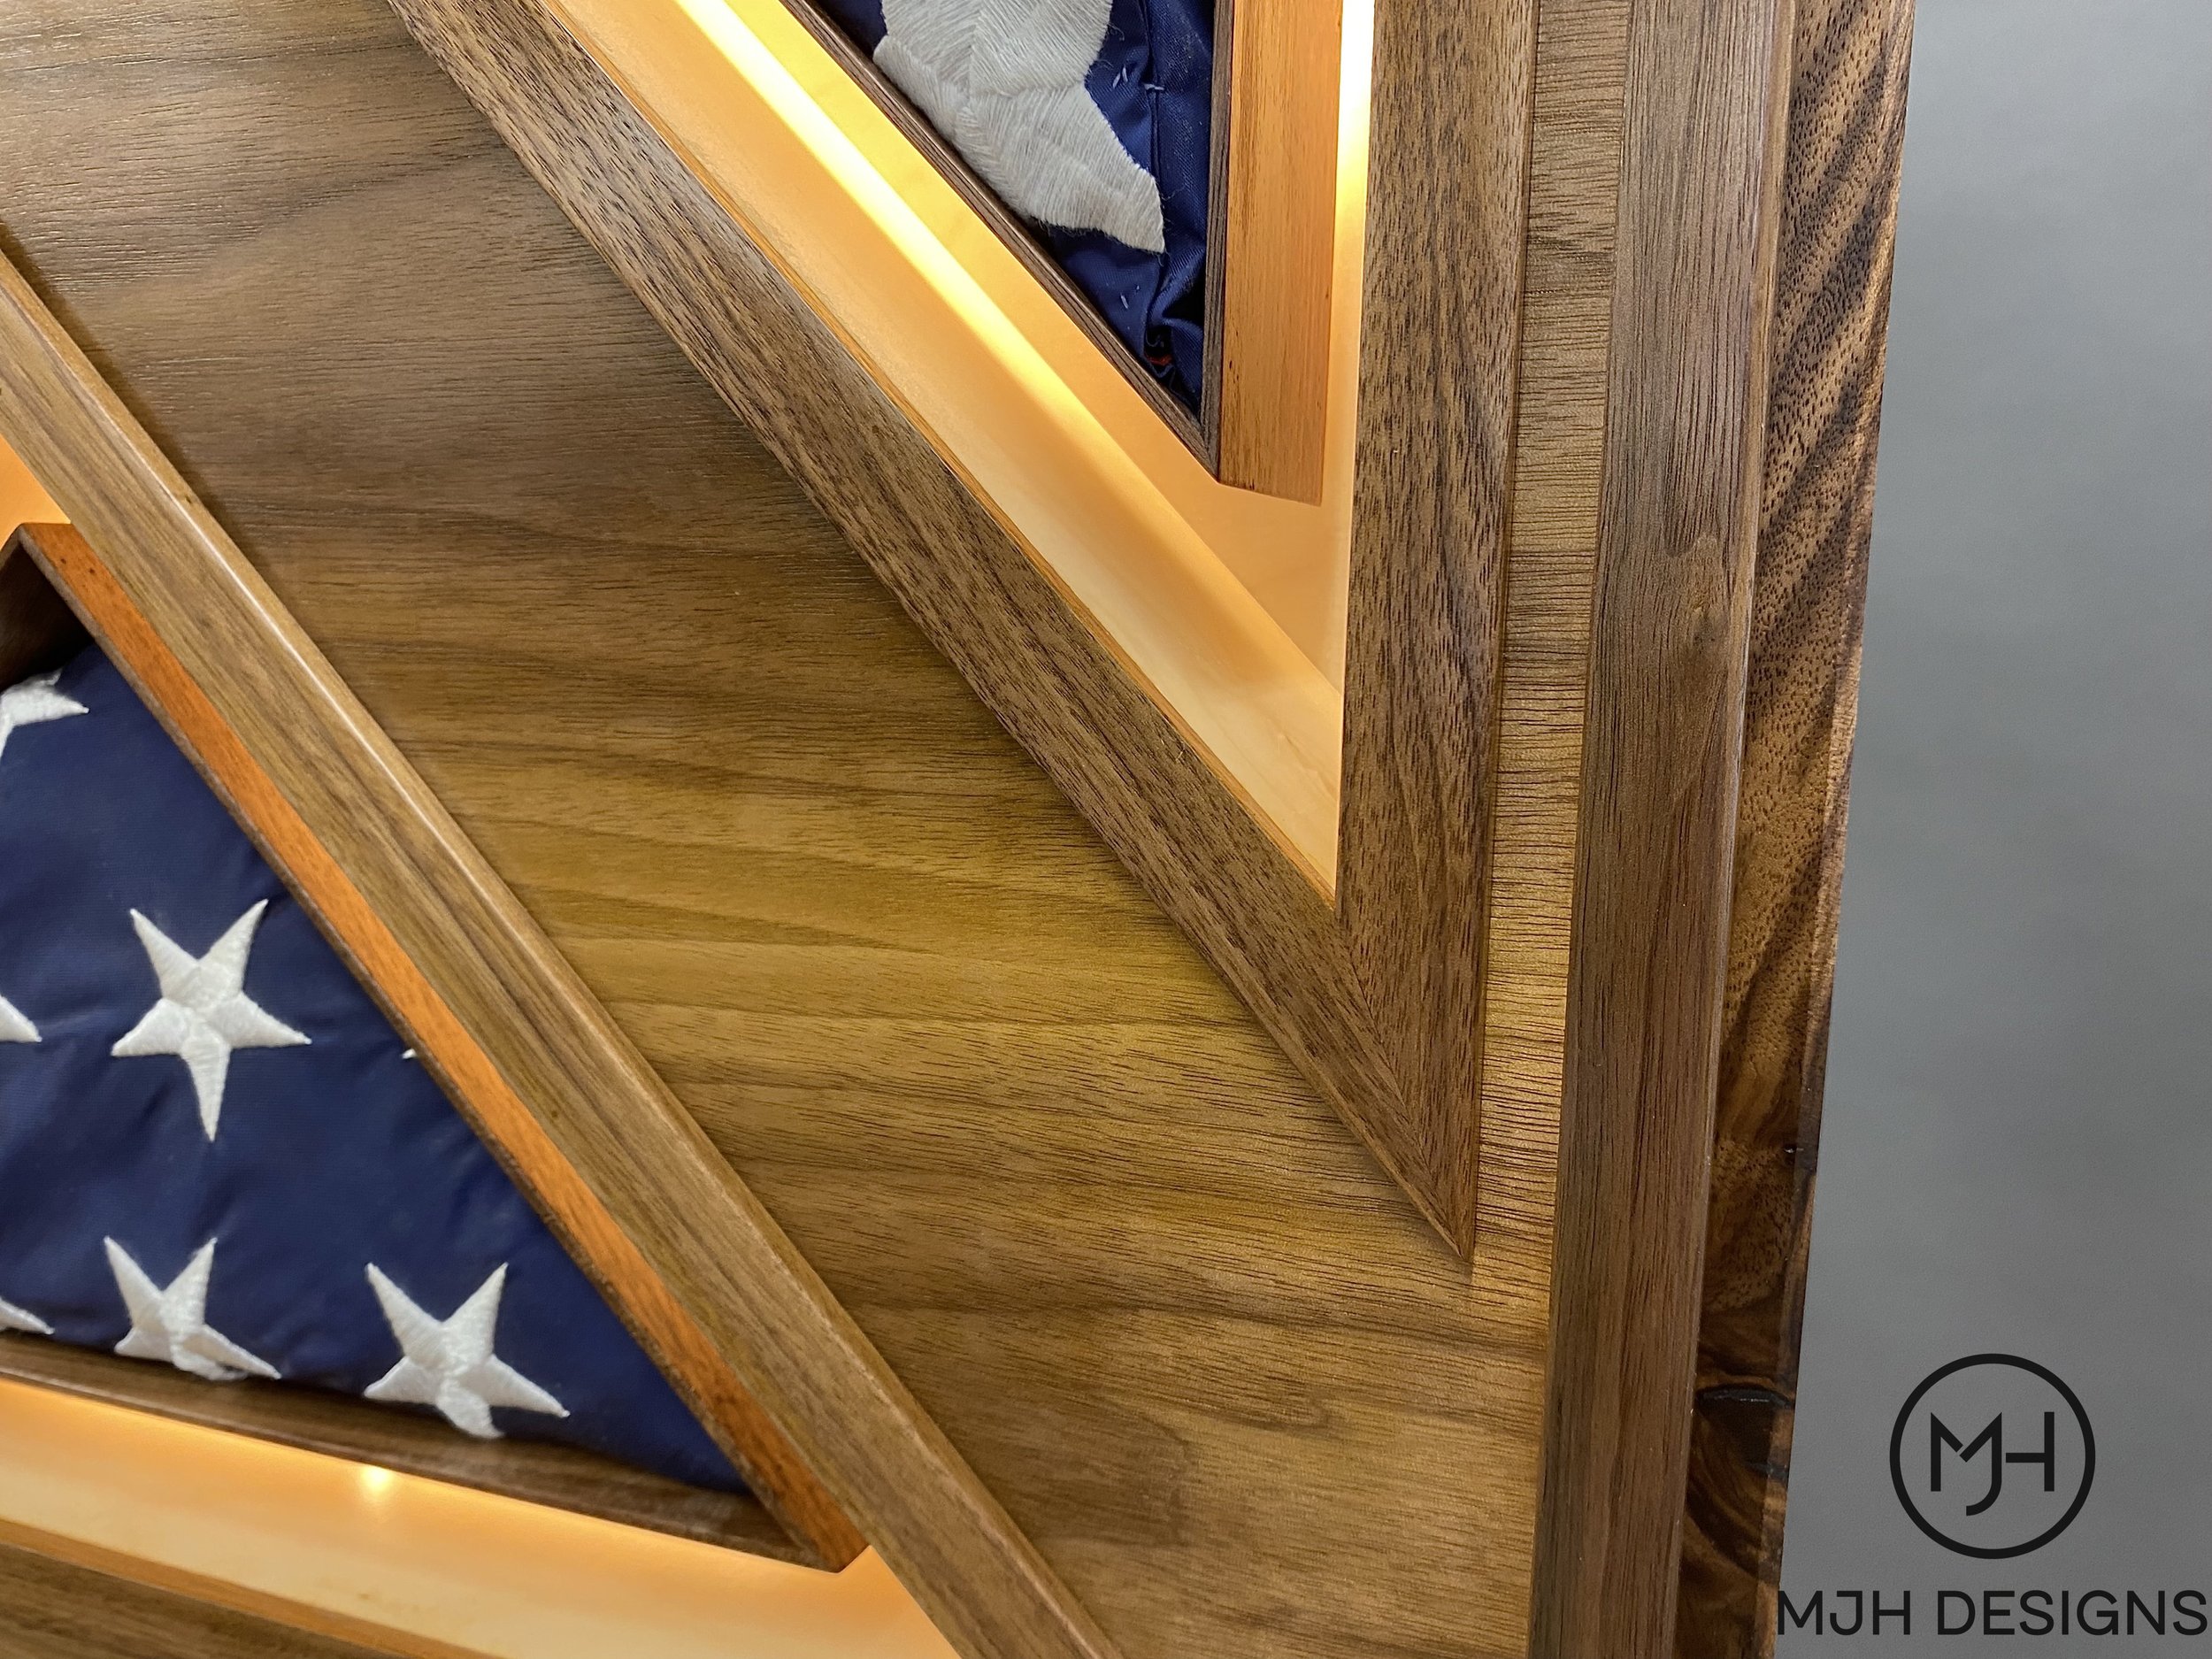
Close-up detail.
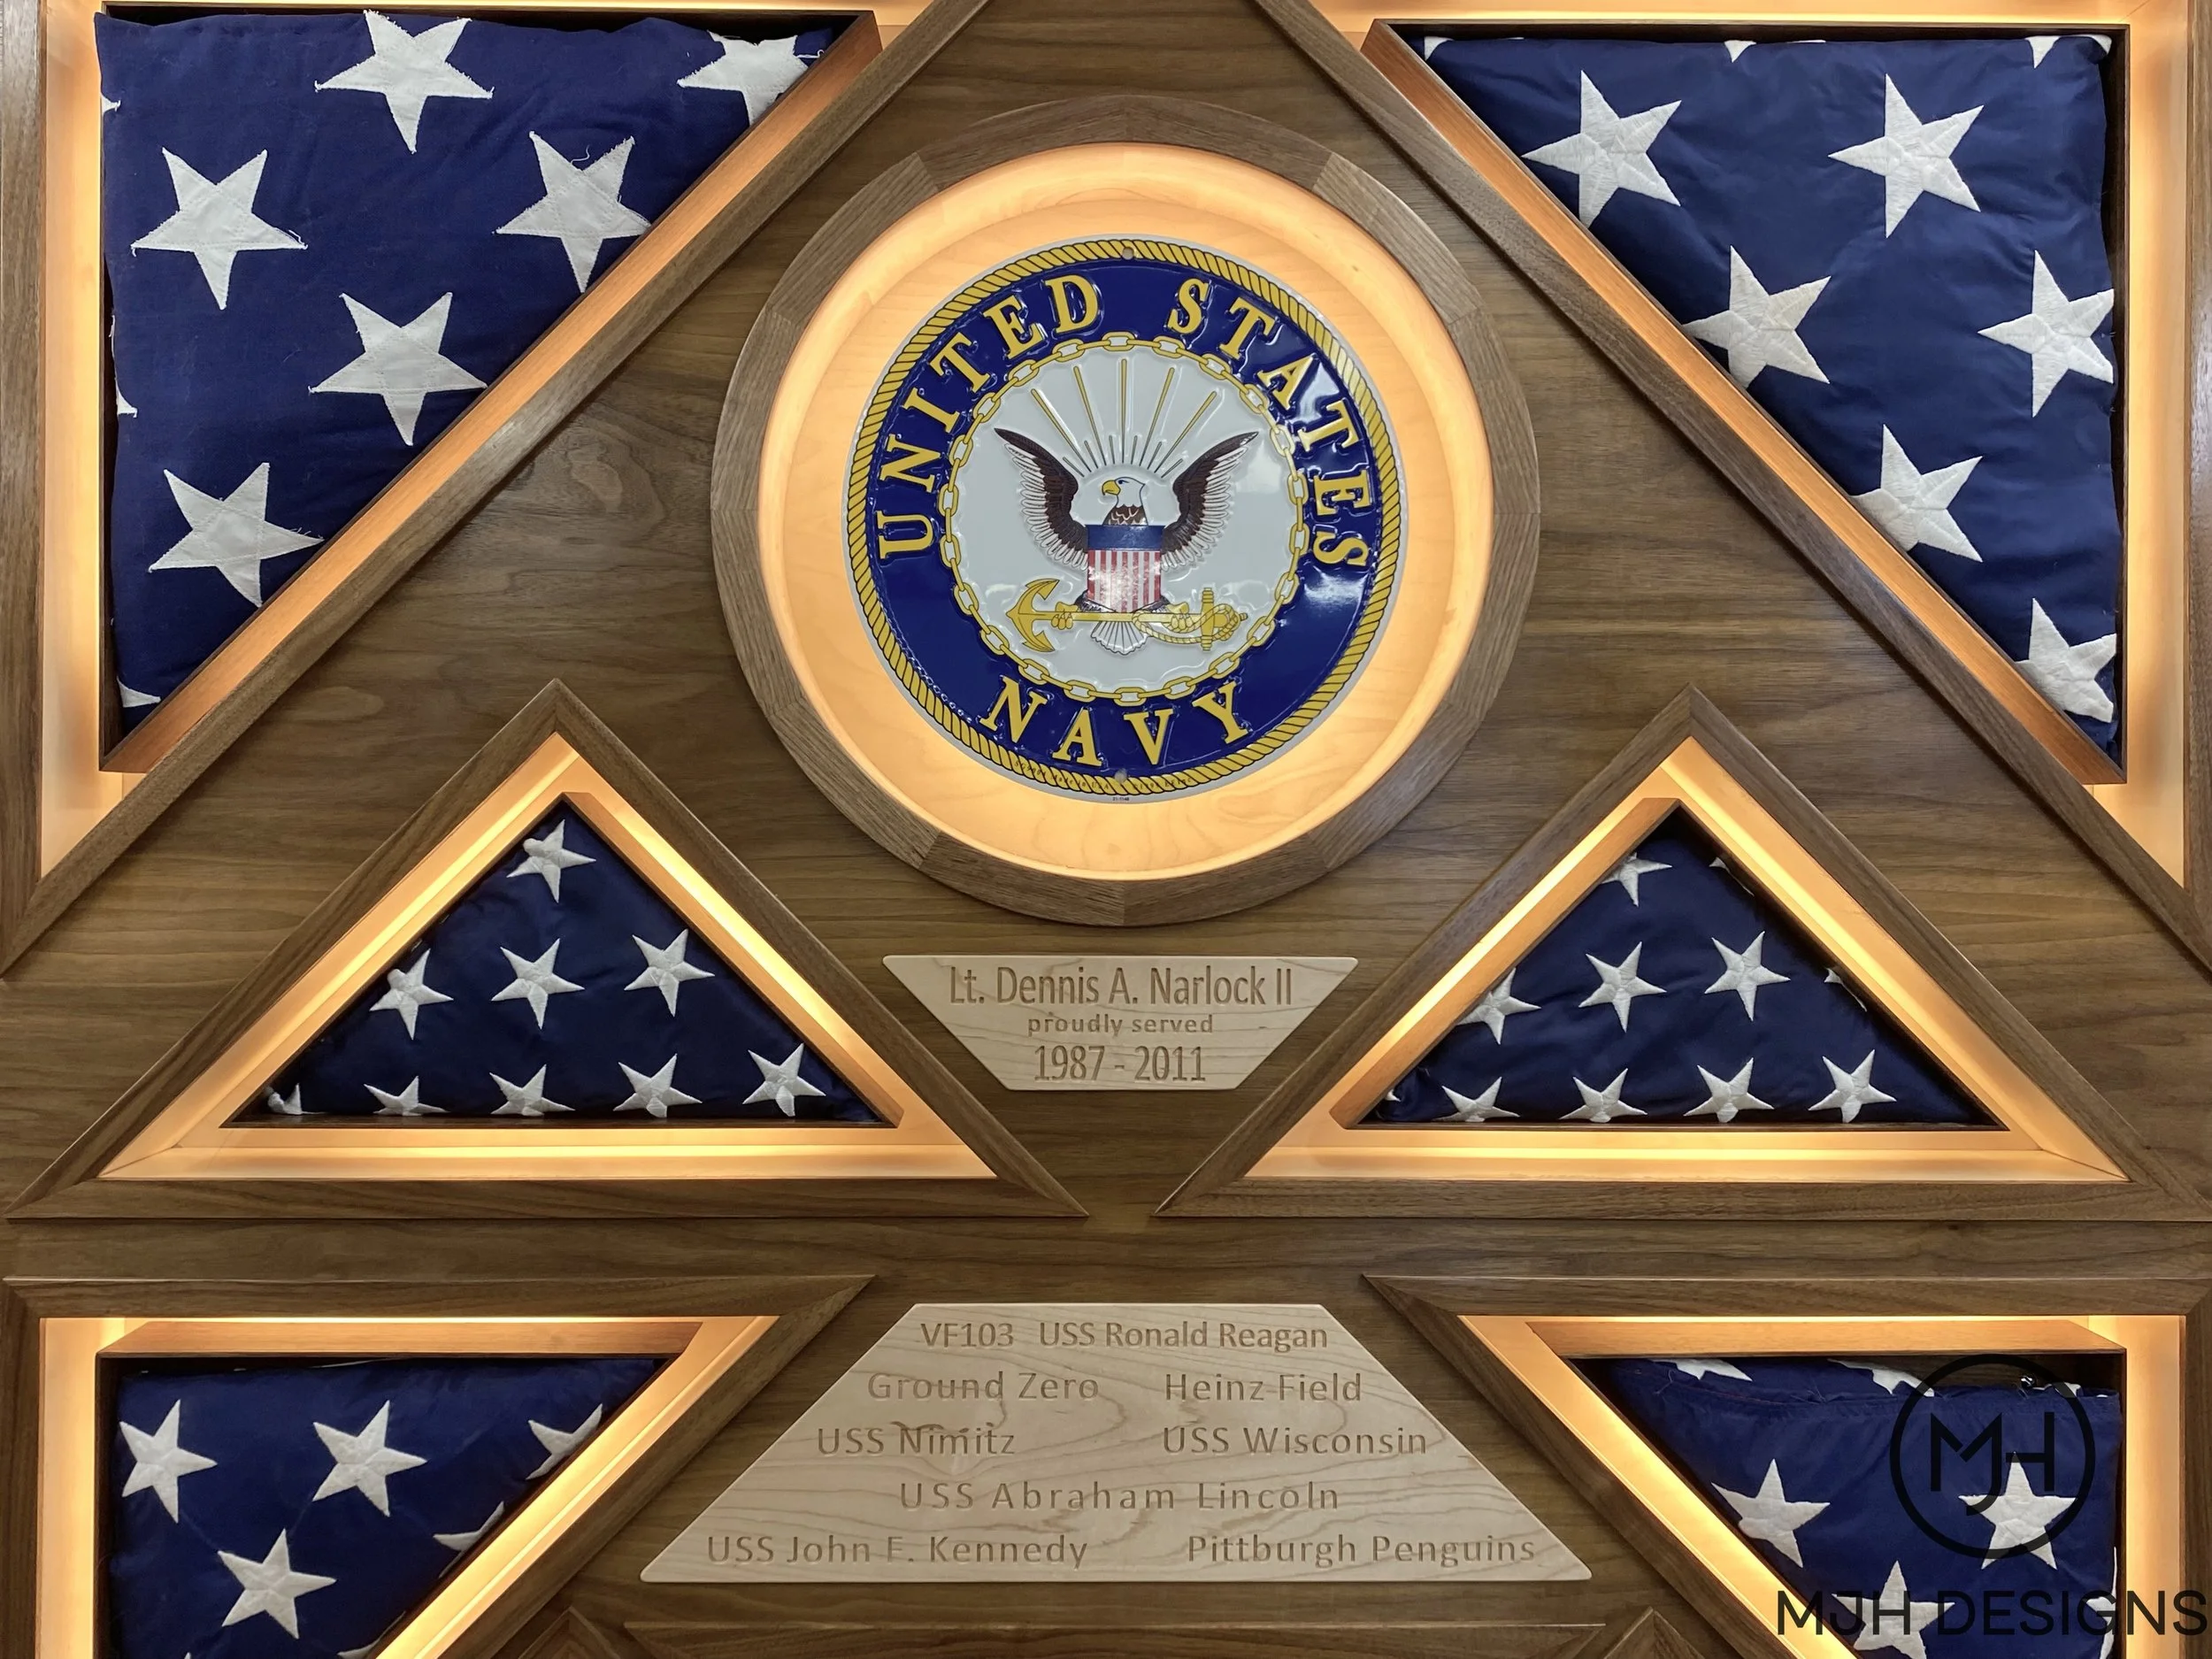
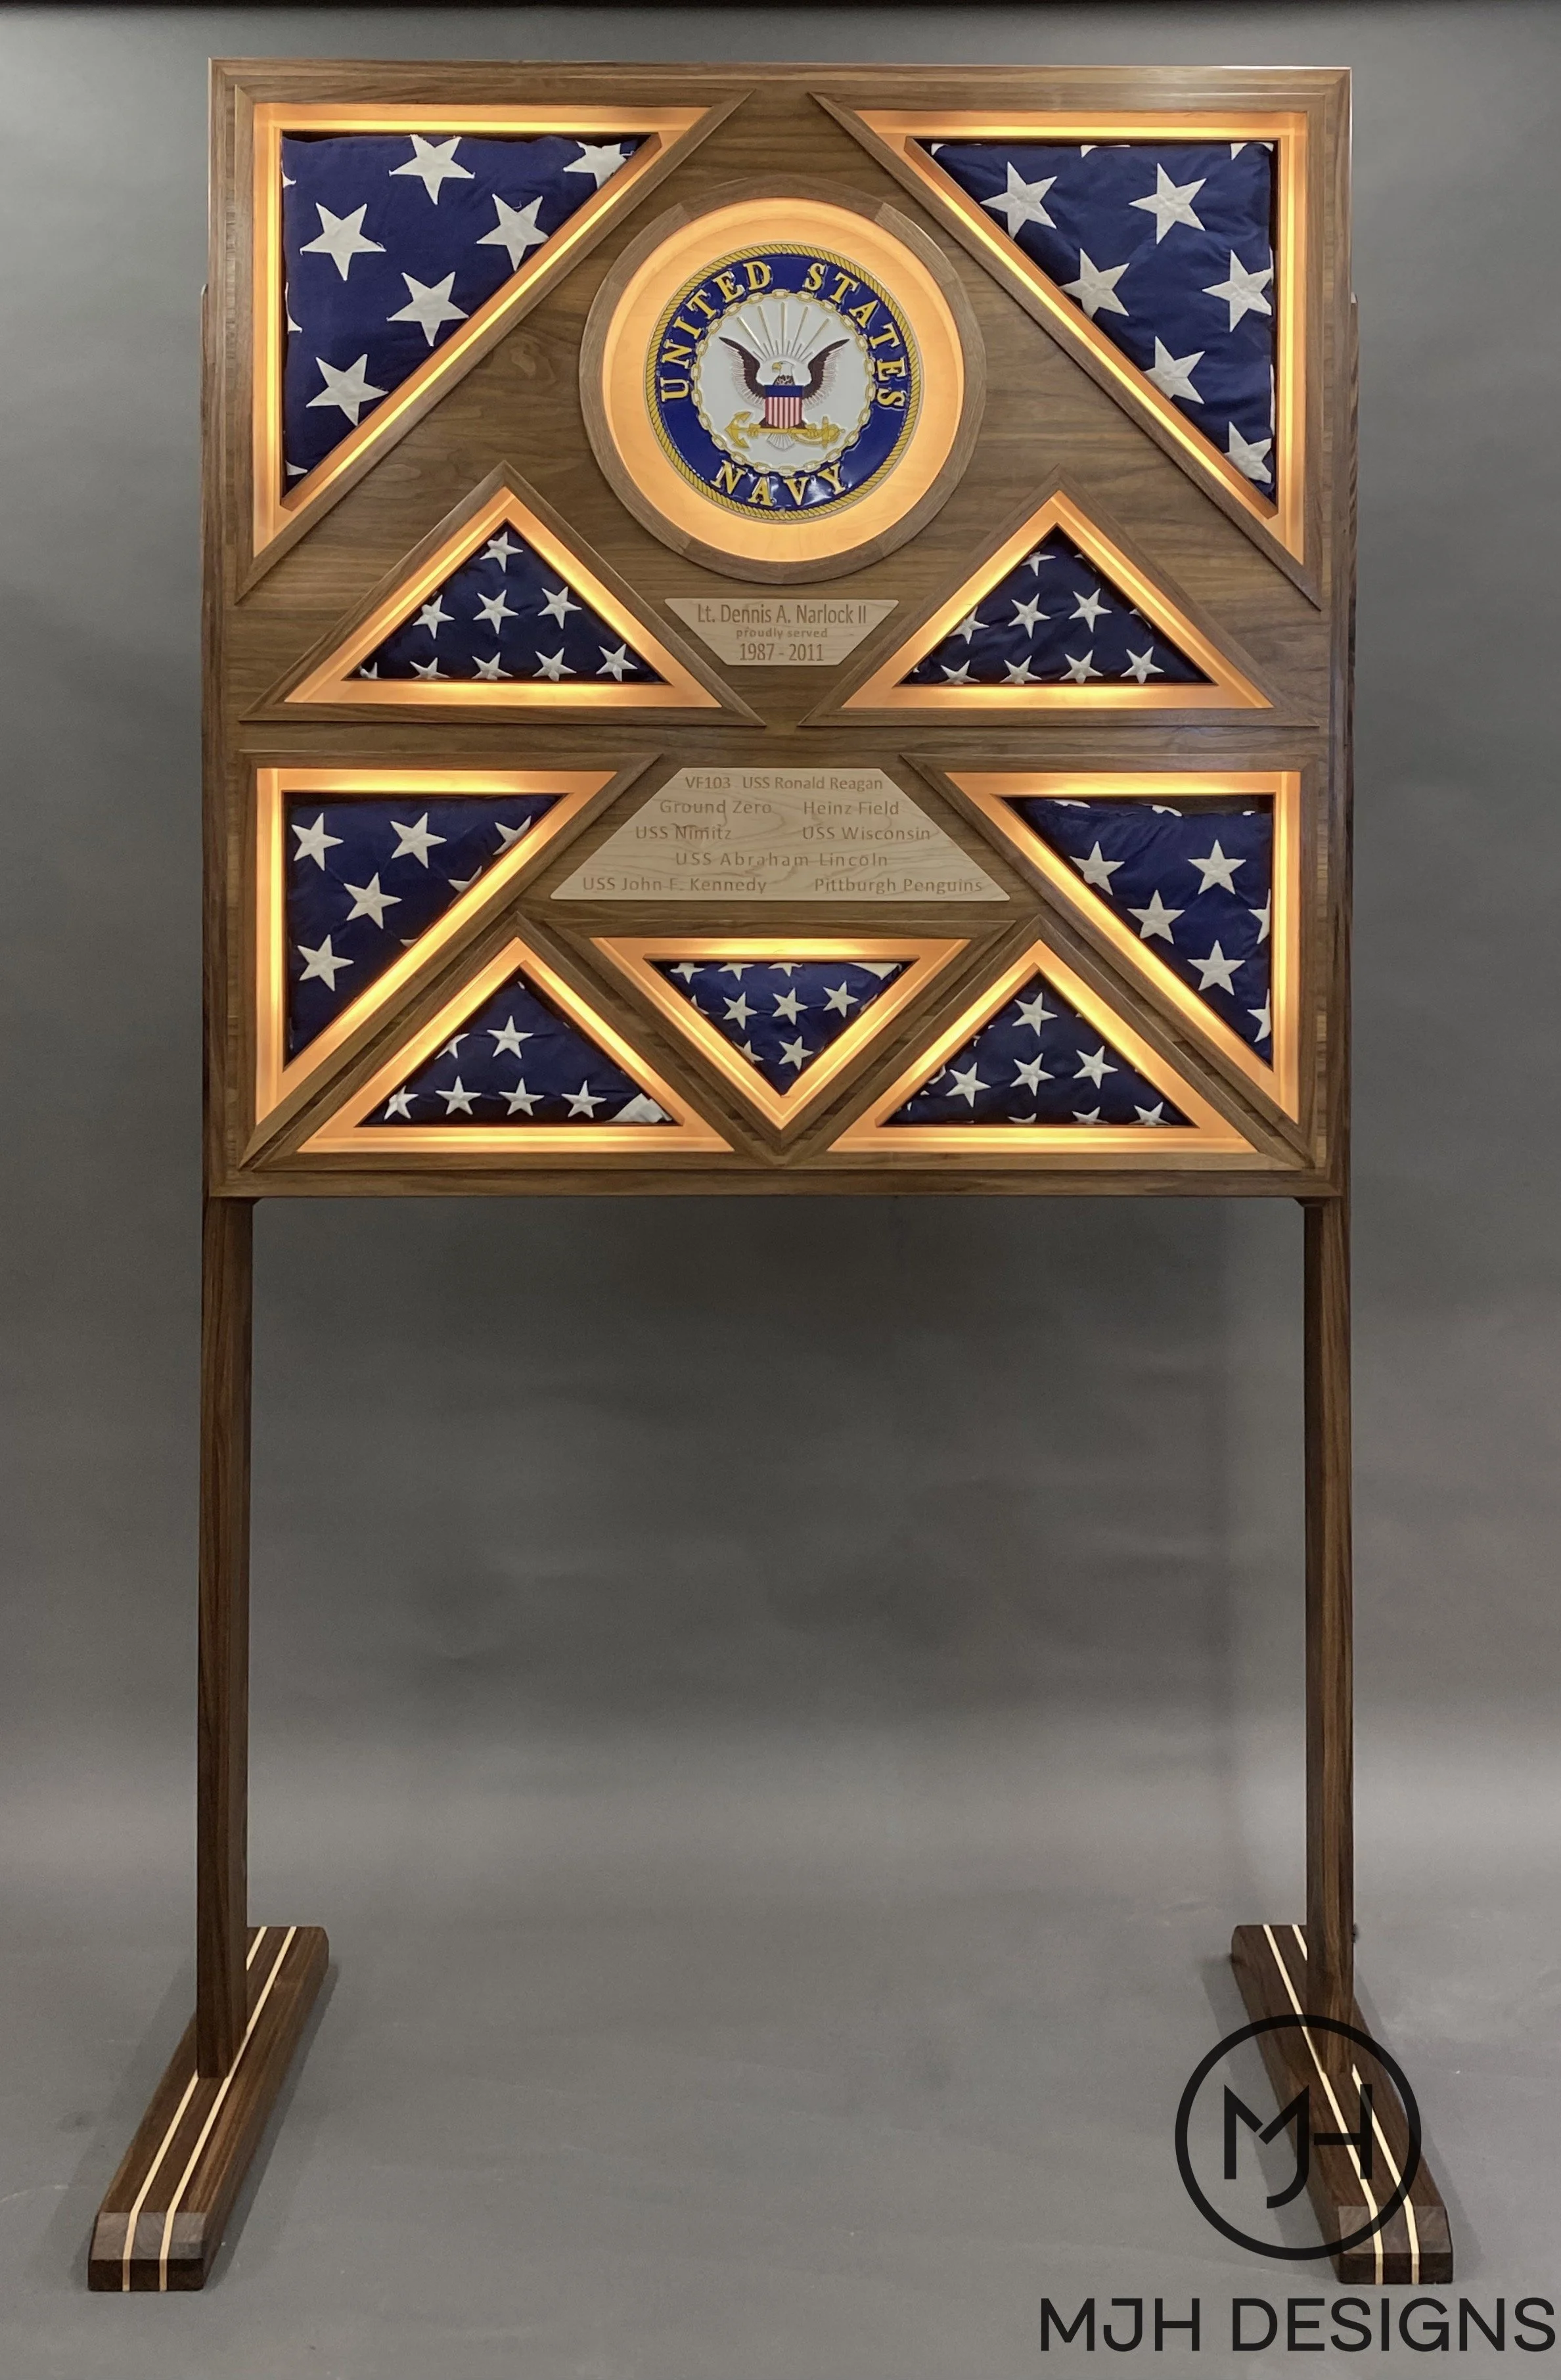
..and this is how it ended…
I was honored to be given the responsibility to design and built this flag display. With the 250th Anniversary of our country this year I am glad these flags now have a fitting and proper place for their display for years to come.